Stop guessing how much coffee to use in your 12-cup maker! This guide reveals the exact golden ratio (2 tbsp per 6oz cup) and practical measurement methods for perfect strength. Learn why “cup” sizes lie, how grind size affects flavor, and troubleshoot common brewing issues for coffee that’s never weak or bitter again.
Key Takeaways
- Golden Ratio is Key: Use 2 level tablespoons (or 10-12 grams) of coffee per standard 6oz cup of water for balanced flavor.
- “Cup” ≠ Standard Cup: Most 12-cup makers brew 60oz (1.8L), not 96oz – always check your machine’s actual capacity.
- Weigh for Precision: A kitchen scale (grams) beats scoops – it’s the #1 tip for consistent results and avoids weak/bitter coffee.
- Grind Size Matters: Use medium-coarse grounds for drip makers; too fine causes bitterness, too coarse makes weak coffee.
- Freshness Wins: Grind beans just before brewing and store coffee in an airtight container away from light/heat.
- Clean Regularly: Mineral buildup alters water flow and taste – descale monthly and replace filters often.
Quick Answers to Common Questions
Can I use the “cup” markings on my carafe to measure coffee?
No, the markings on the carafe indicate water volume, not coffee amount. Always measure coffee separately using tablespoons or a scale based on the water you’re adding. The “12-cup” label refers to the machine’s water capacity (usually 60oz).
Is pre-ground coffee okay for a 12-cup maker?
Pre-ground “drip” coffee is often too fine, leading to bitterness. If you must use it, reduce the amount by 10-15% (e.g., use 16 tbsp instead of 18 for 60oz) and ensure your machine is clean. For best results, grind fresh beans to a medium-coarse consistency.
Why does my coffee taste different every day?
Inconsistent measurements (scooping vs. weighing), changing grind size (if using whole beans), stale coffee, or an unclean machine are likely culprits. Weigh your coffee for consistency, grind fresh each time, use beans within 2-4 weeks of roast date, and descale monthly.
Can I make a smaller batch in my 12-cup maker?
Yes! Use the golden ratio scaled down. For 4 cups (24oz water), use 8 level tablespoons (or ~40g). Always use a paper filter for small batches to prevent grounds from slipping through, and don’t overfill the basket.
How long should coffee sit in the carafe after brewing?
Drink it within 30-60 minutes. Coffee left on the hot plate continues to cook, becoming bitter and developing a burnt taste. Pour it into a thermal carafe immediately after brewing if you’re not drinking it right away.
📑 Table of Contents
- The Great Coffee Confusion: Why “12 Cups” is Misleading
- The Golden Ratio: Your Secret Weapon for Perfect Coffee
- Measuring Like a Pro: Scoops, Scales, and Smart Hacks
- Grind Size: The Hidden Factor in Your Coffee Strength
- Troubleshooting Your 12-Cup Maker: Weak, Bitter, and Everything In Between
- Beyond the Brew: Maintenance for Consistent Results
- Conclusion: Your Path to Coffee Perfection Starts Now
The Great Coffee Confusion: Why “12 Cups” is Misleading
You wake up craving that perfect morning brew. You measure coffee into your 12-cup maker, add water to the “12” line, press start… and end up with coffee that’s either painfully weak or shockingly bitter. Sound familiar? You’re not alone. The biggest culprit? That innocent-looking “12-cup” label. It’s a classic case of coffee maker marketing versus reality.
Here’s the truth most manufacturers don’t shout from the rooftops: a “cup” on your coffee maker isn’t the standard 8oz cup you drink from. In the coffee maker world, a “cup” typically means 6 fluid ounces. So when you fill your “12-cup” maker to the max line, you’re actually brewing roughly 60 ounces (1.8 liters) of coffee – not the 96 ounces (12 x 8oz) you might expect. This discrepancy is the root of so much brewing frustration. You might be using the “right” amount of coffee for 12 standard cups, but your machine is only making 7.5 actual drinking cups. Suddenly, your coffee is weak and watery. Or, you might be using coffee measured for 12 standard cups, resulting in an overly strong, bitter brew. Understanding this “cup” conundrum is step one to mastering your 12-cup coffee maker.
Why Standard Measurements Fail Us
Most of us default to using the scoop that came with the coffee maker or eyeballing tablespoons. But here’s why that often backfires:
- Scoops vary wildly: That plastic scoop? It might hold 2 tbsp, 2.5 tbsp, or even 3 tbsp. Pre-ground coffee scoops are often larger than bean scoops. Consistency is impossible.
- Tablespoons aren’t precise: A “level” tablespoon of coffee can differ based on grind size, how you pack it, and even the spoon itself. Is it heaping? Smoothed? Packed tight?
- Coffee density changes: Dark roasts are less dense than light roasts. Freshly ground coffee is denser than pre-ground. One tablespoon of dark roast might weigh significantly less than one tablespoon of light roast.
This is why the golden ratio – the industry standard for perfect coffee strength – is usually expressed in weight (grams) per volume (water), not scoops or tablespoons. But don’t worry! We’ll translate this into practical, scoop-friendly terms you can use immediately, while also showing you the best way to measure.
The Golden Ratio: Your Secret Weapon for Perfect Coffee
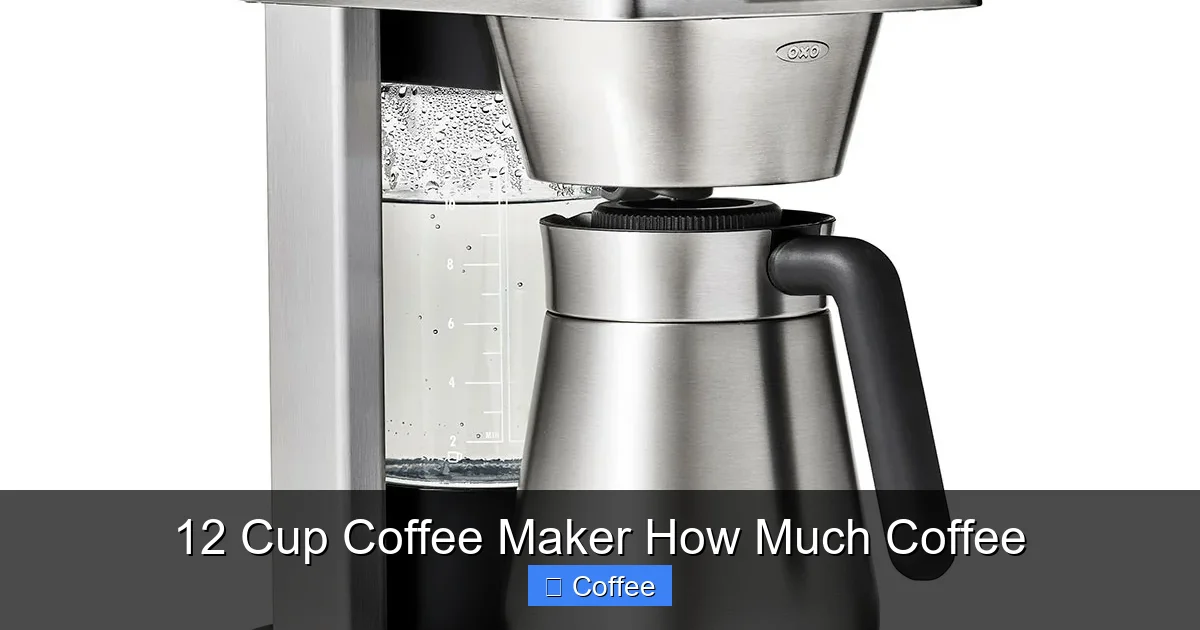
Forget complicated formulas. The sweet spot for most coffee drinkers using a standard drip maker is the golden ratio: 1 to 2 tablespoons of coffee per 6oz cup of water. For a typical 12-cup maker (brewing 60oz), this translates to:

Visual guide about 12 Cup Coffee Maker How Much Coffee
Image source: m.media-amazon.com
- 12 level tablespoons (for a lighter, milder brew)
- 18-24 level tablespoons (for a standard, balanced strength – this is the sweet spot for most)
- 24+ tablespoons (for a very strong, intense brew – use cautiously!)
Why the range? Personal preference reigns supreme. Do you like your coffee bold and robust, or smooth and subtle? Start with 18 tablespoons for your 60oz batch. Taste it. If it’s too weak next time, bump it up to 20 or 22. Too strong? Drop down to 16. This simple adjustment is the single biggest factor in transforming your daily cup.
Why Weight (Grams) is the Gold Standard
While tablespoons are convenient, weighing your coffee is the absolute best way to achieve consistency, especially if you drink coffee daily. Here’s why:
- Precision: A digital kitchen scale (costing $10-$20) measures to the gram. No more guessing if your tablespoon is “level” or if the grind is packed.
- Consistency: Whether you use light roast, dark roast, or pre-ground, 10 grams is always 10 grams. Your brew strength stays the same cup after cup.
- The True Golden Ratio: Specialty coffee associations recommend 1:15 to 1:18 coffee-to-water ratio by weight. For water, 1 gram = 1ml. So for 60oz (1774ml) of water:
- 1:16 ratio: 1774ml / 16 = 111 grams of coffee (This is the ideal starting point for most)
- 1:15 ratio: 1774ml / 15 = 118 grams (Stronger)
- 1:17 ratio: 1774ml / 17 = 104 grams (Lighter)
Practical Tip: Place your empty carafe on the scale, tare it to zero. Add water to your desired level (e.g., 60oz mark). Note the water weight in grams (it should be very close to the ml/oz volume). Then, tare the scale again. Add coffee until you hit your target gram weight (e.g., 111g for 1:16). It’s that simple! This method eliminates all the “cup” confusion and scoop variability.
Measuring Like a Pro: Scoops, Scales, and Smart Hacks
Okay, you might not have a scale handy right this second (though you really should get one!). Let’s make the scoop method work as well as possible.
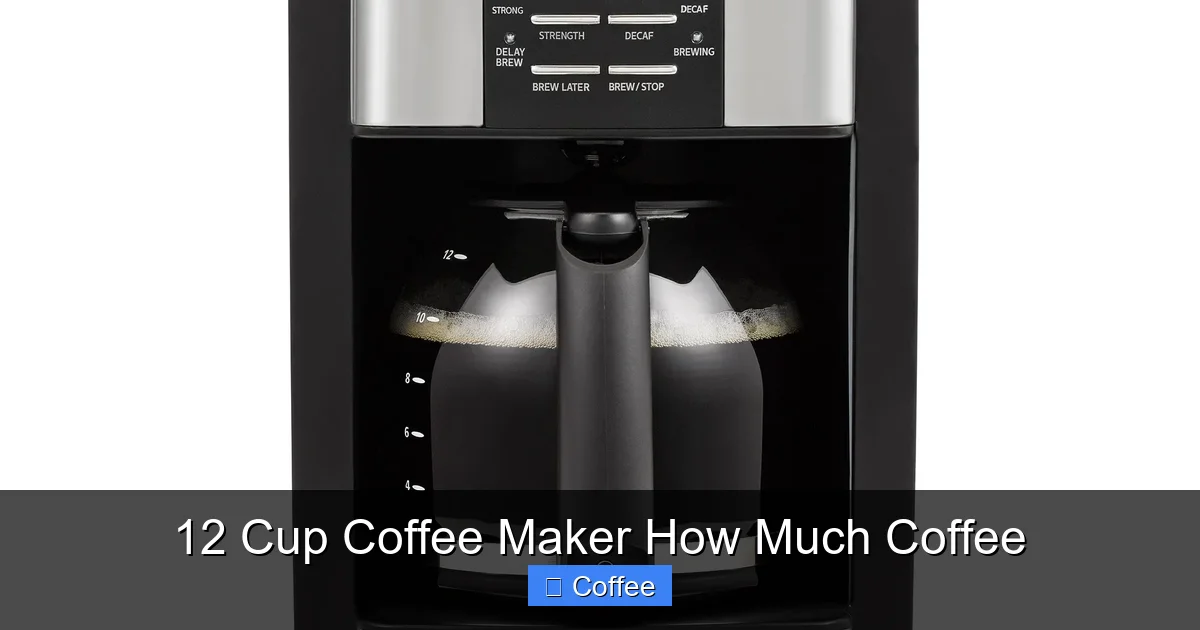
Visual guide about 12 Cup Coffee Maker How Much Coffee
Image source: cdn.bigeasymart.com
Mastering the Tablespoon Method
If you’re using tablespoons, follow these steps for better results:
- Use a standard measuring spoon: Not a random kitchen spoon. Get actual measuring spoons (1 tbsp size).
- Level it off: Scoop the coffee, then use the straight edge of a knife to scrape off the excess, creating a perfectly level tablespoon. Do not pack it down.
- Count meticulously: For a 60oz (12-cup) batch, start with 18 level tablespoons. Use a small bowl to hold them as you count – it’s easy to lose track.
- Adjust based on taste: After brewing, ask: “Is this too weak?” If yes, next time use 20 tbsp. “Too strong/bitter?” Use 16 tbsp next time. Keep notes!
Real-Life Example: Sarah always used “about 10 scoops” for her 12-cup maker. Her coffee was consistently weak. She switched to counting 18 level tablespoons. The difference was night and day – rich, full-bodied coffee she actually looked forward to. She now adjusts between 18-20 tbsp based on her mood.
When You Absolutely Need a Scale (and Why It’s Worth It)
Here’s when investing in a $15 digital kitchen scale pays off instantly:
- Brewing for guests: Want to impress? Consistently perfect coffee says “I care.”
- Experimenting with beans: Trying a new single-origin? Weighing ensures you taste the bean, not measurement errors.
- Making cold brew concentrate: Precision ratios are critical for concentrate strength.
- You’re serious about coffee: If you spend $15 on beans, why not $15 on the tool to brew them perfectly?
Hack for Scoop Users: Do a one-time calibration. Weigh 1 level tablespoon of your usual coffee grind. Note the weight (e.g., 5g). Now you know: 1 tbsp = ~5g. For 111g (ideal for 60oz), you need roughly 22 level tablespoons. This isn’t as precise as weighing each time, but it’s a huge leap from guessing!
Grind Size: The Hidden Factor in Your Coffee Strength
You measured the coffee perfectly… but your brew is still off. The culprit? Grind size. It’s just as crucial as the coffee-to-water ratio for a 12-cup drip maker.
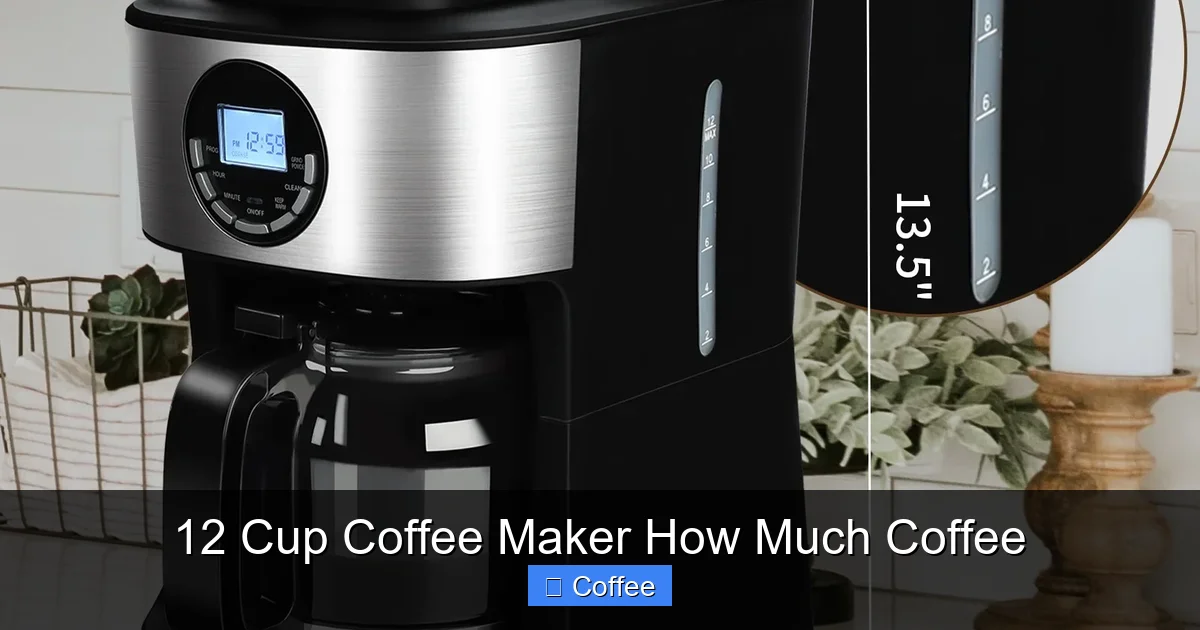
Visual guide about 12 Cup Coffee Maker How Much Coffee
Image source: i5.walmartimages.com
Why Grind Size Makes or Breaks Your Brew
Drip coffee makers work by hot water dripping through a bed of coffee grounds. The grind size determines:
- Extraction Rate: Finer grinds have more surface area, so water extracts flavor compounds faster. Too fine = over-extraction (bitter, harsh). Coarser grinds extract slower. Too coarse = under-extraction (sour, weak).
- Brew Time: Water flows through coarse grounds quickly (short brew time = weak coffee). Fine grounds slow the flow (long brew time = bitter coffee).
- Clogging: Extremely fine grounds (like espresso grind) can clog the filter, causing overflow or very slow brewing.
For a standard 12-cup drip coffee maker, you need a medium-coarse grind. Think sea salt or coarse sand. It should feel gritty between your fingers, not powdery.
Finding the Right Grind (Without a Fancy Grinder)
Not everyone owns a burr grinder. Here’s how to navigate:
- Pre-ground “Drip” Coffee: Most supermarket pre-ground labeled “Drip” or “Regular” is usually medium-fine, which is often too fine for most home drip makers, leading to bitterness. If you must use pre-ground, try using 10-15% less coffee than you normally would (e.g., 16 tbsp instead of 18 for 60oz) to compensate for faster extraction.
- Blade Grinders (Pulse Method): If you have a blade grinder, pulse in short bursts (2-3 seconds), shake the grinder, and pulse again. Check the grind. Aim for visible chunks mixed with finer particles – avoid a uniform powder. It’s imperfect, but better than pre-ground.
- The “Feel Test”: Rub a pinch between your fingers. Medium-coarse should feel noticeably gritty, not smooth like flour. If it feels like sandpaper, it’s too coarse. If it feels like powdered sugar, it’s too fine.
Pro Tip: If your coffee tastes bitter, try a slightly coarser grind next time (or use less coffee if grind size is fixed). If it tastes sour or weak, try a slightly finer grind (or use more coffee). Grind size adjustments are often more impactful than tiny ratio changes.
Troubleshooting Your 12-Cup Maker: Weak, Bitter, and Everything In Between
Even with perfect measurements, things can go wrong. Let’s fix the most common issues.
Why Is My Coffee Always Weak and Watery?
This is the #1 complaint. Causes and fixes:
- Too little coffee: The most common reason. Did you use the “12-cup” label as your guide but only added coffee for 12 standard cups? Remember, it’s 60oz, not 96oz. Fix: Increase coffee by 2-4 tablespoons next brew.
- Too coarse grind: Water zips through the grounds without extracting enough flavor. Fix: Use a slightly finer grind (but not powdery!).
- Old or stale coffee: Coffee loses volatile oils and flavor compounds over time. Pre-ground coffee is especially vulnerable. Fix: Use freshly roasted beans (within 2-4 weeks of roast date) and grind just before brewing. Store beans airtight in a cool, dark place.
- Incorrect water temperature: If your machine isn’t heating water hot enough (ideally 195°F-205°F), extraction is poor. Fix: Descale your machine (see maintenance section). If it’s old, it might need replacing.
Quick Test: Brew a small batch (e.g., 4 cups/24oz water) with 8 level tablespoons of coffee. If it’s still weak, your grind is likely too coarse or your coffee is stale.
Why Is My Coffee Bitter, Harsh, or Burnt?
Over-extraction is usually the villain. Solutions:
- Too much coffee: You used the “12 standard cups” amount for a 60oz brew. Fix: Decrease coffee by 2-4 tablespoons.
- Too fine grind: Water lingers too long, pulling out bitter compounds. Common with pre-ground “drip” coffee. Fix: Use a coarser grind or reduce coffee amount by 10-15%.
- Brewing too long: A clogged filter or mineral buildup slows water flow. Fix: Clean the machine thoroughly (see maintenance). Ensure the filter isn’t overloaded.
- Water too hot: Boiling water (212°F+) scorches coffee. Most good drip makers regulate this, but descaling helps. Fix: Descale regularly.
- Dark roast over-extraction: Dark roasts are more soluble and prone to bitterness. Fix: Use slightly less coffee or a slightly coarser grind with dark roasts.
Quick Test: Brew a small batch with 6 tablespoons for 24oz water. If it’s still bitter, your grind is definitely too fine.
Other Annoying Issues (And Fixes)
- Coffee tastes “flat” or “stale”: Almost always old coffee or improper storage. Fix: Buy fresh beans, grind before brewing, store properly.
- Brewing is very slow or stops: Clogged filter, mineral buildup in the tube, or too fine grind. Fix: Use a paper filter (rinsed!), descale machine, check grind size.
- Coffee tastes like plastic/metal: New machine residue or old, rancid oils in the carafe/basket. Fix: Run 2-3 cycles with just water and vinegar (then water only) for new machines. Wash carafe/basket with baking soda paste for old residue.
Beyond the Brew: Maintenance for Consistent Results
Your coffee maker is a workhorse, but it needs TLC to keep brewing perfectly. Neglect leads to off-flavors and inconsistent strength, no matter how perfectly you measure.
The Non-Negotiable: Descale Regularly
Hard water leaves mineral deposits (scale) inside the heating element and tubes. This:
- Reduces water flow (causing slow brewing or weak coffee)
- Insulates the heating element (causing lower water temps = poor extraction)
- Adds a metallic taste to your coffee
How to Descale:
- Fill the reservoir with equal parts white vinegar and water (e.g., 30oz vinegar + 30oz water for a 60oz capacity).
- Run a full brew cycle (without coffee or filter).
- Discard the vinegar solution. Rinse the reservoir thoroughly.
- Run 1-2 full cycles with fresh water only to remove vinegar taste.
- Frequency: Every 1-2 months if you have hard water, every 3-4 months with soft water. If you see white crust in the reservoir or spout, do it immediately!
Pro Tip: Use citric acid powder (found in canning sections) instead of vinegar for less odor – same effectiveness.
Filter and Basket Care
- Paper Filters: Always rinse them with hot water before adding coffee. This removes paper taste and preheats the basket. Use unbleached filters for a cleaner taste.
- Permanent Filters: Clean meticulously after every use. Coffee oils build up and turn rancid, ruining flavor. Soak in hot water with a drop of dish soap, scrub gently, rinse extremely well. Deep clean weekly with baking soda paste.
- Basket and Carafe: Wash after every use with mild soap. For stubborn stains or odors in the carafe, fill with warm water and a tablespoon of baking soda, let sit overnight, then scrub.
The Weekly Habit: Every Sunday, do a quick rinse cycle with water only. Every month, do the full descale. Your coffee will taste noticeably fresher and more vibrant.
Conclusion: Your Path to Coffee Perfection Starts Now
Mastering how much coffee to use in your 12-cup maker isn’t about complex math or expensive gear – it’s about understanding a few key principles and making small, consistent adjustments. Remember the core truth: that “12-cup” label brews 60 ounces, not 96. Embrace the golden ratio (2 tbsp per 6oz cup, or 10-12g per 180ml water) as your starting point. Ditch the guesswork with scoops; invest in a simple kitchen scale – it’s the single best upgrade for your coffee ritual.
Pay attention to grind size – medium-coarse is your drip maker’s best friend. Don’t let stale coffee or a neglected machine sabotage your efforts; fresh beans and regular descaling are non-negotiable for great flavor. When your coffee tastes off, use the troubleshooting guide: weak? Add coffee or fine-tune the grind. Bitter? Reduce coffee or coarsen the grind. It’s a dance of small tweaks, not a overhaul.
The reward? That first sip of consistently perfect coffee – rich, balanced, and exactly how you like it – becomes your new normal. No more disappointment, no more wasted beans. Just reliable, delicious coffee that fuels your mornings and delights your senses. You hold the power to transform your daily brew. Measure wisely, grind fresh, maintain diligently, and savor the difference. Your perfect cup of coffee is waiting – go brew it.
Frequently Asked Questions
What is the exact coffee-to-water ratio for a 12-cup maker?
The ideal ratio is 1:16 coffee to water by weight. For a standard 12-cup maker (60oz/1774ml water), this equals 111 grams of coffee. If using volume, start with 18 level tablespoons for 60oz of water and adjust to taste. Always prioritize weight measurement for accuracy.
Why does my “12-cup” maker only fill 7-8 standard mugs?
Coffee maker “cups” are traditionally 6 fluid ounces, not the standard 8oz drinking cup. So a “12-cup” maker brews approximately 60 ounces (1.8 liters), which fills about 7.5 standard 8oz mugs. This historical measurement quirk is the main reason for confusion over coffee amounts.
Can I use a French press ratio in my drip maker?
No, French press uses a much stronger ratio (e.g., 1:15) and coarser grind because it’s immersion brewing. Using a French press ratio in a drip maker will likely result in over-extracted, bitter coffee due to the faster flow rate. Stick to the drip-specific golden ratio (1:16 to 1:18).
How often should I clean my 12-cup coffee maker?
Daily: Wash the carafe, filter basket, and permanent filter (if used). Weekly: Run a water-only brew cycle. Monthly: Descale thoroughly with vinegar or citric acid solution. Neglecting cleaning leads to rancid oils and mineral buildup that ruins flavor and performance.
Is it better to use a paper filter or permanent filter?
Paper filters produce cleaner, brighter coffee by trapping fine grounds and oils. They require rinsing to remove paper taste. Permanent filters (metal/mesh) are eco-friendly but allow more oils and fines through, resulting in a heavier body. They require meticulous cleaning to prevent rancid flavors. Choose based on your taste preference and commitment to cleaning.
Can I use instant coffee in a 12-cup maker?
While possible, it’s not ideal. Instant coffee dissolves instantly in hot water, so the dripper’s function is redundant. You’ll likely get weak, watery results because the machine is designed for brewing grounds. For best instant coffee, simply add hot water directly to the mug. Using the maker wastes energy and doesn’t improve the coffee.