
Fresh bone-in chicken thighs cook in just 8-10 minutes under pressure, while boneless need 6-8 minutes. Frozen thighs require 12-15 minutes. Always use natural release for 10 minutes to keep meat tender and juicy. This foolproof method guarantees fall-off-the-bone results every time.
Key Takeaways
- Fresh bone-in thighs: 8-10 minutes high pressure + 10-minute natural release
- Boneless thighs: 6-8 minutes high pressure + quick release
- Frozen thighs: 12-15 minutes high pressure + 10-minute natural release
- Minimum liquid: 1 cup (240ml) broth/water to create steam
- Natural release is crucial: Prevents toughness for bone-in cuts
- Internal temp check: Verify 165°F (74°C) with meat thermometer
- No overcrowding: Arrange in single layer for even cooking
📑 Table of Contents
- Why Pressure Cooker Chicken Thighs Are a Game-Changer
- Essential Prep: Setting Up for Pressure Cooker Success
- The Golden Rules: Timing Your Chicken Thighs Perfectly
- Liquid Wisdom: Getting the Broth Ratio Right
- Release Methods Decoded: Natural vs. Quick Release
- Troubleshooting Common Pressure Cooker Chicken Issues
- Beyond Basic: Creative Ways to Use Pressure Cooker Chicken Thighs
- Conclusion: Your Foolproof Path to Perfect Chicken Thighs
Why Pressure Cooker Chicken Thighs Are a Game-Changer
Let’s be honest: weeknights are brutal. You’re tired, hungry, and the thought of spending 45 minutes babysitting a chicken dish sounds like torture. That’s where your pressure cooker becomes your secret weapon. Chicken thighs are naturally forgiving – they’re harder to overcook than breasts and stay incredibly juicy. When you combine that with the magic of pressure cooking? You get tender, flavorful, fall-off-the-bone perfection in a fraction of the time. No more dry, stringy chicken ruining your dinner. Just set it, forget it (well, mostly), and enjoy amazing results.
Unlike roasting or pan-frying, pressure cooking locks in moisture while rapidly breaking down connective tissue. Those rich, collagen-packed thighs transform into succulent meat that practically shreds with a fork. Plus, it’s incredibly hands-off. While the pressure builds and the timer counts down, you can set the table, toss a salad, or just sit down for five minutes. The best part? This method works brilliantly whether you’re using fresh or frozen thighs – a total lifesaver when you forgot to thaw dinner. Forget complicated recipes; this is about mastering one simple technique that delivers consistent, restaurant-quality results every single time.
Essential Prep: Setting Up for Pressure Cooker Success
Before you even think about hitting that pressure button, proper prep makes all the difference between good chicken and great chicken. Rushing this step is the #1 reason people end up with disappointing results. Let’s break it down simply.
Visual guide about How Long to Cook Chicken Thighs in Pressure Cooker
Image source: sweetpeaskitchen.com
Patience Pays Off: Drying and Seasoning
Grab your chicken thighs and place them on a clean plate or cutting board. Using paper towels, gently pat each thigh completely dry. This might seem like a small step, but it’s non-negotiable. Moisture on the surface creates steam that prevents proper browning and can make your seasoning slide right off. Once dry, season generously on all sides. Don’t be shy! A simple mix of salt, pepper, garlic powder, and paprika works wonders. For extra flavor, add a pinch of dried thyme or oregano. If you’re using frozen thighs, season them directly – no need to thaw first for this step.
The Liquid Lifeline: Why You Can’t Skip This
Here’s where many beginners stumble: the pressure cooker needs liquid to create steam and build pressure. Pour at least 1 cup (240ml) of liquid into the inner pot before adding chicken. This is non-negotiable – less liquid risks burning your food or damaging the cooker. Use low-sodium chicken broth for maximum flavor, but water works in a pinch. You can also add aromatics like sliced onions, minced garlic, or lemon wedges to the liquid for extra depth. Remember: the liquid doesn’t cook the chicken directly; it creates the steam environment that does the cooking. Never skip this step!
Strategic Placement: Avoiding the Soggy Bottom
How you arrange your thighs matters more than you’d think. Place them in the pot in a single layer, skin-side up if they have skin. Don’t stack them or cram them in – overcrowding traps steam and leads to uneven cooking. Some pieces might end up boiled while others stay undercooked. If you’re cooking a large batch, work in batches or use a steamer basket to keep thighs elevated above the liquid. This ensures even heat distribution and prevents the bottom pieces from becoming waterlogged. Pro tip: If using a basket, you can still get great results with slightly less liquid (3/4 cup), but 1 cup is always safe.
The Golden Rules: Timing Your Chicken Thighs Perfectly
This is the moment you’ve been waiting for: the exact timing for perfect pressure cooker chicken thighs. Getting this right is the heart of the whole process. The magic number depends entirely on two factors: whether your thighs are fresh or frozen, and whether they’re bone-in or boneless. Let’s demystify it.
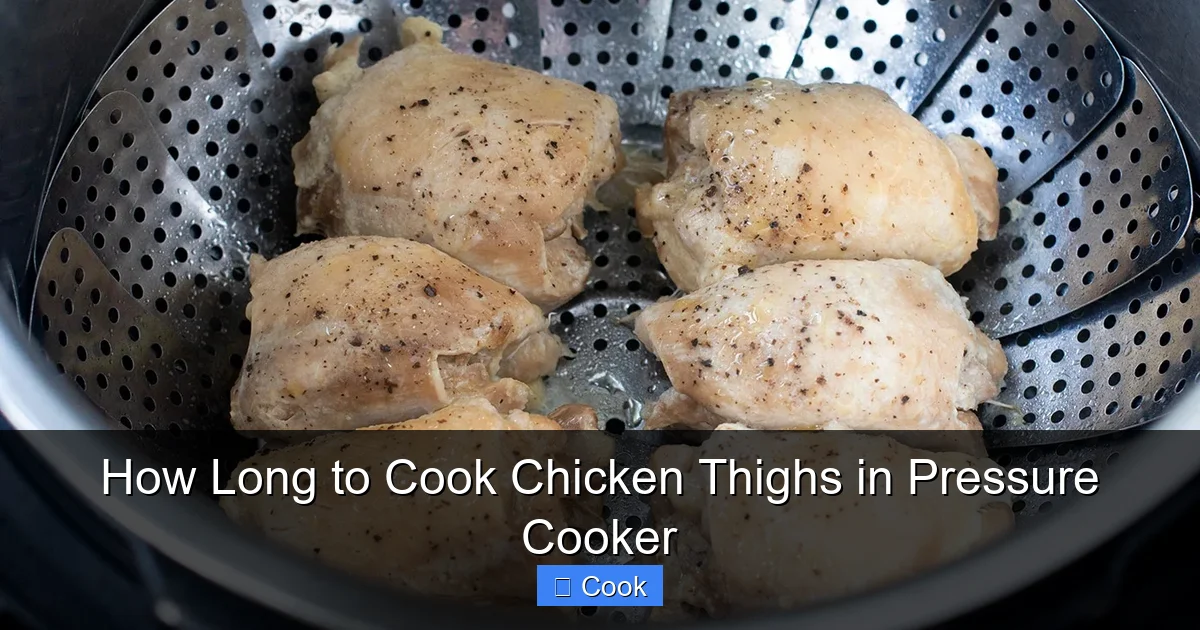
Visual guide about How Long to Cook Chicken Thighs in Pressure Cooker
Image source: storables.com
Fresh Bone-In Chicken Thighs: The Classic Winner
For most home cooks, fresh bone-in, skin-on thighs are the go-to choice. They’re affordable, flavorful, and nearly impossible to dry out. Here’s the sweet spot: 8-10 minutes on high pressure. Why the range? Thighs vary in size. Smaller thighs (around 4-5 oz each) might only need 8 minutes, while jumbo thighs (6-7 oz+) could need the full 10. But here’s the critical part: after cooking, let the pressure release naturally for 10 minutes. This means walking away and letting the cooker slowly depressurize on its own. Jumping straight to quick release after bone-in chicken = tough, stringy meat. The natural release allows the fibers to relax and reabsorb juices. After 10 minutes, you can safely do a quick release for any remaining pressure. Total time from start to shredding: about 25-30 minutes.
Boneless, Skinless Thighs: Speed Demon Option
Short on time? Boneless thighs are your best friend. Without the bone slowing things down, they cook faster: 6-8 minutes on high pressure. Again, size matters – smaller pieces cook quicker. The big difference here is the release method. Because boneless thighs are more delicate, you can usually do a quick release immediately after cooking. This stops the cooking process fast, preventing them from turning mushy. Just stand back, use the quick-release valve, and keep your hands clear of the steam. Total time: 15-20 minutes from pot to plate. Perfect when you need dinner on the table in a flash.
Frozen Chicken Thighs: The Emergency Savior
Forgot to thaw dinner? No panic needed. Pressure cookers handle frozen thighs brilliantly, but they need extra time. Set your cooker for 12-15 minutes on high pressure. The longer time compensates for the frozen core. Crucially, always use a 10-minute natural release for frozen bone-in thighs. The gradual pressure drop ensures the center cooks through without the outside turning rubbery. For frozen boneless thighs, 10-12 minutes with a quick release usually suffices. Remember: never try to force quick release on large frozen bone-in pieces – the sudden pressure change can make them tough. This method turns a dinner disaster into a delicious meal in under 30 minutes.
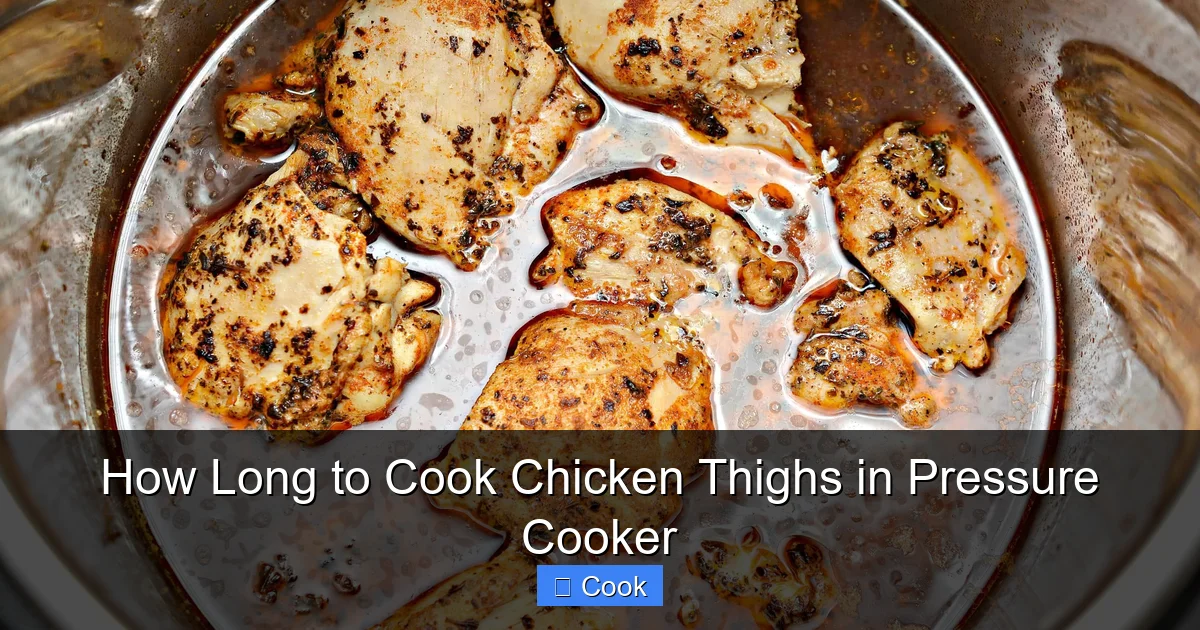
Liquid Wisdom: Getting the Broth Ratio Right
We touched on liquid earlier, but it deserves its own spotlight. Too little liquid risks burning and a “burn notice” error. Too much dilutes flavor and can make chicken watery. Finding the sweet spot is key to pressure cooker mastery.
Visual guide about How Long to Cook Chicken Thighs in Pressure Cooker
Image source: sweetpeaskitchen.com
The Minimum Mandate: Never Go Below 1 Cup
Your pressure cooker’s manual likely states a minimum liquid requirement – usually 1 cup (240ml). This isn’t arbitrary. It’s the absolute minimum needed to generate enough steam to reach and maintain pressure. Skipping this or using less (like 1/2 cup) is the fastest way to ruin your meal and potentially damage your cooker. The liquid creates the steam environment; without sufficient volume, pressure can’t build properly. Always measure – eyeballing leads to mistakes. When in doubt, add an extra 1/4 cup. It’s far better to have slightly more liquid that you can drain off than to risk a burnt dinner.
Flavor Boosters: Beyond Plain Water
While water works, why not make that liquid work for your chicken? Swap in low-sodium chicken broth – it adds depth without making the chicken salty. For a bright twist, use coconut milk (great for curries) or even a splash of apple cider vinegar to tenderize. Add aromatics directly to the liquid: a smashed garlic clove, a slice of onion, a bay leaf, or a few peppercorns. These infuse the steam, subtly flavoring the chicken from the inside out. Avoid adding dairy (like cream) directly to the liquid before pressure cooking – it can curdle or separate under high heat. Save creamy elements for after cooking.
Post-Cook Liquid: Goldmine or Drain?
That leftover liquid in the pot? It’s liquid gold! After cooking, you’ll have flavorful, rich broth infused with chicken essence. Don’t dump it! Strain it through a fine-mesh sieve to remove any bits, then use it as:
- Base for gravy (thicken with cornstarch slurry)
- Cooking liquid for rice or quinoa
- Added to soups or stews for instant depth
- Moisture for shredding chicken (keeps it juicy)
If it’s too thin, simmer it uncovered for 5-10 minutes to reduce and concentrate flavor. This step transforms simple cooking liquid into a versatile kitchen staple.
Release Methods Decoded: Natural vs. Quick Release
This is where many pressure cooker newbies go wrong. Choosing the right release method isn’t optional – it directly impacts texture. Let’s clear up the confusion.
Natural Release (NR): The Gentle Approach
Natural release means letting the pressure drop slowly on its own as the cooker cools. No touching the valve! This takes 10-20 minutes depending on the cooker and food volume. Use NR for:
- Bone-in meats (like our thighs)
- Large cuts (whole chicken, roasts)
- Foods that foam (beans, oats, pasta)
- Frozen items
Why? The gradual pressure drop prevents the violent bubbling that can tear delicate fibers or cause toughness. For bone-in thighs, NR allows heat to penetrate the bone marrow, enriching the meat and keeping it succulent. Skipping NR for bone-in chicken is the #1 cause of dry results.
Quick Release (QR): When Speed is Essential
Quick release involves manually venting steam through the valve immediately after cooking. It takes 1-3 minutes. Use QR for:
- Boneless, skinless cuts (thighs, breasts)
- Vegetables (to retain crunch)
- Delicate fish
- When you need to stop cooking instantly
For boneless thighs, QR prevents overcooking since they’re more prone to becoming mushy with residual heat. Always stand back, use a long utensil to turn the valve, and keep hands/face clear of the steam blast. Never force QR on large bone-in pieces – the sudden change shocks the meat.
The Hybrid Hack: Best of Both Worlds
For bone-in thighs, the ideal method is often a 10-minute natural release followed by quick release. This gives the meat time to relax (preventing toughness) while speeding up the overall process. After 10 minutes of NR, any remaining pressure can be safely vented with QR. This hybrid approach delivers tender results in less total time than full NR while avoiding the pitfalls of immediate QR.
Troubleshooting Common Pressure Cooker Chicken Issues
Even with perfect timing, things can occasionally go sideways. Don’t panic – most issues have simple fixes. Here’s how to rescue your chicken thighs.
Why Is My Chicken Tough or Rubbery?
This usually means overcooking or improper release. Bone-in thighs cooked with immediate quick release often turn tough because the fibers contract violently. Solution: Always use natural release (or 10-min NR) for bone-in cuts. If you accidentally did QR, try shredding the chicken and simmering it in broth for 5 minutes to rehydrate. For future batches, reduce cook time by 1-2 minutes or double-check your release method.
Undercooked Chicken: The Safety Risk
If your chicken is still pink or cold in the center after the recommended time, it’s undercooked. This is dangerous. Never guess – use an instant-read thermometer. If it reads below 165°F (74°C), return the pot to pressure for 2-3 more minutes. For bone-in thighs, ensure you’re using natural release to allow heat to penetrate fully. Frozen thighs often need the full 15 minutes – don’t cut corners here.
Soggy or Watery Chicken: The Liquid Trap
Too much liquid or overcrowding can lead to boiled-tasting chicken. Solution: Always use exactly 1 cup liquid minimum, and arrange thighs in a single layer. If chicken is watery after cooking, remove it and simmer the liquid uncovered for 5-10 minutes to reduce. You can also pat the cooked thighs dry with paper towels before serving. Avoid stacking thighs – this traps steam and causes uneven cooking.
The “Burn Notice” Nightmare
If your cooker displays “burn” or “error,” it means the liquid evaporated too much during cooking. This happens with insufficient liquid or cooking starchy foods (like rice) under the chicken. Prevention: Always use at least 1 cup liquid, and when layering foods, place starchy items (rice, potatoes) directly in the liquid, with chicken on a steamer basket above. If burn happens, carefully discard the burnt layer at the bottom – the chicken on top might still be salvageable.
Beyond Basic: Creative Ways to Use Pressure Cooker Chicken Thighs
Perfectly cooked thighs are just the starting point. Their versatility is incredible. Here’s how to transform them into amazing meals.
Effortless Shredded Chicken
Once your thighs are done and pressure is released, transfer them to a bowl. Let them rest for 5 minutes, then use two forks to shred. The meat should fall apart easily. Toss with:
- Barbecue sauce for sandwiches
- Taco seasoning and salsa for burrito bowls
- Buffalo sauce and ranch for wraps
- Teriyaki glaze for Asian-inspired bowls
Use the reserved cooking liquid to moisten the shreds – they’ll stay juicy for days. Store in the fridge for up to 4 days or freeze for 3 months.
One-Pot Wonder Meals
Turn your pressure cooker into a complete meal machine. After removing cooked thighs, sauté onions and peppers in the same pot. Add rice, broth, and your shredded chicken. Pressure cook for 5 minutes (natural release) for a flavorful chicken fried rice. Or add diced tomatoes, beans, corn, and taco seasoning for a 15-minute chicken chili. The built-in flavors from the cooking liquid elevate the whole dish.
Flavor Infusion Techniques
Boost taste without extra cook time. Before pressure cooking, rub thighs with:
- Mexican: Chili powder, cumin, lime zest
- Mediterranean: Lemon juice, oregano, garlic
- Asian: Soy sauce, ginger, sesame oil
- Indian: Curry powder, turmeric, garam masala
Add complementary veggies to the pot: potatoes, carrots, or sweet potatoes cook perfectly alongside thighs (add 2 extra minutes for dense veggies). Finish with fresh herbs after cooking for a bright pop.
Conclusion: Your Foolproof Path to Perfect Chicken Thighs
Mastering how long to cook chicken thighs in a pressure cooker unlocks a world of easy, delicious weeknight dinners. Remember the core principles: fresh bone-in thighs need 8-10 minutes plus 10-minute natural release, boneless are ready in 6-8 minutes with quick release, and frozen require 12-15 minutes with natural release. Never skip the 1 cup liquid minimum, and always arrange thighs in a single layer. These simple rules guarantee juicy, tender results every single time.
The beauty of this method is its reliability and speed. In less than 30 minutes, you can have protein ready for tacos, salads, sandwiches, or grain bowls. No more dry chicken, no more babysitting the stove, no more dinner disasters. Whether you’re a pressure cooker newbie or a seasoned pro, these timing guidelines take the guesswork out of cooking chicken thighs. So fire up that Instant Pot or electric pressure cooker, trust the process, and get ready to enjoy perfectly cooked, fall-off-the-bone chicken thighs that will make you wonder how you ever cooked them any other way. Your future self (and your taste buds) will thank you.
Frequently Asked Questions
Can I cook chicken thighs from frozen in a pressure cooker?
Yes! Frozen bone-in thighs need 12-15 minutes high pressure with a 10-minute natural release. Frozen boneless thighs cook in 10-12 minutes with quick release. No thawing required – just season directly and add extra cook time.
Why is my pressure cooker chicken tough?
Tough chicken usually results from using quick release on bone-in thighs or overcooking. Always use natural release (or 10-min NR) for bone-in cuts to allow fibers to relax. Check internal temperature – it should reach 165°F (74°C).
How much liquid is absolutely necessary?
Minimum 1 cup (240ml) liquid is essential for pressure to build. Less risks burning and “burn notice” errors. Use broth for flavor, but water works. Never go below this amount.
Can I put chicken thighs in without drying them first?
Patting thighs dry is crucial! Moisture prevents proper seasoning adhesion and can lead to steaming instead of browning. Always dry thoroughly with paper towels before seasoning for best results.
Why do I need natural release for bone-in thighs?
Natural release prevents violent bubbling that tears meat fibers. Bone-in cuts need gradual pressure drop to allow heat to penetrate the bone and keep meat tender. Quick release causes toughness.
How do I know if chicken is fully cooked?
Always verify with an instant-read thermometer. Insert into the thickest part away from bone – it must read 165°F (74°C). Visual cues alone aren’t reliable, especially with bone-in pieces.