Chicken thighs cooked at 425°F typically take 25-35 minutes, but exact timing depends on thickness and bone status. Always verify doneness with a meat thermometer hitting 165°F internally, and let them rest 5-10 minutes before serving for maximum juiciness. Bone-in thighs need 5-10 extra minutes compared to boneless cuts.
Key Takeaways
- Core Timing Range: Expect 25-35 minutes for most chicken thighs at 425°F, but always use a thermometer – time alone isn’t reliable.
- Internal Temperature is King: 165°F measured at the thickest part (avoiding bone) is the absolute safety minimum; 170-175°F yields more tender results.
- Bone-In vs. Boneless Matters: Bone-in thighs generally need 5-10 extra minutes compared to boneless, skin-on or skin-off.
- Resting is Non-Negotiable: Always let thighs rest 5-10 minutes after baking; this allows juices to redistribute, preventing dryness.
- Thickness is Crucial: A thin ¾-inch boneless thigh cooks much faster (20-25 mins) than a thick 1.5-inch bone-in piece (35-40 mins).
- Oven Hot Spots Exist: Rotate your baking sheet halfway through cooking for even browning and doneness.
- Frozen Thighs Need Adjustment: Add 10-15 minutes to cook time and ensure they reach 165°F internally – thawing is always better.
Quick Answers to Common Questions
Can I cook frozen chicken thighs at 425°F?
Yes, but add 10-15 minutes to the estimated cook time and always verify they reach 165°F internally. Thawing is preferred for more even cooking and better browning, but frozen is safe if cooked thoroughly.
Do skin-on thighs cook faster or slower than skinless?
Skin-on thighs generally cook slightly *slower* than skinless thighs of the same thickness because the fat layer needs time to render. However, the skin protects the meat, often resulting in juicier results. Add 2-5 minutes to the time for skinless vs skin-on.
Should I cover chicken thighs with foil when baking at 425°F?
Generally, no. Covering traps steam, which prevents browning and crisping. Only cover loosely with foil if the outside is browning too quickly *before* the inside is done (usually in the last 5-10 minutes), or to keep them warm after cooking while resting.
How do I know if my oven is really at 425°F?
Use an oven thermometer! Oven dials are often inaccurate. Place the thermometer on the center rack and preheat for at least 20-30 minutes. Adjust your cooking time up or down based on whether your oven runs hot or cool.
Can I use a convection oven at 425°F?
Yes, but convection cooks faster and more evenly. Reduce the temperature by 25°F (to 400°F) or reduce the cook time by 5-10 minutes. Start checking for doneness 5-10 minutes earlier than the standard time estimates.
📑 Table of Contents
- The Juicy Secret: Mastering Chicken Thighs at 425°F
- Why Timing Isn’t One-Size-Fits-All: Key Factors That Change Everything
- Your Step-by-Step Guide to Perfect 425°F Chicken Thighs
- Don’t Guess, Verify: The Only Safe Way to Know They’re Done
- Troubleshooting Common Chicken Thigh Problems at 425°F
- Flavor Boosters: Beyond Basic Salt & Pepper
- Conclusion: Your Foolproof Path to Perfect Chicken Thighs
The Juicy Secret: Mastering Chicken Thighs at 425°F
Let’s talk chicken thighs. They’re the unsung heroes of the weeknight dinner table – forgiving, flavorful, and packed with moisture that breast meat can only dream of. But even these resilient cuts can turn dry or undercooked if you don’t nail the timing. You’ve probably found yourself staring into the oven, wondering, “How long to cook chicken thighs in oven 425?” It’s a question that seems simple, but the answer holds the key to consistently perfect, restaurant-quality results right in your own kitchen.
Why 425°F? It’s the sweet spot for chicken thighs. High enough to render fat, crisp skin (if you have it), and develop beautiful caramelization through the Maillard reaction, but not so high that the outside burns before the inside cooks through. This temperature gives you that glorious contrast of tender, juicy meat and golden, flavorful edges. Forget dry, bland chicken – mastering this method unlocks deep flavor and texture. In this guide, we’ll cut through the guesswork. We’ll give you the precise timing framework, the critical factors that change everything, and the foolproof steps to ensure your chicken thighs are always cooked to perfection – moist, safe, and absolutely delicious. No more dry hockey pucks or risky pink centers!
Why Timing Isn’t One-Size-Fits-All: Key Factors That Change Everything
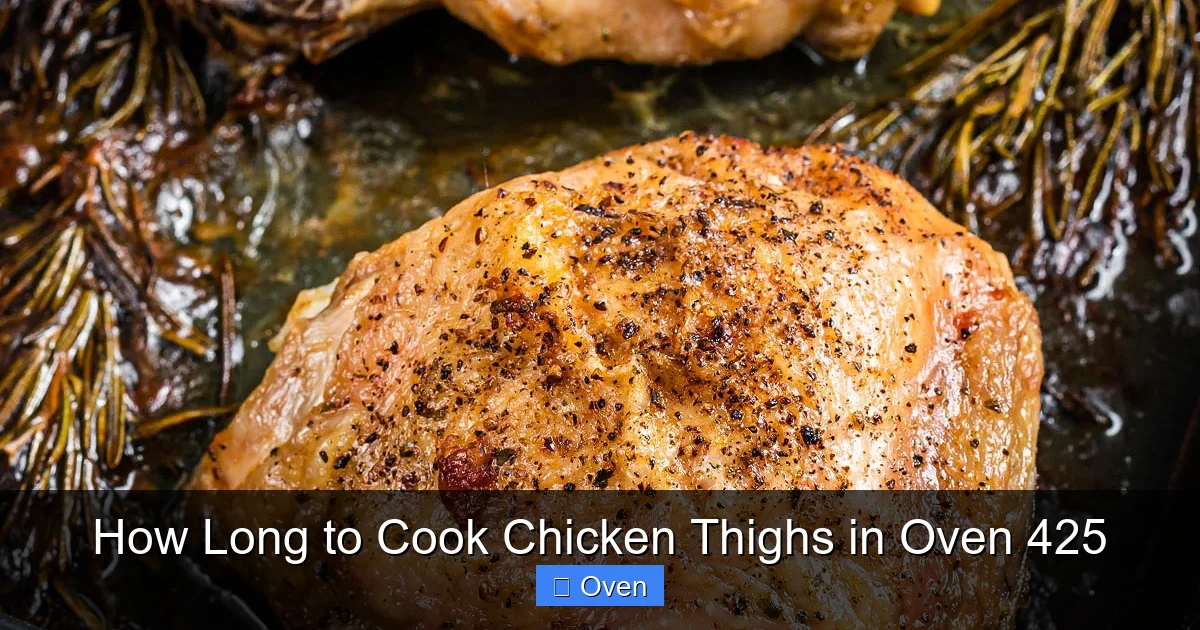
Here’s the honest truth: there’s no single magic number for “how long to cook chicken thighs in oven 425.” If someone tells you “always 30 minutes,” run. Cooking time depends heavily on several variables. Ignoring these is the #1 reason people end up with disappointing results. Let’s break down what truly matters.
Visual guide about How Long to Cook Chicken Thighs in Oven 425
Image source: kitskitchen.com
Thickness is Your Biggest Clue
Think of your chicken thigh like a steak. A thin cut cooks fast; a thick cut needs more time. This is the single most significant factor. A standard supermarket boneless, skinless thigh might be about ¾ to 1 inch thick. A bone-in, skin-on thigh from a larger bird can easily be 1.5 inches thick at its center. That extra half-inch adds substantial cooking time. Always visually assess your thighs before they go in the oven. If they’re uneven, place the thicker end towards the center of the pan where heat is often more intense.
Bone-In vs. Boneless: The Game Changer
This distinction makes a huge difference. Bone acts as an insulator. Heat takes longer to travel through the bone to cook the meat surrounding it. Consequently, bone-in thighs almost always take longer than boneless thighs of similar thickness. As a general rule of thumb, add 5-10 minutes to your estimated time for bone-in pieces compared to boneless. Skin-on thighs also cook slightly slower than skinless because the fat layer needs time to render, but the skin protects the meat, often resulting in juicier results.
Starting Temperature Matters
Did you take your chicken straight from the fridge? Or did it sit out for 20-30 minutes? Cold chicken straight from the refrigerator will take longer to cook through than chicken that’s been brought closer to room temperature. While it’s safest to cook chicken from cold (minimizing time in the danger zone), be aware it adds a few extra minutes. Patting the thighs *very* dry with paper towels before seasoning isn’t just for better browning – it also helps them cook slightly more evenly by removing a cold, wet surface layer.
Your Oven’s Personality
No two ovens are identical. Some run hot, some run cool. Convection ovens (with a fan) cook faster and more evenly than conventional ovens – you might need to reduce the time by 5-10 minutes or lower the temp by 25°F. Oven calibration drifts over time. If your chicken consistently cooks too fast or too slow, consider investing in an inexpensive oven thermometer to check its accuracy. Also, overcrowding your baking sheet creates steam, which hinders browning and can slightly increase cooking time. Give your thighs space!
Your Step-by-Step Guide to Perfect 425°F Chicken Thighs
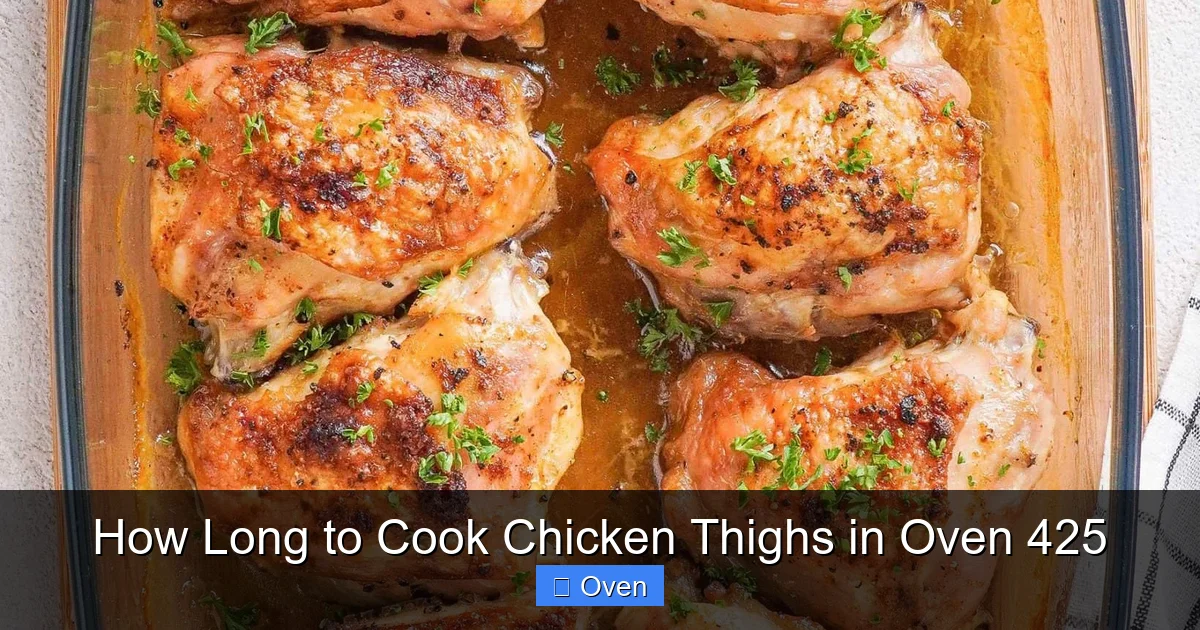
Now that you understand the variables, let’s walk through the foolproof process. This method works for bone-in, skin-on; bone-in, skinless; boneless, skin-on; and boneless, skinless thighs. The core principle remains the same: high heat, proper prep, and temperature verification.

Visual guide about How Long to Cook Chicken Thighs in Oven 425
Image source: sweetandsavorymeals.com
Prep is Where Flavor Begins
Don’t skip this step! Place your chicken thighs on a plate or cutting board. Pat them *thoroughly* dry with paper towels. This is crucial for getting that beautiful sear and preventing steaming. If you’re using skin-on thighs, drying the skin is especially important for crispiness. Season generously on all sides with salt and pepper. This is your foundation. Feel free to add other dry spices like garlic powder, onion powder, paprika, dried herbs (thyme, rosemary), or a pinch of cayenne. For wet marinades (like lemon-herb or teriyaki), apply them at least 30 minutes before cooking, or up to 24 hours in the fridge (discard used marinade).
Choosing the Right Pan & Setting Up
Use a heavy-duty baking sheet or roasting pan. Lightly grease it with oil (avocado, canola, olive) or line it with parchment paper for easier cleanup. Avoid flimsy pans that can warp. If you have skin-on thighs and want extra crispy skin, place them skin-side up on a wire rack set over the baking sheet. This allows air to circulate underneath, rendering fat more effectively. For boneless thighs or if you prefer simplicity, place them directly on the greased pan. Ensure they aren’t touching each other – give them at least an inch of space. Preheat your oven to a verified 425°F. A hot oven from the start is essential for good browning.
The Bake: Timing Framework & Monitoring
Place the pan in the center rack of your preheated oven. Here’s your starting point for timing, remembering these are estimates *before* checking temperature:
- Boneless, Skinless (¾-1″ thick): 20-25 minutes
- Boneless, Skin-On (¾-1″ thick): 22-27 minutes
- Bone-In, Skinless (1-1.25″ thick): 28-35 minutes
- Bone-In, Skin-On (1-1.5″ thick): 30-40 minutes
Set a timer for the *minimum* time in your range. At this point, start checking for visual cues: the chicken should be golden brown, the skin (if present) should be crispy and shrunken away from the edges, and you should see clear juices running from any cuts (not pink). However, **visuals alone are NOT sufficient for safety.** This is where the thermometer becomes essential.
The Critical Resting Phase
Once your thighs hit the target internal temperature (more on that next!), carefully remove the pan from the oven. **Do not cut into them immediately!** Transfer the thighs to a clean plate or cutting board, loosely tent them with foil, and let them rest for 5-10 minutes. This resting period is non-negotiable for juicy results. During baking, the juices are driven towards the center of the meat by the heat. Resting allows those juices to redistribute evenly throughout the thigh. Cutting too soon means all those precious juices spill out onto your cutting board, leaving you with dry meat. Trust the process – the resting time is part of the cooking time!
Don’t Guess, Verify: The Only Safe Way to Know They’re Done
We cannot stress this enough: **Relying solely on cooking time or color is dangerous and unreliable.** The only accurate way to ensure your chicken thighs are safe to eat is by using an instant-read meat thermometer. This is the single most important tool for perfect chicken.
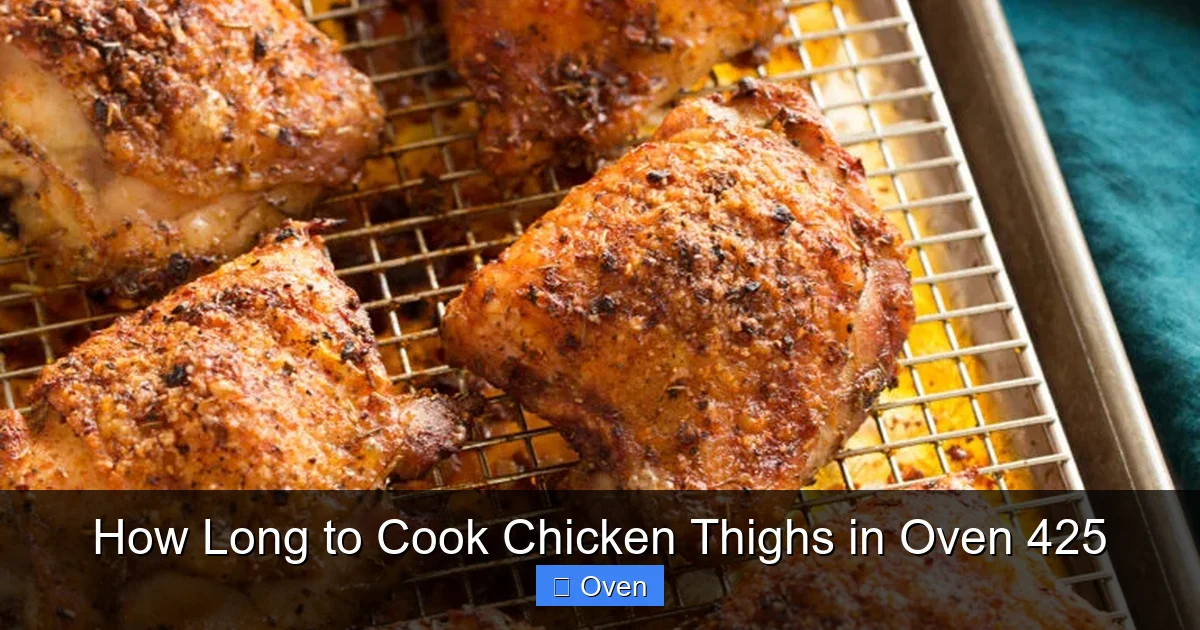
Visual guide about How Long to Cook Chicken Thighs in Oven 425
Image source: cookingclassy.com
Why 165°F is the Magic Number (and Why You Might Go Higher)
The USDA mandates that poultry reach an internal temperature of 165°F to instantly kill harmful bacteria like Salmonella and Campylobacter. This is the absolute safety minimum. Insert the thermometer probe into the thickest part of the thigh, making sure it doesn’t touch the bone (bone conducts heat differently and gives a false reading). If you hit 165°F, your chicken is safe. However, many chefs and food scientists note that chicken thighs, being darker meat with more connective tissue, actually become more tender and juicy as they cook to 170°F or even 175°F. At 165°F, they are safe but can be slightly firmer. At 170-175°F, the collagen breaks down more, resulting in incredibly succulent, almost fall-apart tender meat. **The key is knowing your preference and using the thermometer to hit *your* target within the safe range (165°F+).** For most home cooks seeking maximum juiciness, aiming for 170-175°F is ideal.
Mastering Your Thermometer
Invest in a good instant-read thermometer (like Thermapen or ThermoPop) – they give readings in 2-3 seconds. Avoid slow thermometers or oven-safe probes that stay in during cooking (they can be inaccurate for thin cuts like thighs). Calibrate it occasionally in ice water (should read 32°F) and boiling water (should read 212°F at sea level). Clean the probe with hot, soapy water between uses, especially if checking multiple pieces. When inserting, angle the probe so it goes deep into the center of the thickest section. Wiggle it slightly to ensure you’re not hitting fat or bone. Take readings in 2-3 different spots if the thigh is very large or uneven.
Carryover Cooking: The Hidden Factor
Remember that resting phase? During those 5-10 minutes, the internal temperature of the chicken will continue to rise by 5-10°F. This is called carryover cooking. It happens because the heat from the outer layers continues to migrate inward. So, if you pull your thighs out at exactly 165°F, they might reach 170°F or more while resting. If you’re aiming for 170°F tenderness, you might actually want to pull them out around 165-167°F to account for this rise. This is why resting is so crucial – it’s the final, gentle cook.
Troubleshooting Common Chicken Thigh Problems at 425°F
Even with the best intentions, things can go sideways. Here’s how to diagnose and fix the most frequent issues when cooking chicken thighs at 425°F.
Dry Chicken Thighs: Where Did the Juice Go?
This is the heartbreak of chicken cooking. Dry thighs usually stem from one of two causes: overcooking or insufficient resting. If your thermometer hit 175°F+ before you pulled them out, you likely overcooked them. Remember, carryover cooking happens! Next time, pull them out 5°F below your target temp. If they were dry *despite* hitting the right temp, you probably skipped or shortened the resting time. Those juices need time to settle back into the meat fibers. Also, ensure you’re not using leaner cuts like very thin boneless thighs without enough fat or marinade for protection. Bone-in, skin-on thighs are naturally more forgiving.
Pink Juices or Undercooked Meat: Safety First!
If you cut into your thigh and see pink juices or the meat looks pink near the bone, **do not eat it.** This indicates it hasn’t reached a safe internal temperature. Immediately return it to the oven. Check the temperature again in 5-minute increments. Pink juices can sometimes be misleading (myoglobin can cause pinkness even at safe temps, especially near bone), but **when in doubt, cook it longer.** Your thermometer is your only reliable guide. Never rely on color alone for poultry safety.
Pale, Soggy Skin (For Skin-On Thighs)
You got the timing right, but the skin is limp and pale? This usually means insufficient rendering time or moisture trapped underneath. Ensure you patted the skin *extremely* dry before seasoning. Using the wire rack method is the best solution – it allows fat to drip away and hot air to circulate. If cooking directly on the pan, you might need to give the skin an extra 5-10 minutes *after* the meat is nearly done (cover the meat loosely with foil if it’s browning too fast) to really crisp up. Broiling for the last 1-2 minutes (watch constantly!) can also rescue soggy skin, but be cautious of burning.
Uneven Cooking: Hot Spots & Thickness
One side is done, the other is raw? This screams oven hot spots or uneven thickness. Always rotate your baking sheet 180 degrees halfway through the estimated cooking time. If your thighs are very uneven, place the thicker ends towards the center of the oven where heat is often more intense. Consider pounding thicker boneless thighs to an even ¾-inch thickness with a meat mallet between sheets of plastic wrap before seasoning – this is a pro trick for even cooking.
Flavor Boosters: Beyond Basic Salt & Pepper
While perfectly cooked plain thighs are delicious, 425°F is a fantastic canvas for big flavors. The high heat helps caramelize marinades and dry rubs beautifully.
Dry Rubs: Quick & Flavor-Packed
Dry rubs are perfect for 425°F baking. They form a delicious crust. Try combinations like:
- Smoky Paprika: 2 tbsp smoked paprika, 1 tbsp brown sugar, 1 tsp garlic powder, 1 tsp onion powder, 1 tsp dried thyme, 1 tsp salt, ½ tsp black pepper, ¼ tsp cayenne (optional).
- Herbes de Provence: 2 tbsp dried herbes de Provence, 1 tbsp dried rosemary (crushed), 1 tbsp garlic powder, 1 tsp salt, ½ tsp black pepper.
- Lemon Pepper: Zest of 1 lemon + 2 tbsp lemon pepper seasoning, 1 tbsp dried oregano, 1 tsp garlic powder.
Apply the rub generously to the dried thighs 15-30 minutes before baking, or even the night before (covered in the fridge).
Marinades: Tenderizing & Infusing
Marinades add moisture and flavor penetration. Acidic components (lemon juice, vinegar, yogurt) help tenderize. Oil carries fat-soluble flavors. Keep marinades simple for 425°F:
- Mediterranean: ¼ cup olive oil, 3 tbsp lemon juice, 2 minced garlic cloves, 1 tbsp dried oregano, 1 tsp salt.
- Teriyaki-Ginger: ¼ cup soy sauce, 2 tbsp honey or maple syrup, 1 tbsp rice vinegar, 1 tbsp grated ginger, 1 minced garlic clove, 1 tsp sesame oil.
- Yogurt & Spice: ½ cup plain yogurt, 2 tbsp lemon juice, 1 tbsp garam masala, 1 tsp cumin, 1 tsp turmeric, 1 minced garlic clove, 1 tsp salt.
Marinate for at least 30 minutes, up to 24 hours (discard marinade after use). Pat thighs very dry before baking to ensure good browning.
Finishing Touches: The Last Minute Magic
Don’t forget the power of finishing elements added in the last 5-10 minutes of baking or after resting:
- Brush with melted butter mixed with fresh herbs (parsley, thyme) or honey.
- Sprinkle with flaky sea salt and freshly cracked black pepper right before serving.
- Toss cooked thighs in a simple pan sauce made from the rendered drippings (skim excess fat), a splash of broth or wine, and a pat of butter.
- Garnish with fresh herbs, lemon wedges, or toasted nuts.
These small additions elevate simple baked thighs to something special.
Conclusion: Your Foolproof Path to Perfect Chicken Thighs
Mastering how long to cook chicken thighs in oven 425 is less about memorizing a single number and more about understanding the principles and having the right tools. Remember the core framework: 25-35 minutes is a starting point, but thickness, bone status, and your oven’s quirks will shift that time. The absolute non-negotiable step is verifying doneness with an instant-read thermometer hitting at least 165°F internally – aiming for 170-175°F often yields the most tender, juicy results. Never skip the crucial 5-10 minute resting period; it’s when the magic of juice redistribution happens.
Equipped with this knowledge, you can confidently adapt to any situation – whether you’re cooking thin boneless cutlets for a quick dinner or thick, bone-in, skin-on thighs for a special meal. You’ll know to add time for frozen thighs, adjust for convection ovens, and rotate your pan for even cooking. You’ll understand why dry skin happens and how to fix it, and why pink juices mean it’s back in the oven. Most importantly, you’ll move beyond guesswork and timers to true precision cooking, ensuring every single thigh that comes out of your 425°F oven is safe, succulent, and bursting with flavor. So preheat that oven, grab your thermometer, and get ready to enjoy the most reliable, delicious chicken thighs you’ve ever made. The perfect weeknight dinner (or impressive weekend feast) is just 30 minutes away!
Frequently Asked Questions
What is the absolute minimum internal temperature for chicken thighs?
The USDA mandates 165°F as the safe minimum internal temperature for all poultry, including chicken thighs. This temperature ensures harmful bacteria are destroyed. Always measure at the thickest part, avoiding bone.
Why do my chicken thighs sometimes look pink even at 165°F?
Pinkness near the bone can occur due to myoglobin (a protein in muscle tissue) and is not always an indicator of undercooking, especially in bone-in pieces. However, the only reliable way to ensure safety is to verify the internal temperature reaches 165°F with a thermometer. If unsure, cook longer.
How much longer do bone-in thighs take compared to boneless?
Bone-in thighs typically take 5-10 minutes longer to cook than boneless thighs of similar thickness at 425°F. The bone acts as an insulator, slowing heat transfer to the surrounding meat. Always use a thermometer to confirm doneness regardless of bone status.
Can I cook chicken thighs from frozen at 425°F?
Yes, you can cook frozen chicken thighs at 425°F, but it will take significantly longer (add 10-15 minutes or more) and results may be less even. Thawing in the refrigerator is always recommended for best texture, browning, and more predictable cooking times.
Why is resting chicken thighs after baking so important?
Resting allows the juices, which have been driven to the center by the oven’s heat, to redistribute evenly throughout the meat. Cutting into the thighs immediately causes those juices to spill out, resulting in dry chicken. Resting for 5-10 minutes is crucial for maximum juiciness.
What’s the best way to get crispy skin on chicken thighs at 425°F?
Pat the skin *extremely* dry with paper towels before seasoning. Place the thighs skin-side up on a wire rack set over a baking sheet (not directly on the pan) to allow air circulation and fat rendering. Ensure your oven is fully preheated. You can also broil for the last 1-2 minutes (watch constantly!) to finish crisping, but be careful of burning.