Discover the foolproof method for cooking 1 cup of rice in a rice cooker with this easy guide. We’ll walk you through rinsing, water ratios, and settings for consistently fluffy results. No more guesswork—just perfect rice in 30 minutes!
Key Takeaways
- Rinse rice thoroughly: Removes excess starch for non-sticky grains. Always use cold water until it runs clear.
- Perfect water ratio: 1 cup rice to 1.25 cups water for white rice. Adjust slightly for brown or jasmine varieties.
- Use the right setting: Select “White Rice” for most types. Avoid “Quick Cook” for best texture.
- Rest before fluffing: Let rice sit 10 minutes after cooking. This prevents mushiness and ensures even moisture.
- Clean your cooker regularly: Starch buildup affects performance. Wipe the inner pot after each use.
- Measure accurately: Use the cooker’s cup (not a standard measuring cup) for precise ratios.
📑 Table of Contents
- Why Cooking 1 Cup of Rice in a Rice Cooker is a Game-Changer
- Why Use a Rice Cooker Instead of Stovetop?
- Essential Tools and Ingredients for Perfect 1-Cup Rice
- Step-by-Step Guide: How to Cook 1 Cup of Rice in Rice Cooker
- Pro Tips for Restaurant-Quality Rice
- Troubleshooting Common Rice Cooker Issues
- Conclusion: Your Rice Cooker, Your Secret Weapon
Why Cooking 1 Cup of Rice in a Rice Cooker is a Game-Changer
Let’s be honest: cooking rice on the stove can feel like a high-stakes balancing act. Too much water? You get mush. Too little? It’s crunchy disappointment. But here’s the good news: your rice cooker is a silent hero waiting to transform your kitchen routine. Whether you’re a busy parent, a college student, or just someone who hates babysitting pots, learning how to cook 1 cup of rice in rice cooker eliminates all the stress. It’s foolproof, consistent, and takes less than 5 minutes of active effort.
Rice cookers aren’t just for large batches. That 1-cup measurement is perfect for solo diners or small households. No more wasting rice or dealing with leftovers that dry out in the fridge. With the right technique, you’ll get restaurant-quality grains every single time—fluffy, separate, and full of flavor. Plus, modern rice cookers come with smart features like keep-warm functions and delay timers, making them ideal for meal prep. In this guide, we’ll break down the entire process into simple steps, so you never second-guess your rice again.
Why Use a Rice Cooker Instead of Stovetop?
You might wonder, “Why bother with a rice cooker when I can just use a pot?” The answer boils down to three magic words: consistency, convenience, and control. Stovetop rice requires constant attention—adjusting heat, checking water levels, and praying it doesn’t boil over. A rice cooker automates all that. It senses when the water is absorbed and switches to “warm” mode automatically. No more burnt bottoms or soupy tops!
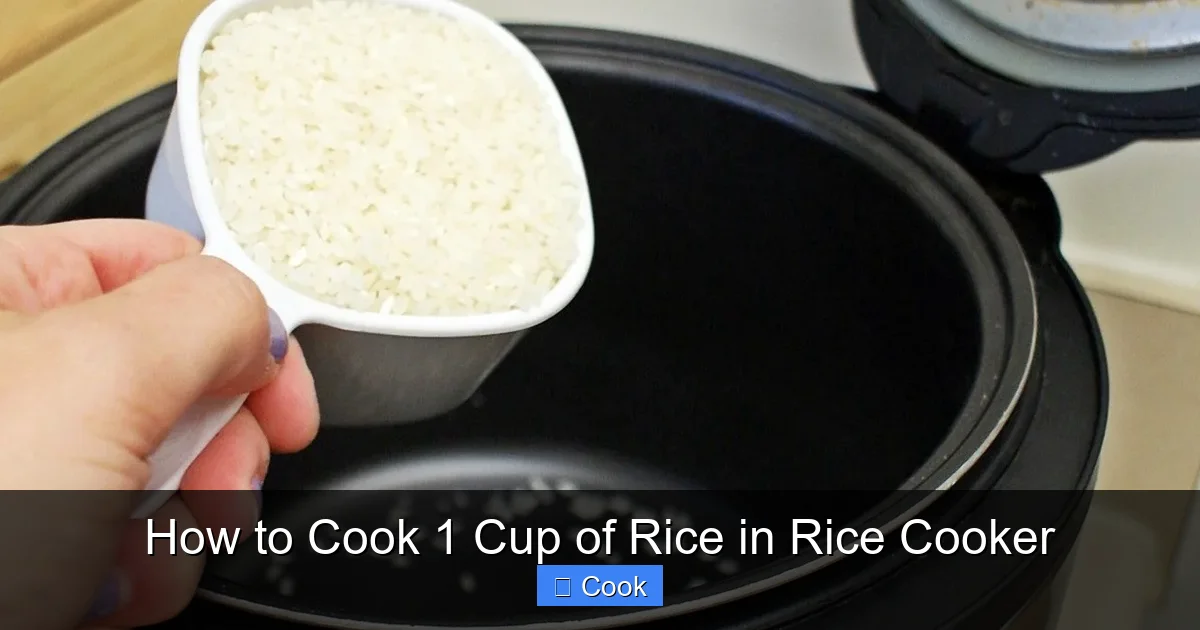
Visual guide about How to Cook 1 Cup of Rice in Rice Cooker
Image source: i.pinimg.com
Consistency Every Single Time
Ever made rice that turned out perfect one day and gluey the next? That’s usually due to inconsistent water measurements or heat fluctuations. Rice cookers eliminate human error. They use precise temperature control to steam rice evenly from top to bottom. For how to cook 1 cup of rice in rice cooker, this means you’ll get identical results whether it’s Monday morning or Friday night. No more “I think I added enough water” anxiety.
Hands-Off Convenience
Picture this: you’re chopping veggies for stir-fry, and your rice is cooking itself in the background. That’s the beauty of a rice cooker. Once you add rice and water, you’re free to focus on other tasks. It’s a lifesaver for weeknight dinners when every minute counts. Plus, most models have non-stick inner pots, so cleanup is a breeze—just rinse and wipe.
Energy Efficiency
Rice cookers use less electricity than stovetops. They heat up quickly and retain warmth efficiently, especially during the “keep-warm” phase. For eco-conscious cooks, this small switch can reduce your kitchen’s energy footprint. And let’s not forget: no more wasted gas from forgotten pots boiling dry!
Essential Tools and Ingredients for Perfect 1-Cup Rice
Before we dive into the steps, let’s gather your toolkit. You don’t need fancy gadgets—just a few basics to set yourself up for success. The key is precision: rice cookers thrive on accurate measurements.
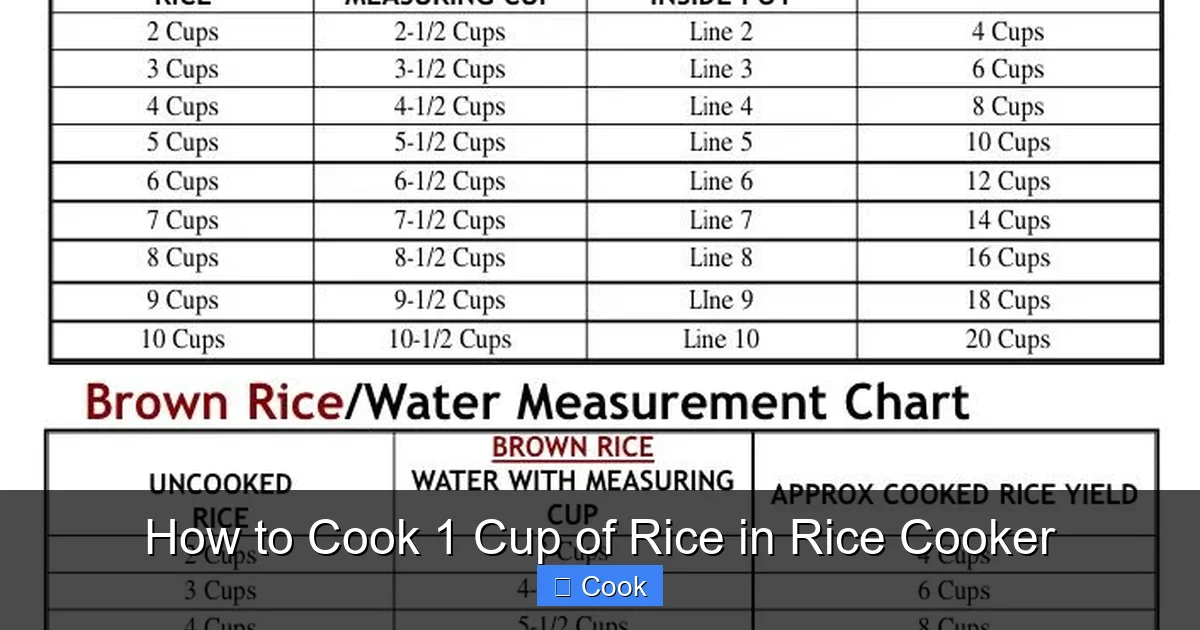
Visual guide about How to Cook 1 Cup of Rice in Rice Cooker
Image source: omnivorescookbook.com
Choosing the Right Rice Cooker
Most standard rice cookers (1-3 cup capacity) work great for 1 cup of rice. Avoid oversized models—they can overcook small batches. Look for these features:
- Non-stick inner pot: Prevents sticking and simplifies cleaning.
- Transparent lid: Lets you peek without releasing steam.
- Multiple settings: “White Rice,” “Brown Rice,” and “Steam” options add versatility.
Budget-friendly picks like the Zojirushi NS-ZCC10 or Aroma Housewares ARC-5 work wonders. Even basic models from Target or Walmart get the job done!
Measuring Rice and Water Accurately
Here’s where most people slip up: using a regular measuring cup instead of the rice cooker’s cup. Rice cooker cups are smaller (about 180ml vs. a standard 240ml cup). Always use the manufacturer’s cup for perfect ratios. For how to cook 1 cup of rice in rice cooker, you’ll need:
- 1 rice cooker cup of uncooked rice (about ¾ standard cup)
- 1.25 rice cooker cups of water for white rice
Pro tip: Place the inner pot on a kitchen scale. 1 cup of uncooked rice weighs roughly 185g. This eliminates guesswork!
Optional Add-Ins for Flavor
Plain rice is great, but why not level up? Add these while cooking:
- 1 tsp butter or oil: For richer texture.
- ½ tsp salt: Enhances natural flavors.
- Garlic powder or bay leaf: Infuses subtle aromas.
Avoid adding acidic ingredients (like lemon juice)—they can interfere with cooking.
Step-by-Step Guide: How to Cook 1 Cup of Rice in Rice Cooker
Now for the main event! Follow these steps for foolproof results. Total time: 30-40 minutes (mostly hands-off).

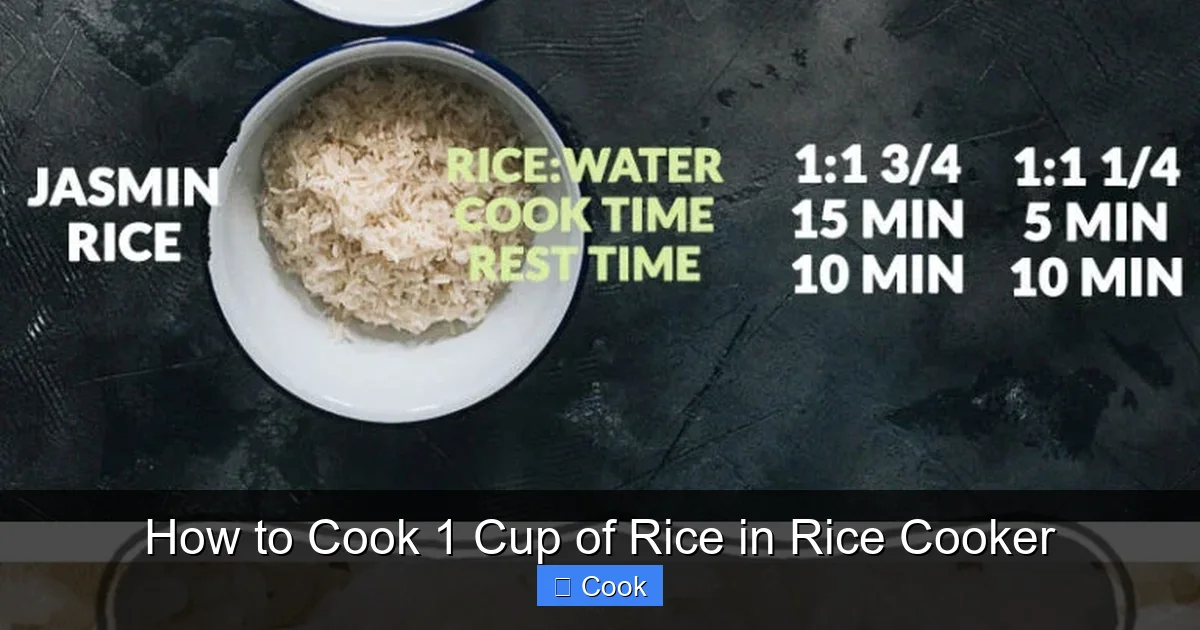
Visual guide about How to Cook 1 Cup of Rice in Rice Cooker
Image source: i.pinimg.com
Step 1: Rinse the Rice (Why and How)
Skipping this step? Big mistake. Unrinsed rice releases excess starch, leading to gummy results. Here’s how to do it right:
- Measure 1 cup of rice into a fine-mesh strainer.
- Rinse under cold water for 30-60 seconds, swishing gently.
- Repeat until water runs clear (usually 3-4 rinses).
Why it matters: Rinsing removes surface starch without washing away nutrients. For brown rice, soak for 20 minutes first to reduce cooking time.
Step 2: Measure the Water
Water ratio is everything. Too little = crunchy rice. Too much = mush. Use this cheat sheet:
- White rice: 1 cup rice : 1.25 cups water
- Brown rice: 1 cup rice : 1.5 cups water
- Jasmine rice: 1 cup rice : 1 cup water
Pro tip: Place the rinsed rice in the inner pot first, then add water. The “knuckle method” (water level at your first knuckle when finger touches rice) works too!
Step 3: Add Rice and Water to the Cooker
Drain the rinsed rice well—any excess water throws off ratios. Transfer it to the inner pot, then add measured water. Give it a gentle stir to distribute evenly. Never fill beyond the “Max” line (usually ⅔ full for 1-cup batches).
Step 4: Select the Cooking Setting
This is where many go wrong. Avoid “Quick Cook”—it rushes the process and ruins texture. Instead:
- Use “White Rice” for jasmine, basmati, or sushi rice.
- Choose “Brown Rice” for whole-grain varieties (takes 50-60 minutes).
- Skip “Multigrain” or “Steam” settings—they’re unnecessary for basic rice.
Press start and walk away! Resist the urge to open the lid—steam escape = uneven cooking.
Step 5: Let It Cook and Rest
Most cookers beep when done, but don’t rush to open it. Let rice rest for 10 minutes. This allows residual steam to finish cooking and moisture to redistribute. Cutting this step short = wet, clumpy rice.
Step 6: Fluff and Serve
After resting, use a fork to fluff rice gently in a folding motion. Never stir vigorously—it breaks grains. Serve immediately for peak texture. Leftovers? Store in an airtight container for up to 3 days.
Pro Tips for Restaurant-Quality Rice
Even with perfect steps, small tweaks elevate your rice from good to great. These are game-changers.
Adjusting Water for Different Rice Types
Not all rice is created equal. Here’s how to tweak ratios:
- Older rice: Add 1-2 tbsp extra water (it absorbs more).
- Humid climates: Reduce water by 1 tbsp (moisture in air affects absorption).
- Sushi rice: Use 1:1 ratio + 1 tbsp rice vinegar after cooking.
Test one batch, then adjust for your next cook!
The Importance of Resting Time
That 10-minute rest isn’t optional—it’s science. During cooking, rice grains expand rapidly. Resting lets them settle, preventing “exploded” grains. For 1-cup batches, extend rest to 15 minutes if rice seems underdone.
Avoiding Common Mistakes
Steer clear of these pitfalls:
- Overfilling the pot: Causes overflow and uneven cooking.
- Using hot water: Cold water only—it prevents premature starch release.
- Skipping the rinse: Leads to sticky rice (unless you’re making risotto!).
Also, never cook rice straight from the fridge—it shocks the grains.
Storing Leftover Rice
Cooked rice dries out fast. To keep it fresh:
- Cool completely before refrigerating (within 2 hours).
- Store in shallow containers—thicker layers = faster spoilage.
- Reheat with a splash of water to restore moisture.
Freeze portions for up to 3 months! Thaw overnight in the fridge.
Troubleshooting Common Rice Cooker Issues
Even pros hit snags. Here’s how to fix them fast.
Rice is Too Hard or Undercooked
This usually means not enough water or interrupted cooking. Solutions:
- Add 2-3 tbsp hot water, close lid, and restart “Cook” for 5 minutes.
- Check if the inner pot is seated properly on the heating plate.
Prevention: Always use the correct water ratio and avoid opening the lid early.
Rice is Too Soft or Mushy
Too much water or overcooking is the culprit. Try:
- Spreading rice on a baking sheet to evaporate excess moisture.
- Reducing water by 1-2 tbsp next time.
For sticky rice dishes (like sushi), this might be intentional—but for plain rice, less water is key.
Rice Sticking to the Bottom
Blame burnt starch or insufficient rinsing. Fixes:
- Soak the inner pot in warm, soapy water for 10 minutes before scrubbing.
- Always rinse rice thoroughly and use non-stick spray on the pot.
Prevention: Avoid “Quick Cook” settings—they don’t allow proper steaming.
Unpleasant Odors in the Cooker
Stale rice residue causes funky smells. Combat it with:
- A vinegar rinse: Fill pot with 1 cup water + ¼ cup vinegar, run “Cook” for 10 minutes.
- Baking soda scrub: Make a paste with water, apply to stains, and wipe clean.
Clean after every use to prevent buildup!
Conclusion: Your Rice Cooker, Your Secret Weapon
Mastering how to cook 1 cup of rice in rice cooker isn’t just about convenience—it’s about reclaiming joy in cooking. No more failed rice ruining your curry or stir-fry. With these steps, you’ll turn out perfect grains that impress family and friends. Remember: rinse well, measure precisely, and let it rest. That’s the trifecta for success.
Start small—try cooking 1 cup tonight. Notice how the grains separate beautifully? How the kitchen smells like a cozy restaurant? That’s the magic of a rice cooker done right. Soon, you’ll wonder how you ever lived without this humble kitchen hero. So grab your inner pot, rinse that rice, and get cooking. Your perfect bowl awaits!
Frequently Asked Questions
Can I cook 1 cup of rice in any rice cooker?
Yes! Most standard rice cookers (1-3 cup capacity) handle 1-cup batches perfectly. Avoid oversized models, as they may overcook small portions. Always check your cooker’s manual for minimum fill lines.
Why is my rice sticky even after rinsing?
Over-rinsing can remove too much starch, but stickiness usually means excess water or the wrong rice type. Use the 1:1.25 rice-to-water ratio for white rice, and avoid “Quick Cook” settings. Jasmine rice is naturally stickier—embrace it for sushi!
How long does 1 cup of rice take to cook?
White rice takes 20-25 minutes, while brown rice needs 45-50 minutes. Most cookers include a timer display. Always add 10 minutes for resting—don’t skip this step!
Can I add seasoning while cooking?
Absolutely! Toss in salt, butter, or herbs with the water. Avoid acidic ingredients like lemon juice, which can toughen grains. For infused flavors, add whole spices (cinnamon sticks, cardamom pods) during cooking.
Why does my rice cooker smell burnt?
Burnt smells often come from starch residue on the heating plate. Unplug the cooker, let it cool, then wipe the plate with a damp cloth. Prevent future issues by cleaning the inner pot after each use.
Is it safe to leave rice in the cooker overnight?
No. Bacteria grow rapidly in warm, moist rice. Use the “keep-warm” function for max 12 hours, but refrigerate leftovers within 2 hours of cooking. When in doubt, toss it out!