Pressure cooking artichokes slashes cooking time from 45+ minutes to just 8-12 minutes while delivering incredibly tender, flavorful results. This method is foolproof, preserves nutrients, and makes enjoying this gourmet vegetable incredibly accessible for any home cook. Follow our simple steps for perfectly cooked artichokes every single time.
Key Takeaways
- Massive Time Savings: Pressure cooking reduces artichoke cooking time from 45-60 minutes (steaming/boiling) to a mere 8-12 minutes, making them a practical weeknight option.
- Simple Preparation is Key: Trimming the stem, removing tough outer leaves, and snipping sharp leaf tips are essential steps for safety and enjoyment, taking just 5 minutes.
- Liquid is Non-Negotiable: Always use at least 1 cup of water or broth in the pot to create the necessary steam for pressure cooking; never run the cooker dry.
- Natural Release is Crucial: Allowing pressure to release naturally (10-15 minutes) prevents the artichoke from becoming waterlogged and ensures even, tender cooking throughout.
- Versatile Serving Options: Enjoy pressure-cooked artichokes hot with melted butter or lemon aioli, chilled in salads, or as a flavorful base for dips and spreads.
- Safety First: Always follow your pressure cooker’s manual for safe operation, especially regarding filling limits and steam release procedures.
📑 Table of Contents
- Why Pressure Cook Artichokes? Your Time-Saving Kitchen Hero
- Essential Tools and Ingredients: Keep it Simple
- Step-by-Step Preparation: Prepping for Perfect Pressure Cooking
- Pressure Cooking Process Explained: Fast, Foolproof, and Flavorful
- Serving and Enjoying Your Pressure-Cooked Artichokes
- Troubleshooting Common Issues: Your Pressure Artichoke FAQ
- Conclusion: Embrace the Ease and Flavor of Pressure-Cooked Artichokes
Why Pressure Cook Artichokes? Your Time-Saving Kitchen Hero
Let’s be honest: artichokes have a reputation. They look intimidating with their spiky leaves and dense hearts. Traditional methods like steaming or boiling can take nearly an hour, making them feel like a special-occasion chore rather than a regular part of your healthy rotation. You might have avoided them, thinking they’re too complicated or time-consuming. What if I told you there’s a way to transform this nutritious, delicious vegetable into a quick, easy, and consistently perfect dish? Enter the pressure cooker – your new best friend for artichokes.
The magic of pressure cooking lies in its ability to cook food rapidly under high pressure. This intense environment dramatically speeds up the breakdown of tough fibers, which is exactly what artichokes need to become tender and edible. Instead of simmering away for 45 minutes or more, you’re looking at a total active time of under 20 minutes, with most of that being hands-off pressure cooking. The result? Artichokes that are incredibly tender, infused with flavor, and retain more nutrients than prolonged boiling. Plus, the pressure cooker method is incredibly forgiving – it’s nearly impossible to undercook them, and overcooking is much less likely than with traditional methods. Learning how to cook an artichoke in a pressure cooker unlocks a world of convenience and flavor you might have thought was out of reach.
Essential Tools and Ingredients: Keep it Simple
One of the best things about pressure cooking artichokes is how minimal the setup is. You don’t need fancy gadgets or hard-to-find ingredients. Gather these basics, and you’re ready to go:
Visual guide about How to Cook an Artichoke in a Pressure Cooker
Image source: i0.wp.com
Your Pressure Cooker
This is the star of the show! Whether you have an electric multi-cooker (like an Instant Pot, Ninja Foodi, or similar) or a stovetop pressure cooker (like a Fagor or Kuhn Rikon), the process is very similar. Ensure your cooker is in good working order, the sealing ring is clean and flexible, and you have the correct lid. Remember, how to cook an artichoke in a pressure cooker relies entirely on this essential tool creating the right environment.
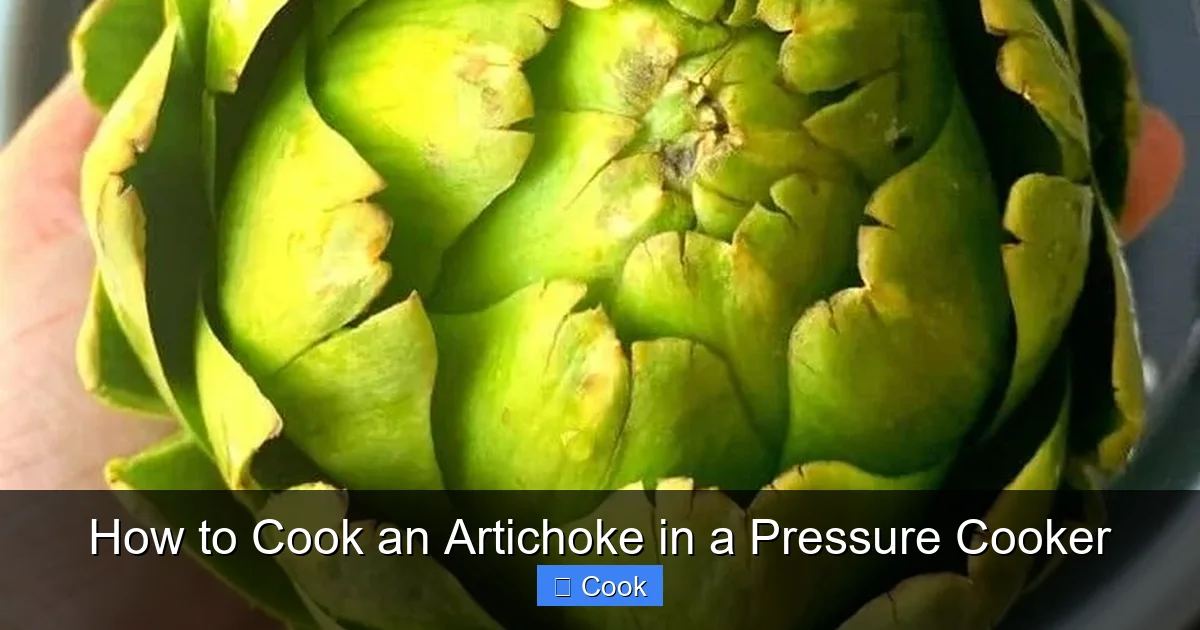
The Artichokes Themselves
Choose fresh, firm artichokes. Look for tightly closed leaves, a heavy feel for their size (indicating moisture), and a deep green color. Avoid any with brown spots, mushy stems, or leaves that are spreading open. For this method, medium-sized globe artichokes (about 10-12 ounces each) work perfectly. You can cook 2-4 depending on your pot size (never fill beyond the max fill line!). While frozen artichoke hearts are convenient, this guide focuses on cooking whole fresh artichokes for the best texture and experience.
Basic Liquid
This is non-negotiable! You need at least 1 cup (8 ounces) of liquid in the bottom of the pot to generate the steam required for pressure cooking. Water is perfectly fine, but using low-sodium vegetable or chicken broth adds a subtle layer of flavor that permeates the artichoke beautifully. Some cooks add a splash of white wine or lemon juice to the liquid for extra brightness – feel free to experiment once you master the basics.
Simple Prep Tools
You’ll need a sharp knife (a chef’s knife or paring knife), kitchen shears (essential for trimming leaf tips), and a cutting board. A vegetable peeler is helpful for the stem. That’s it! No special artichoke tools required, though a dedicated artichoke knife can make trimming easier if you have one.
Step-by-Step Preparation: Prepping for Perfect Pressure Cooking
Proper preparation is the secret sauce to great pressure-cooked artichokes. Skipping these steps can lead to unpleasant surprises (like biting into a thorny leaf!) or uneven cooking. Don’t worry – it only takes about 5 minutes per artichoke and is much simpler than it looks.
Visual guide about How to Cook an Artichoke in a Pressure Cooker
Image source: coopcancook.com
Trimming the Stem
Start by cutting off the stem, leaving about 1 inch attached to the base of the artichoke. Don’t throw the stem away! Peel off the tough outer layer with a vegetable peeler or knife to reveal the tender, pale inner core. Chop this peeled stem into small pieces – it’s delicious and cooks quickly, so you can add it to the pot with the liquid. The stem is often the sweetest part!
Removing Tough Outer Leaves
Gently bend back the outermost, darkest green leaves. They should snap off easily near the base. Remove 2-4 layers of these very tough, fibrous leaves. You’ll know you’ve gone far enough when the leaves become a lighter green and feel more tender. Discard the tough outer leaves. This step makes the artichoke safer and more pleasant to eat.
Snipping the Thorny Tips
This is where kitchen shears become your best friend. The top third of the remaining leaves has sharp, thorny tips that can be unpleasant. Using your shears, carefully snip off about 1/2 to 1 inch from the top of each leaf. Work your way around the whole artichoke. Don’t worry about being perfect; just get the very tips. This simple step transforms the eating experience.
The Optional Lemon Bath (Prevents Browning)
As you cut into the artichoke (especially the heart and stem), it will start to oxidize and turn brown. While this doesn’t affect taste, it can look less appealing. To prevent this, have a bowl of cold water mixed with the juice of half a lemon ready. After trimming each artichoke, submerge it in this lemon water until you’re ready to cook. This step is optional but recommended for the best presentation, especially if prepping ahead.
Pressure Cooking Process Explained: Fast, Foolproof, and Flavorful
Now for the magic! The actual pressure cooking phase is incredibly straightforward and hands-off. This is where you truly grasp the brilliance of how to cook an artichoke in a pressure cooker. Follow these steps carefully for perfect results.
Visual guide about How to Cook an Artichoke in a Pressure Cooker
Image source: i.pinimg.com
Setting Up the Pot
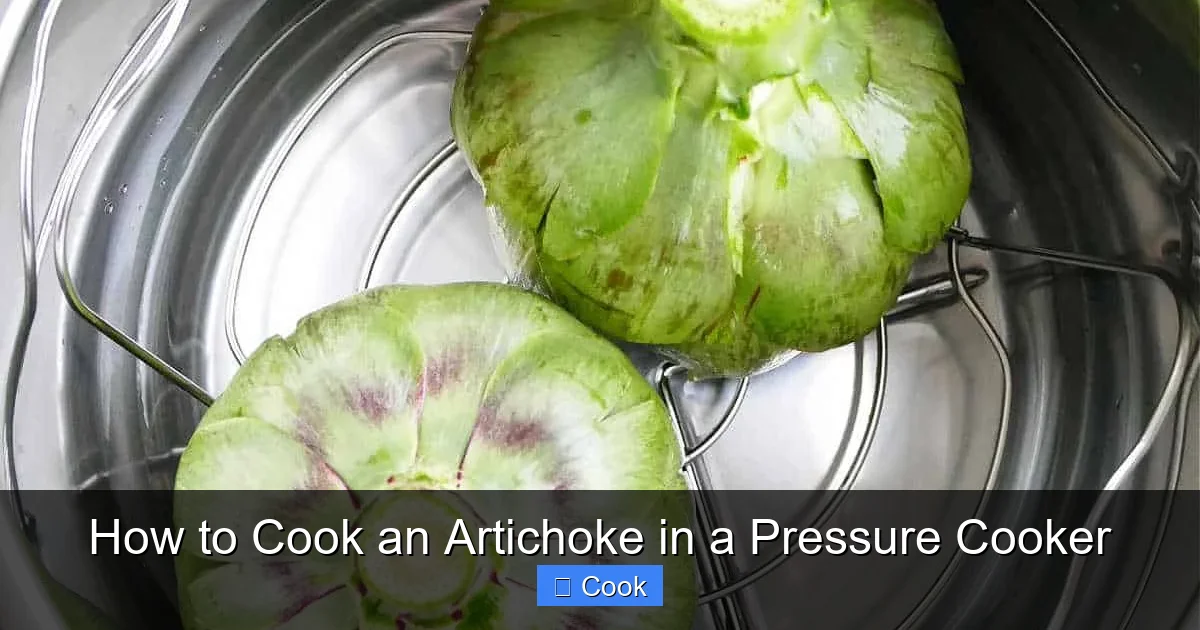
Pour 1 cup of water or broth into the inner pot of your pressure cooker. Add the chopped, peeled stem pieces if you have them. Place the trivet or steamer basket that came with your cooker into the pot. This elevates the artichokes above the liquid, ensuring they steam rather than boil, which is crucial for the best texture. If you don’t have a trivet, you can carefully balance the artichokes directly on the bottom, but steaming is preferred.
Arranging the Artichokes
Place the prepared artichokes upright (stem-side down) on the trivet. They can touch each other slightly, but avoid overcrowding – you want steam to circulate. If cooking more than two, arrange them in a single layer if possible. For very large artichokes, you might need to cook them one at a time. Remember the max fill line! Never fill the pot more than 2/3 full with food and liquid combined.
Sealing and Cooking
Securely lock the lid onto your pressure cooker according to the manufacturer’s instructions. Ensure the steam release valve is set to the “Sealing” position (for electric cookers) or the regulator is set correctly (for stovetop). Select the “Manual” or “Pressure Cook” function on electric models. Set the cooking time:
- Medium Artichokes (10-12 oz): 8 minutes on High Pressure
- Larger Artichokes (14+ oz): 10-12 minutes on High Pressure
It will take 5-10 minutes for the cooker to come up to full pressure (this “coming to pressure” time is NOT included in the cooking time). The actual timer starts once full pressure is reached.
The Critical Natural Release
This step is VITAL for perfect texture. Once the cooking time ends, DO NOT attempt a quick release. Instead, allow the pressure to release NATURALLY for 10-15 minutes. This means simply leaving the cooker alone, with the valve still in the “Seeking” or “Natural Release” position. The pressure will slowly dissipate as the cooker cools. After 10-15 minutes, carefully perform a quick release for any remaining pressure (a few hisses are normal). Only then should you unlock and remove the lid, opening it away from you to avoid steam burns. Rushing this step can cause the artichokes to become waterlogged and mushy.
Serving and Enjoying Your Pressure-Cooked Artichokes
The anticipation is over! You’ve mastered how to cook an artichoke in a pressure cooker, and now it’s time to savor the results. Pressure-cooked artichokes are incredibly versatile and delicious.
Checking for Doneness
Before serving, always check one artichoke. The leaves should pull away easily from the base with gentle resistance – not too loose (underdone) and not requiring a hard tug (overdone). The heart (the prized, tender core) should be fork-tender. If they need a bit more time (rare), return them to the pot for 1-2 additional minutes under pressure, followed by another natural release.
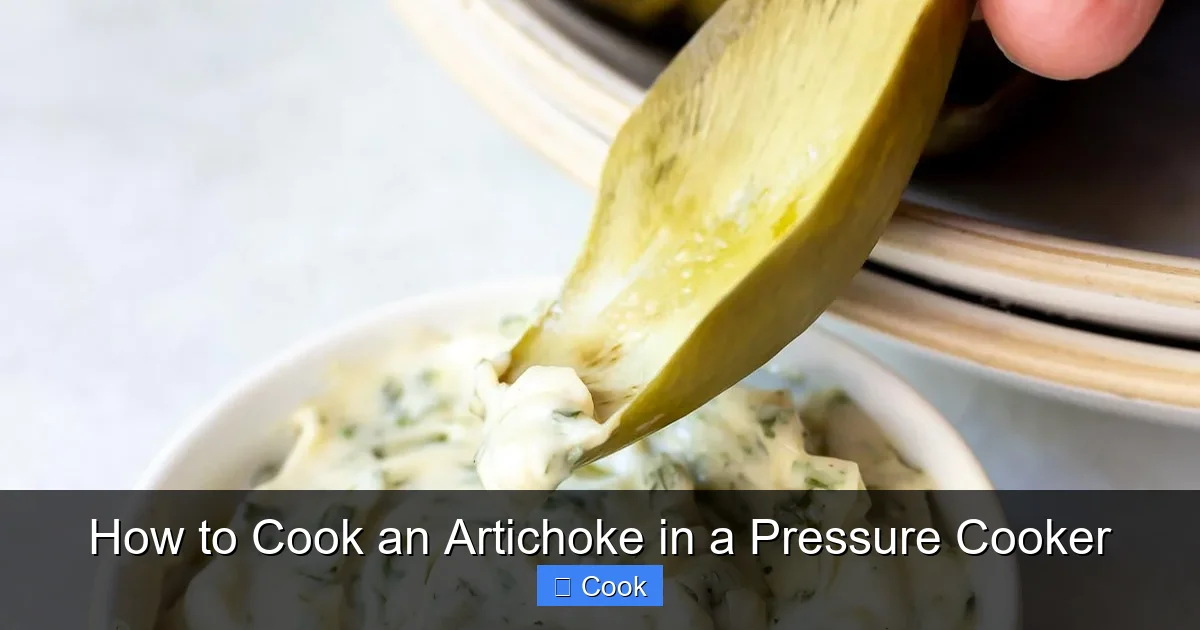
Classic Hot Serving
This is the most traditional and beloved way. Serve the whole artichokes hot, upright on plates. Provide small bowls of dipping sauce alongside. Melted butter (salted or unsalted) is the timeless favorite. For extra zing, mix melted butter with minced garlic, lemon juice, and a pinch of red pepper flakes. Lemon aioli (mayo mixed with lemon zest, juice, and garlic) is another fantastic option. Encourage your guests to pull off the leaves, scrape the tender flesh near the base with their teeth, and discard the fibrous part. Once the leaves are gone, cut off the top third of the choke (the fuzzy inedible part) to reveal the glorious, tender heart. Slice the heart and enjoy it dipped in sauce – it’s the sweetest reward!
Cold Artichoke Salad
Pressure-cooked artichokes are PERFECT for salads once chilled. After cooking and natural release, carefully remove the artichokes and let them cool completely (you can speed this up by placing them in an ice bath for 10 minutes). Once cold, you can easily pull off the leaves and chop the tender heart and base. Toss with a simple vinaigrette (olive oil, lemon juice, Dijon mustard, salt, pepper), chopped fresh herbs (parsley, dill, chives), maybe some capers or red onion, and serve over mixed greens. It’s a refreshing and elegant dish.
Artichoke Heart Dips and Spreads
Don’t discard those tender hearts! Chop them finely and blend into dips. Mix with cream cheese, sour cream, mayo, lemon juice, garlic, and Parmesan for a crowd-pleasing artichoke dip. Or puree them with olive oil, lemon, and tahini for a vibrant artichoke hummus. The pressure-cooked hearts have a wonderful concentrated flavor that shines in these applications.
Troubleshooting Common Issues: Your Pressure Artichoke FAQ
Even with the best instructions, questions can pop up. Here’s how to handle the most common hiccups when learning how to cook an artichoke in a pressure cooker.
Artichokes Are Still Tough After Cooking
This is unusual with the natural release method but can happen with very large or older artichokes. Don’t panic! Carefully return the artichokes to the pot (adding a splash more liquid if needed), reseal, and cook for an additional 2-3 minutes on high pressure. Always follow with another 5-10 minute natural release. Check again. They should be tender.
Artichokes Are Mushy or Waterlogged
This almost always means the natural release time was skipped or was too short. The rapid pressure drop causes the artichoke to absorb too much liquid. Unfortunately, you can’t reverse this texture, but you can still use them! Chop them up for dips, soups, or pasta sauces where the texture won’t matter as much. For next time, remember: Natural Release is non-negotiable for perfect texture.
Not Enough Liquid / Burn Notice
If your cooker gives a “Burn” notice or you see very little liquid left, it means you didn’t use enough liquid initially, or the artichokes were placed directly in the pot without a trivet (causing them to sit in too little liquid). Always use at least 1 cup of liquid and use the trivet. If this happens mid-cook, carefully quick release (if safe per your manual), add 1/2 cup hot water or broth, reseal, and cook for the remaining time plus 1-2 minutes.
Leaves Won’t Pull Off Easily
If leaves are still very hard to remove, the artichokes are undercooked. See the “Still Tough” solution above. Ensure you’re using medium-sized artichokes and the correct timing. Very large artichokes might need the full 12 minutes.
Can I Cook Frozen Artichoke Hearts?
Yes! While this guide focuses on whole fresh artichokes, frozen hearts are a great shortcut. Place frozen hearts (no need to thaw) on the trivet over 1 cup of liquid. Cook on high pressure for 3-4 minutes, followed by a 5-minute natural release, then quick release any remaining pressure. They’ll be tender and ready to use in dips, pasta, or salads. Adjust timing based on quantity – don’t overcrowd the pot.
Conclusion: Embrace the Ease and Flavor of Pressure-Cooked Artichokes
Learning how to cook an artichoke in a pressure cooker is truly a game-changer for any home cook. It demystifies this beautiful, nutritious vegetable and transforms it from a daunting project into a simple, reliable, and incredibly fast weeknight meal or impressive appetizer. The pressure cooker does the heavy lifting, breaking down the tough fibers in a fraction of the time required by traditional methods, while locking in moisture and flavor for results that are consistently tender and delicious.
Remember the key pillars: proper preparation (trimming stem, removing outer leaves, snipping tips), using sufficient liquid, employing the trivet for steaming, and most importantly, allowing that crucial natural pressure release. These steps ensure your artichokes turn out perfectly every single time. Whether you enjoy them hot with melted butter, chilled in a vibrant salad, or blended into a creamy dip, pressure-cooked artichokes offer versatility and satisfaction that’s hard to beat. So, don’t let the spiky exterior intimidate you any longer. Grab your pressure cooker, pick up some fresh artichokes, and discover just how easy and rewarding it is to master this culinary classic. Your taste buds (and your schedule) will thank you!
Frequently Asked Questions
Can I cook artichokes in an Instant Pot?
Absolutely! The Instant Pot is one of the most popular electric pressure cookers and works perfectly for artichokes. Simply follow the steps outlined in this guide, using the “Manual” or “Pressure Cook” function and setting the time as specified for your artichoke size. The process is identical to other electric multi-cookers.
How long do pressure-cooked artichokes last?
Properly stored in an airtight container in the refrigerator, cooked artichokes (whole or chopped) will keep for 3-4 days. They can also be frozen for longer storage (up to 3 months). Blanch them for 2 minutes in boiling water, cool in an ice bath, pat dry, and freeze in a single layer before transferring to a freezer bag. Thaw in the fridge before using.
Do I need to remove the choke before pressure cooking?
No, you do not need to remove the fuzzy choke (the inedible part) before pressure cooking. The high heat and pressure will cook the entire artichoke, including the heart beneath the choke. The choke itself will become soft enough to easily scoop out with a spoon after cooking, once the artichoke has cooled slightly. This saves significant prep time!
Can I add seasoning to the cooking liquid?
Yes! While plain water or broth works great, adding aromatics to the cooking liquid infuses the artichokes with extra flavor. Try adding 2-3 crushed garlic cloves, a bay leaf, a strip of lemon zest, a few peppercorns, or a sprig of fresh thyme or rosemary to the 1 cup of liquid. Avoid adding too much salt to the liquid, as artichokes can absorb it readily.
Why are my artichokes turning brown?
Browning is caused by oxidation when the artichoke’s flesh is exposed to air after cutting. While it doesn’t affect safety or taste, it can look less appealing. Prevent it by submerging trimmed artichokes in a bowl of cold water mixed with lemon juice (as mentioned in the prep section) until ready to cook. The acid in the lemon slows down the browning reaction.
Can I cook artichokes with other vegetables in the pressure cooker?
It’s generally best to cook artichokes alone to ensure proper timing and prevent other vegetables from becoming mushy. Artichokes require a specific pressure cooking time and natural release that might overcook quicker-cooking veggies like potatoes or carrots. However, you *can* add hearty vegetables like baby potatoes or carrot chunks to the pot *around* the artichokes (on the trivet or below if space allows), but be prepared to adjust timing or accept that the other veggies might cook faster than ideal. For best results, cook them separately.