
Discover the precise pressure cooker timing for perfectly cooked toor dal – typically 15-20 minutes under pressure after reaching full steam, plus crucial resting time. This method delivers creamy, tender lentils far faster than stovetop cooking while preserving authentic flavor. Master the water ratio, resting period, and texture control for foolproof results every time.
Key Takeaways
- Exact Pressure Time: Cook unsoaked toor dal for 15-20 minutes under full pressure after the cooker reaches peak steam (whistle/vent). Soaked dal requires only 8-12 minutes.
- Critical Resting Period: Always allow 10-15 minutes of natural pressure release (NPR) after cooking. This finishes the dal, prevents splattering, and ensures even texture.
- Water Ratio is Key: Use 2.5 to 3 cups of water per 1 cup of unsoaked toor dal for perfect creaminess. Adjust slightly based on your cooker and desired thickness.
- Texture Control: For firmer dal (like for sambar), use less water and cook slightly less time. For ultra-creamy dal (like dal makhani style), use more water and mash slightly after cooking.
- Soaking Saves Time: Soaking dal for 30-60 minutes reduces pressure cooking time by 30-50% and can improve digestibility, but it’s not mandatory for good results.
- Avoid Common Pitfalls: Never fill the cooker more than 2/3 full, ensure the vent is clear, and always use enough water to prevent burning and ensure proper pressure build-up.
- Flavor Boosters: Tempering (tadka) with ghee, cumin, garlic, and asafoetida added *after* pressure release is essential for authentic, restaurant-quality flavor.
📑 Table of Contents
- Why Pressure Cooker Toor Dal is a Game-Changer
- Essential Prep Work: Setting Up for Pressure Cooker Success
- The Exact Pressure Cooker Timing Guide: Your Step-by-Step Blueprint
- Troubleshooting Common Toor Dal Pressure Cooker Issues
- Serving, Storing, and Elevating Your Pressure Cooker Toor Dal
- Conclusion: Your Foolproof Path to Perfect Pressure Cooker Toor Dal
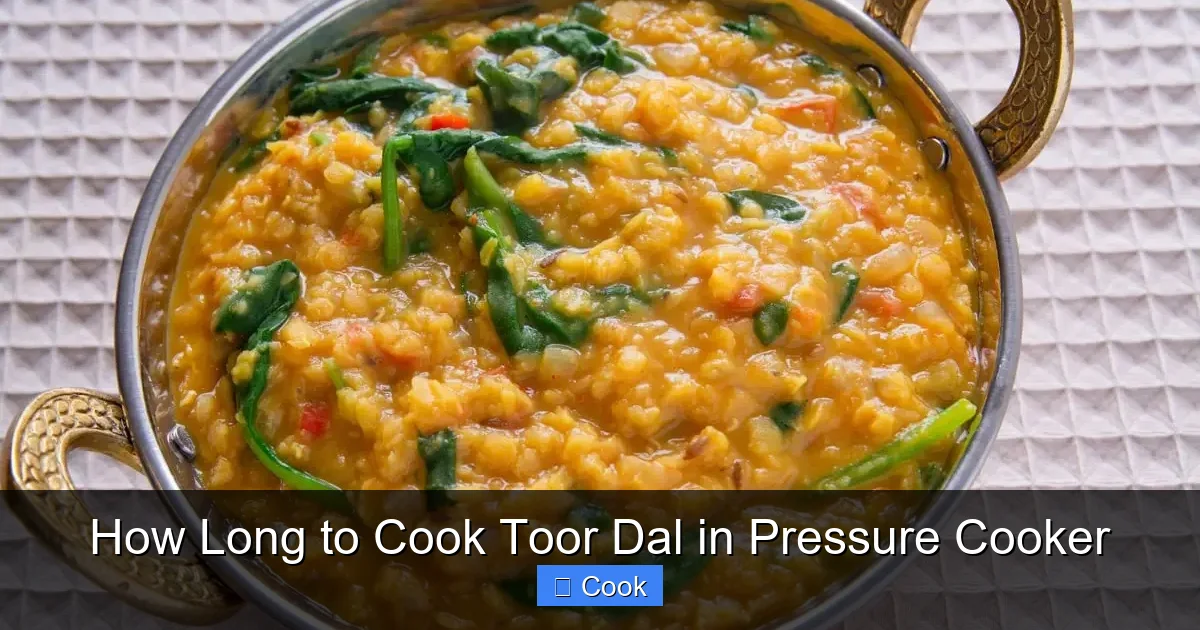
Why Pressure Cooker Toor Dal is a Game-Changer
Toor dal, also known as pigeon pea lentils or arhar dal, is the soul of countless Indian meals. It’s the base for comforting dal, the star in tangy sambar, and the foundation for creamy dal makhani variations. But let’s be honest: cooking dried lentils traditionally on the stovetop can feel like an eternity. Hours of simmering, constant stirring, and the anxiety of them sticking to the pot? No thank you! That’s where your trusty pressure cooker becomes your absolute best friend. It transforms this time-honored staple from a labor-intensive chore into a remarkably quick and effortless process, delivering tender, flavorful dal in a fraction of the time.
The magic lies in the pressure cooker’s ability to create a sealed, high-pressure environment. This significantly raises the boiling point of water, allowing the dal to cook at much higher temperatures than possible in an open pot. Think of it like turbocharging the cooking process. The intense heat and pressure penetrate the tough outer skin of the lentils rapidly, breaking them down into that signature creamy texture we all love, without the need for hours of gentle simmering. The result? Perfectly cooked toor dal in under 30 minutes from start to finish, leaving you with plenty of time to prepare the rest of your meal or simply relax. It’s not just faster; it’s often *more* reliable, minimizing the risk of undercooked or burnt dal.
Essential Prep Work: Setting Up for Pressure Cooker Success
Before you even think about hitting that pressure release valve, a little prep goes a long way towards ensuring your toor dal turns out flawless. Skipping these steps is the fastest route to disappointment – mushy dal, undercooked bits, or worse, a burnt mess at the bottom of your cooker. Let’s break down the non-negotiables.
Visual guide about How Long to Cook Toor Dal in Pressure Cooker
Image source: recipes.net
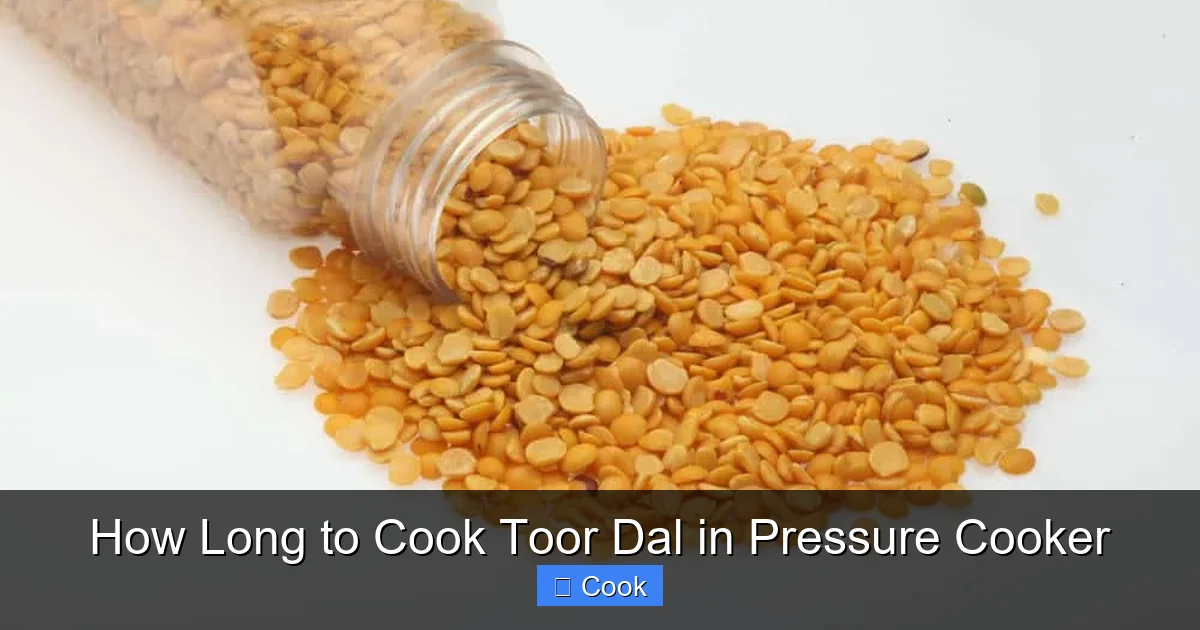
Rinsing and Sorting: The Foundation of Clean Dal
Start by measuring out your toor dal. A standard serving for 2-3 people is usually 1 cup of dried lentils. Place them in a fine-mesh strainer and rinse thoroughly under cool running water. This removes any dust, debris, or tiny stones that might have made their way into the package during processing or transport. Swirl the dal gently with your fingers as the water runs through. Keep rinsing until the water runs relatively clear. This simple step prevents grittiness and ensures a clean, pleasant texture in your final dish. Don’t rush it – take a minute to do this properly.
Soaking: Optional but Highly Recommended
Here’s where you have a choice, and it significantly impacts your cooking time. Soaking toor dal is not strictly mandatory for pressure cooking – it *will* cook without it – but it offers clear benefits. Soaking for 30-60 minutes (or even up to 2 hours) in plenty of water rehydrates the lentils slightly, reducing the pressure cooking time by 30-50%. More importantly, it can improve digestibility for some people and often results in a more even texture, with fewer split lentils. If you’re short on time, you can skip soaking, but be prepared for the longer cook time (15-20 minutes). If you do soak, remember to drain the soaking water completely before adding fresh water for pressure cooking. Never cook dal in the soaking water, as it can contain impurities and lead to a slightly off flavor.
Water Ratio: The Golden Rule for Perfect Texture
This is arguably the most critical factor for achieving your desired dal consistency in the pressure cooker. Too little water, and you risk burning the dal or ending up with hard, undercooked lentils. Too much water, and you’ll have a soupy, bland mess that needs lengthy reduction. The ideal ratio depends on whether you soaked the dal and how creamy you like your final dish.
- Unsoaked Toor Dal: Use 2.5 to 3 cups of water per 1 cup of dried lentils. This is the standard starting point for most home cooks aiming for a classic, creamy dal consistency (like for everyday dal or dal tadka).
- Soaked Toor Dal: Use 2 to 2.5 cups of water per 1 cup of soaked (and drained) lentils. Since they’ve already absorbed some water, they need less additional liquid.
- Adjusting for Thickness: Prefer your dal thicker, almost like a stew (great for pairing with rice)? Lean towards the lower end of the water ratio (2.5 cups unsoaked, 2 cups soaked). Want it thinner, more soup-like (perfect for sambar or with roti)? Go towards the higher end (3 cups unsoaked, 2.5 cups soaked).
Always remember: Never fill your pressure cooker more than 2/3 full, even with the water and dal. Lentils expand significantly during cooking, and you need ample space for the steam to build safely. Overfilling is a major cause of clogged vents and potential safety hazards.
The Exact Pressure Cooker Timing Guide: Your Step-by-Step Blueprint
Now for the heart of the matter: how long to cook toor dal in pressure cooker. Getting this timing right is the difference between perfectly tender lentils and a pot of disappointment. The key is understanding the two distinct phases: the time to *reach* full pressure, and the actual *cooking* time under pressure. Let’s demystify it.

Visual guide about How Long to Cook Toor Dal in Pressure Cooker
Image source: missvickie.com
Phase 1: Reaching Full Pressure (The “Time to Whistle”)
This is the variable part. How long it takes your pressure cooker to build up enough steam to start whistling (or for the weight/vent to rock steadily) depends on several factors: the size and type of your cooker (stovetop vs. electric), the amount of food/water inside, and even your stove’s heat output. For a standard 3-5 liter stovetop pressure cooker with 1 cup of unsoaked dal and 2.5-3 cups water, this usually takes 8-12 minutes on medium-high heat. An electric pressure cooker (like an Instant Pot) might take 10-15 minutes to come to pressure due to its lower maximum heat. Do not start your timer until you hear that first distinct whistle or see the pressure indicator clearly show “High” pressure. This initial phase is crucial – cooking only begins once full pressure is achieved.
Phase 2: The Actual Pressure Cooking Time (The Critical Countdown)
This is the fixed timing you need to focus on. Once full pressure is reached and you’ve started your timer, here’s the breakdown:
- Unsoaked Toor Dal: Cook under full pressure for 15-20 minutes. This is the sweet spot for most home cooks. 15 minutes often yields dal that’s tender but still holds its shape slightly (good for sambar). 20 minutes results in the classic, melt-in-your-mouth creamy texture perfect for dal tadka or with rice. If your dal is consistently undercooked at 20 minutes, your cooker might not be reaching true pressure, or you might need slightly more water.
- Soaked Toor Dal: Cook under full pressure for 8-12 minutes. The pre-soaking does a lot of the work, so significantly less time is needed. Start checking at 8 minutes – it might be done! Overcooking soaked dal is easy and leads to mush.
Important Note on Cooker Types: Stovetop cookers generally cook slightly faster than electric models due to higher maximum heat. If using an electric pressure cooker (Instant Pot, etc.), you might need to add 1-2 minutes to the stovetop timings, especially for unsoaked dal. Always refer to your specific cooker’s manual for any quirks.
Phase 3: Natural Pressure Release (NPR) – Don’t Skip This!
This is where many home cooks go wrong and end up with splattered dal or uneven texture. After the pressure cooking time is complete, you MUST allow for Natural Pressure Release (NPR). This means simply turning off the heat (for stovetop) or pressing “Cancel/Keep Warm” (for electric) and letting the pressure drop on its own as the cooker cools down. For toor dal, allow 10-15 minutes of NPR before attempting to open the cooker.
- Why NPR is Essential: It allows the dal to finish cooking gently in the residual heat and pressure. It prevents the violent eruption of hot liquid and dal that happens with a Quick Release (QR), which can clog vents and make a huge mess. More importantly, it ensures the lentils cook evenly throughout, avoiding a mushy exterior with a hard core.
- When to Use Quick Release (QR): Generally, avoid QR for toor dal. The only exception might be if you’re making a very specific, thin dal where you *want* some lentils to retain more shape and are willing to risk splatter (use extreme caution and point the vent away from you and cabinets!). For 99% of toor dal recipes, NPR is the way to go.
After the 10-15 minute NPR, carefully perform a Quick Release for any remaining pressure (just a few short bursts) before opening the lid. Always open the lid away from you to avoid steam burns.
Troubleshooting Common Toor Dal Pressure Cooker Issues
Even with the best timing, things can occasionally go sideways. Don’t panic! Most pressure cooker dal problems have straightforward fixes. Here’s how to diagnose and solve the most frequent frustrations.
Visual guide about How Long to Cook Toor Dal in Pressure Cooker
Image source: missvickie.com
Problem: Dal is Undercooked or Hard
You opened the cooker, and the lentils are still firm or chalky. This is usually due to insufficient cooking time, not enough water, or the cooker not reaching proper pressure.
- Solution: Close the lid securely and return to heat. Bring back to full pressure and cook for an additional 3-5 minutes (unsoaked) or 2-3 minutes (soaked). Always allow another 5-10 minutes NPR after this extra cook time. Next time, ensure you’re using the correct water ratio (leaning towards the higher end if this happens often) and verify your cooker is functioning correctly (check the seal and vent).
Problem: Dal is Mushy or Overcooked
The lentils have completely disintegrated into a thick paste. This is almost always caused by cooking for too long under pressure, using too much water, or skipping the NPR and using a Quick Release which can break down the lentils too aggressively.
- Solution: Unfortunately, you can’t reverse mushiness, but you can still use it! Mash it well with a spoon or whisk to create an ultra-creamy base for dal makhani or sambar. Reduce it gently on the stovetop with a splash of water or tamarind extract to thicken it back up. For next time, reduce the pressure cooking time by 2-3 minutes (especially if using soaked dal) and always use NPR. Double-check your water ratio – you might have used too much.
Problem: Burnt Taste or Dal Stuck to Bottom
A distinct burnt smell or blackened bits at the bottom of the pot. This is a serious issue usually caused by insufficient water, filling the cooker too full (preventing proper steam circulation), or cooking on excessively high heat causing the water to evaporate too quickly before pressure builds.
- Solution: If the burning is minimal and only on the very bottom, you *might* be able to salvage the top layers by carefully scooping them out, discarding the burnt bits, and continuing to cook the salvaged dal with fresh water for a few minutes. However, if the burnt flavor permeates, it’s best to start over. Crucially: Always use the minimum recommended water ratio (2.5 cups per cup unsoaked dal), never fill above 2/3 full, and cook on medium-high heat (not maximum blast) to allow time for pressure to build steadily without scorching. Ensure the vent pipe is completely clear before each use.
Problem: Watery or Soupy Dal
The dal lacks body and is too thin, even after the recommended cook time and NPR.
- Solution: This is easily fixed! Remove the lid and continue cooking the dal, uncovered, on medium heat. Let it simmer gently, stirring occasionally, until it reaches your desired thickness. This reduction process concentrates the flavors beautifully. You can also mash a portion of the dal with a spoon or whisk to help thicken it naturally. For next time, use slightly less water (try 2.25 cups per cup unsoaked dal) or reduce the cook time by 1-2 minutes.
Serving, Storing, and Elevating Your Pressure Cooker Toor Dal
You’ve mastered the pressure cooker timing – congratulations! Now, it’s time to transform that perfectly cooked dal into a truly memorable meal. The magic often happens *after* the pressure release.
The Essential Tempering (Tadka): Flavor Explosion
Plain pressure-cooked toor dal is good, but tempering (tadka) is what makes it exceptional and authentic. This quick step, done in a small pan with ghee or oil, unlocks incredible depth and aroma. Here’s a simple, classic method:
- Heat 2-3 tablespoons of ghee or oil in a small pan over medium heat.
- Add 1 teaspoon cumin seeds. Let them sizzle and crackle for 10-15 seconds.
- Add 1-2 dried red chilies (broken) and a pinch of asafoetida (hing). Sizzle for another 10 seconds.
- (Optional but recommended): Add 1-2 finely chopped garlic cloves or a small piece of ginger (julienned). Sauté until fragrant, about 30 seconds – don’t let garlic burn!
- Pour this hot, sizzling tadka immediately over the cooked dal in the pressure cooker or serving bowl. Cover the dal immediately for 30 seconds to let the flavors infuse.
The sizzle as the tadka hits the dal is pure culinary magic! You can also add fresh curry leaves or a squeeze of lemon juice at the end for brightness. This step takes 5 minutes but elevates your dal from “okay” to “restaurant-quality.”
Serving Suggestions: Beyond the Basics
Toor dal is incredibly versatile. Serve it simply with steamed rice and a dollop of ghee for a classic comfort meal. Pair it with roti, naan, or paratha for a satisfying bread-and-dal combo. It’s the essential base for sambar (add vegetables and sambar powder during the last few minutes of pressure cooking or simmer after). For a richer experience, stir in a tablespoon of butter or cream after the tadka for a dal makhani-inspired twist. Garnish with fresh cilantro for a pop of color and freshness.
Storing and Reheating: Leftovers Taste Great!
One of the best things about pressure cooker toor dal? It tastes even better the next day as the flavors meld! Let it cool completely before transferring to an airtight container. It will keep well in the refrigerator for up to 4-5 days. Freezing is also excellent – portion it out in freezer-safe containers or bags, leaving a little headspace, for up to 3 months. Thaw overnight in the fridge before reheating.
- Reheating: Gently reheat portions in a saucepan over medium-low heat, adding a splash of water or vegetable broth if it seems too thick. Stir occasionally until heated through. Avoid microwaving large quantities at full power, as it can make the dal unevenly hot and potentially rubbery. Reheating gently preserves the texture.
Storing the plain, pressure-cooked dal (before tadka) is also a fantastic meal prep strategy. Cook a big batch, cool it, and store it plain. When ready to eat, simply reheat a portion and add a fresh tadka – you get the speed of leftovers with the vibrancy of a freshly tempered dish.
Conclusion: Your Foolproof Path to Perfect Pressure Cooker Toor Dal
Mastering how long to cook toor dal in pressure cooker unlocks a world of quick, delicious, and deeply satisfying meals. It’s no longer a dish reserved for weekends or special occasions; it becomes a reliable weeknight staple. Remember the core pillars: meticulous rinsing, the strategic use of soaking (even just 30 minutes makes a difference!), the non-negotiable water ratio (2.5-3 cups per cup unsoaked dal), the precise pressure cooking time (15-20 minutes unsoaked, 8-12 soaked), and the absolutely critical 10-15 minute Natural Pressure Release. These steps transform dried lentils into creamy, comforting perfection in under 30 minutes.
Don’t be discouraged by a first attempt that isn’t flawless. Pressure cooking has a learning curve, especially dialing in the exact timing for *your* cooker and *your* preferred texture. Use the troubleshooting guide – undercooked? Add a few more minutes. Mushy? Reduce time next round. Watery? Simmer it down. The beauty of dal is its forgiving nature; even “imperfect” batches can be salvaged and still taste wonderful. Embrace the process, trust the timing guidelines, and always finish with that fragrant tadka. Soon, you’ll be whipping up restaurant-quality toor dal with confidence, freeing up your time for the things that truly matter, all while enjoying the warm, nourishing heart of Indian cuisine right in your own kitchen. Happy pressure cooking!
Frequently Asked Questions
Can I cook toor dal in a pressure cooker without soaking?
Absolutely! Soaking is optional but recommended to reduce cooking time and improve texture. Unsoaked toor dal requires 15-20 minutes under full pressure after the cooker reaches peak steam. Just ensure you use the correct water ratio (2.5-3 cups per cup of dal) and allow for natural pressure release.
Why is my pressure cooker toor dal always mushy?
Mushy dal is usually caused by overcooking (too much pressure time), using too much water, or skipping the natural pressure release (NPR) and using a quick release which violently breaks down the lentils. Reduce your pressure cooking time by 2-3 minutes, use slightly less water (start with 2.5 cups per cup unsoaked dal), and always allow 10-15 minutes of NPR after cooking.
How much water do I need for 1 cup of toor dal in a pressure cooker?
For unsoaked toor dal, use 2.5 to 3 cups of water per 1 cup of lentils. For soaked (and drained) toor dal, use 2 to 2.5 cups of water. Adjust within this range based on your desired thickness – less water for thicker dal, more for thinner. Never fill the cooker more than 2/3 full.
Do I really need to wait for natural pressure release (NPR) for toor dal?
Yes, NPR is highly recommended for toor dal. Skipping it and using a quick release often results in splattering, clogged vents, and unevenly cooked dal (mushy outside, hard inside). Allowing 10-15 minutes of NPR lets the dal finish cooking gently and evenly in the residual heat and pressure, ensuring perfect texture.
Can I use an electric pressure cooker (like Instant Pot) for toor dal?
Definitely! Electric pressure cookers work perfectly for toor dal. Use the same water ratios and general timing guidelines, but add 1-2 minutes to the pressure cooking time compared to stovetop cookers (e.g., 17-22 minutes for unsoaked dal). Always use the “Pressure Cook” or “Manual” setting on High pressure and allow 10-15 minutes of natural release before quick releasing any remaining pressure.
How do I add flavor to pressure cooker toor dal?
The key step for authentic flavor is the tempering (tadka) added AFTER pressure release. Heat ghee/oil, sizzle cumin seeds, dried chilies, asafoetida, and garlic/ginger, then pour it over the cooked dal. You can also add spices like turmeric, red chili powder, or sambar powder *before* pressure cooking, but the tadka provides the most vibrant, restaurant-style flavor burst.