
Pressure cooking pork belly slashes traditional cooking time from hours to under 60 minutes while delivering incredibly tender, melt-in-your-mouth results. The exact time depends on thickness and desired texture, but generally ranges from 45-60 minutes under pressure plus natural release. Mastering prep, liquid levels, and finishing techniques ensures restaurant-quality pork belly every time.
Key Takeaways
- Cook Time Range: Typically 45-60 minutes under pressure for 1.5-2 inch thick slabs, plus 15-20 minutes natural release. Thicker pieces need more time.
- Thickness is Crucial: Always measure your pork belly slab. Thicker cuts (over 2 inches) may require 70-80 minutes pressure time for full tenderness.
- Natural Release is Non-Negotiable: Allowing pressure to release naturally ( NPR ) for 15-20 minutes prevents tough, stringy meat and ensures perfect texture.
- Internal Temp Check: While time guides are key, verify doneness. Pork belly is safe at 145°F (63°C), but true tenderness for belly requires 195°F-205°F (90°C-96°C) internally.
- Resting Matters: Let the cooked pork belly rest for 10-15 minutes before slicing. This allows juices to redistribute, preventing dryness.
- Finishing is Key: Pressure cooking makes it tender, but broiling, air frying, or pan-searing the skin creates the essential crispy crackling.
- Liquid Level is Vital: Always use at least 1 cup of liquid (broth, water, beer) to create sufficient steam for pressure buildup and prevent burning.
📑 Table of Contents
- Why Pressure Cook Pork Belly? Your Time-Saving Secret Weapon
- Essential Prep: Setting Up for Pressure Cooker Success
- How Long to Cook Pork Belly in Pressure Cooker: The Definitive Guide
- Step-by-Step: Cooking Pork Belly in Your Pressure Cooker
- Beyond the Basics: Flavor Variations and Serving Ideas
- Avoiding Common Pitfalls: Troubleshooting Guide
- Conclusion: Your Foolproof Path to Perfect Pork Belly
Why Pressure Cook Pork Belly? Your Time-Saving Secret Weapon
Let’s talk pork belly. That glorious, fatty, marbled slab is the heart of so many incredible dishes – from melt-in-your-mouth braises to crispy-skinned perfection. But traditionally, cooking it right takes hours. Oven braising? Easily 3-4 hours. Slow cooker? Often 6-8 hours on low. Who has that kind of time on a Tuesday night? Enter the pressure cooker – your new best friend for transforming this luxurious cut into tender, succulent heaven in a fraction of the time.
The magic of pressure cooking lies in its ability to create a superheated, sealed environment. Water boils at a much higher temperature under pressure (around 250°F/121°C instead of 212°F/100°C), which dramatically speeds up the breakdown of tough connective tissues like collagen into gelatin. This is exactly what we want for pork belly – that collagen melting away to create unparalleled tenderness and mouthfeel. The result? Fork-tender pork belly with a rich, unctuous texture that would normally require a long, slow cook, achieved in under 90 minutes total from start to finish. It’s not just faster; it’s often more tender and flavorful because the intense pressure forces moisture and flavor deep into the meat. Forget waiting all day; your pressure cooker unlocks restaurant-quality pork belly on a weeknight.
Essential Prep: Setting Up for Pressure Cooker Success
Before you even think about hitting that pressure button, proper preparation is absolutely critical for perfect pork belly. Skipping these steps can lead to uneven cooking, lackluster flavor, or even safety issues. Think of prep as laying the foundation for your masterpiece.
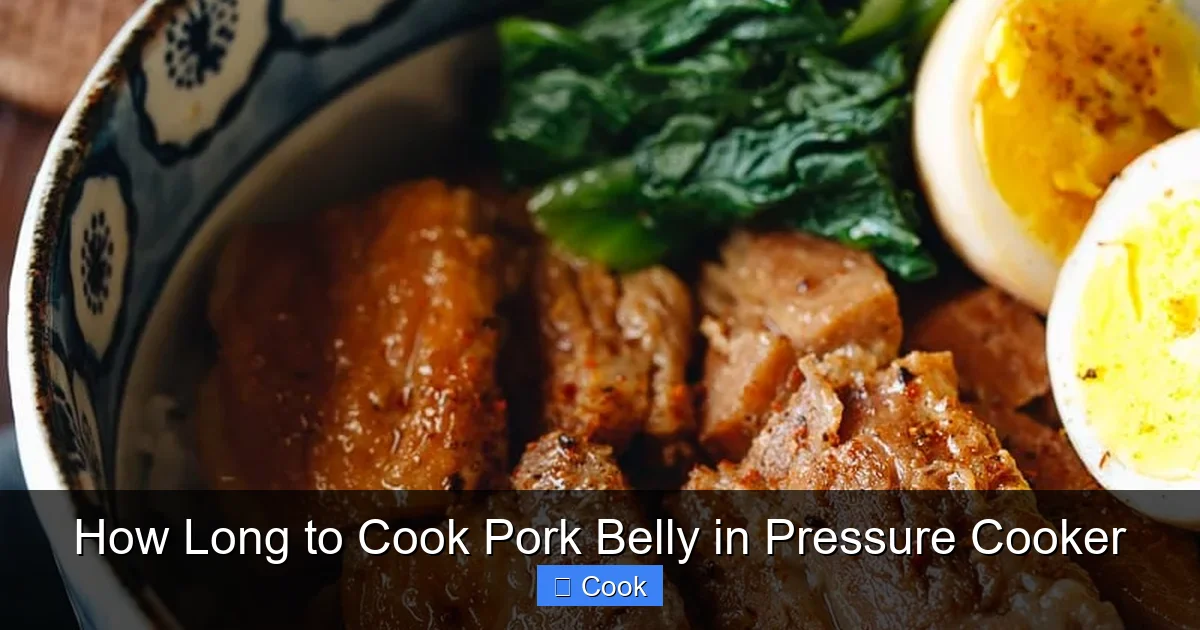
Visual guide about How Long to Cook Pork Belly in Pressure Cooker
Image source: justonecookbook.com
Choosing and Prepping Your Pork Belly
Start with a good quality slab, ideally 1.5 to 2 inches thick. Thicker pieces are forgiving but take longer; thinner pieces cook faster but risk overcooking. Look for well-marbled meat with a decent layer of fat and a uniform pink color. Avoid pieces with excessive yellowing fat or strong odors. The most crucial prep step? Scoring the skin. Use a very sharp knife (a razor blade works great) to make deep, close-set cuts (about 1/4 inch apart) through the skin and fat, down to the meat, but not into the meat itself. This serves two vital purposes: it allows fat to render out more effectively during cooking, preventing a greasy layer, and it helps the skin crisp up beautifully during the finishing step. Don’t skip this! Pat the skin extremely dry with paper towels before scoring – moisture is the enemy of good crisping later.
The Sear: Flavor Foundation (Highly Recommended)
While not 100% mandatory, searing your pork belly before pressure cooking is a game-changer for depth of flavor. Heat a little oil in your pressure cooker pot (if it’s stovetop safe) or a separate skillet over medium-high heat. Place the pork belly skin-side down and sear until deeply golden brown and crisp, about 5-7 minutes. Flip and sear the meat side for 2-3 minutes. This Maillard reaction creates complex, savory flavors that plain boiling just can’t match. Remove the pork belly and set aside. You’ll deglaze the pot with your cooking liquid next, capturing all those delicious browned bits (fond) – that’s pure flavor gold.
Liquid Levels: The Non-Negotiable Steam Source
This is where many beginners go wrong. Your pressure cooker must have sufficient liquid to generate the steam needed to build and maintain pressure. For pork belly, **always use at least 1 cup (8 oz / 240ml) of liquid**. This can be water, but using broth (chicken, pork, or vegetable), beer, apple cider, or even a mix of soy sauce and water adds incredible depth. Remember the fond from searing? Pour your liquid into the pot now, scraping the bottom vigorously to dissolve it all. This liquid also prevents the bottom from scorching and contributes to the final sauce. Never cook pork belly (or most meats) in a pressure cooker with less than 1 cup of liquid – it risks burning and a failed cook.
How Long to Cook Pork Belly in Pressure Cooker: The Definitive Guide
This is the million-dollar question, and the answer isn’t a single magic number. How long to cook pork belly in pressure cooker depends on several key factors. Getting this right is the difference between fall-apart tender perfection and disappointing chewiness. Let’s break down the variables.

Visual guide about How Long to Cook Pork Belly in Pressure Cooker
Image source: whattocooktoday.com
The Core Time Range: 45-60 Minutes is Your Starting Point
For a standard slab of pork belly measuring **1.5 to 2 inches thick**, the pressure cooking time (the time the pot is actively at full pressure) typically falls between **45 and 60 minutes**. This is the sweet spot for achieving that coveted melt-in-your-mouth texture where the fat is rendered and the meat is incredibly tender, but still holds its shape enough to slice. Think of dishes like Chinese Dongpo pork or Korean bossam – this timing gets you there.
Why Thickness is the #1 Factor
Pork belly thickness is the single biggest determinant of your cook time. Heat and pressure need to penetrate the entire slab to break down the collagen uniformly. A thin piece (under 1 inch) might only need 30-40 minutes and risks becoming mushy. A thick, dense slab (over 2.5 inches) could easily require 70-80 minutes or more to reach full tenderness. **Always measure your pork belly before you start.** If you have a particularly thick piece, err on the side of longer cooking time. It’s far better to slightly overcook and then crisp it up than to undercook and end up with tough, chewy meat. Don’t guess – measure!
Desired Texture: Tender vs. Fall-Apart
What’s your end goal? This subtly influences timing:
- Tender but Slicable (e.g., for roast, bossam): Aim for the lower end of the range (45-50 mins for 1.5-2″). The meat will be very tender but still hold together when sliced. Internal temp will be around 195°F-200°F (90°C-93°C).
- Fall-Apart Tender (e.g., for braised dishes, sandwiches): Push towards the higher end (55-60+ mins). The meat will shred easily with a fork. Internal temp will be 200°F-205°F (93°C-96°C) or higher.
Consider your final dish. If you plan to slice it neatly for presentation, don’t overdo the pressure time. If you’re shredding it for tacos or sandwiches, a bit longer ensures complete disintegration of connective tissue.
The Critical Role of Natural Pressure Release (NPR)
This is non-negotiable for pork belly. **Never do a quick release (QR) for pork belly.** After the pressure cooking time is complete, you must allow the pressure to release naturally for at least 15-20 minutes. This slow release continues the cooking process gently and, crucially, allows the collagen and gelatin to set properly. A quick release causes a violent rush of steam that can:
- Make the meat stringy and tough
- Cause the fat to emulsify poorly, leading to a greasy texture
- Result in uneven cooking
Set a timer for 15-20 minutes after the pressure cooking cycle ends and walk away. The pot will slowly depressurize on its own. Only after this natural release period should you carefully perform a quick release for any remaining pressure (most modern pots will indicate when it’s safe).
Step-by-Step: Cooking Pork Belly in Your Pressure Cooker
Now that you understand the timing factors, let’s walk through the entire process. Following these steps ensures success every time.

Visual guide about How Long to Cook Pork Belly in Pressure Cooker
Image source: whattocooktoday.com
Step 1: Prep & Sear (As Detailed Above)
Score and dry the skin thoroughly. Sear skin-side down first until deeply golden and crisp (5-7 mins), then sear the meat side (2-3 mins). Remove pork belly and set aside on a plate. Deglaze the pot with your chosen liquid (at least 1 cup), scraping up all the browned bits.
Step 2: Aromatics & Liquid
Add your aromatics to the deglazed liquid. Classic choices include:
- 2-3 cloves garlic, smashed
- 1-2 inches ginger, sliced
- 1-2 star anise (for Chinese-inspired)
- 1 cinnamon stick
- 2-3 green onions, cut into chunks
- 1-2 tbsp soy sauce or tamari (adds depth and salt)
- Optional: 1 tbsp rice vinegar or apple cider vinegar (helps tenderize)
Stir everything together. Ensure the liquid level is still at least 1 cup. If using soy sauce, you might need slightly less salt later.
Step 3: Pressure Cooking
Place the seared pork belly back into the pot, skin-side up. It should be mostly submerged, but the skin will likely be exposed – that’s okay, we’ll fix that later. Secure the lid according to your manufacturer’s instructions. Set the pressure cooker to High Pressure. Set the cooking time based on your slab’s thickness and desired texture (e.g., 50 minutes for a 1.75-inch slab aiming for tender slices). Start the cook cycle.
Step 4: Natural Release & Resting
When the cooking time ends, do not quick release. Allow the pressure to release naturally for 15-20 minutes. After this NPR period, carefully perform a quick release for any remaining pressure (check your pot’s manual). Once safe, open the lid away from you to avoid steam burns. Using tongs or a meat fork, carefully transfer the pork belly to a cutting board or plate. **Let it rest for 10-15 minutes.** This resting period is vital – it allows the juices to redistribute throughout the meat, ensuring it stays moist when you slice or crisp it.
Step 5: The Finishing Touch: Crisping the Skin
This is where pressure-cooked pork belly transforms from “good” to “WOW!” The pressure cooking makes it tender, but the skin is usually soft. To achieve that essential crispy crackling:
- Broiler Method (Best for even crisping): Preheat your broiler. Place the rested pork belly skin-side up on a broiler pan or baking sheet lined with foil. Broil for 3-7 minutes, watching very closely, until the skin is deeply golden, bubbly, and crisp. Rotate if needed for even browning.
- Air Fryer Method (Quick & Easy): Place pork belly skin-side up in the air fryer basket. Cook at 400°F (200°C) for 5-10 minutes, until skin is crisp.
- Cast Iron Skillet Method: Heat a thin layer of oil in a cast iron skillet over medium-high heat. Place pork belly skin-side down and fry for 3-5 minutes until crisp.
Pro Tip: For extra crispy skin, some chefs sprinkle a tiny bit of baking soda on the dried skin before the final crisp-up (use sparingly, 1/8 tsp max, and rinse off after crisping if concerned about taste). Pat the skin dry again right before broiling/frying.
Beyond the Basics: Flavor Variations and Serving Ideas
Mastered the basic timing? Now it’s time to get creative! The pressure cooker is a fantastic canvas for infusing pork belly with global flavors. The core technique remains the same (prep, sear, pressure cook, NPR, rest, crisp), but the aromatics and liquids change the game.
Global Flavor Inspirations
- Chinese Dongpo Style: Use Shaoxing wine (or dry sherry) as part of your liquid. Add rock sugar (or brown sugar), light and dark soy sauce, star anise, cinnamon, and ginger. Pressure cook 60 mins. Serve sliced with the rich, dark sauce and steamed buns.
- Korean Bossam: Simmer with Korean radish, garlic, ginger, green onions, doenjang (soybean paste), gochujang (chili paste), and a bit of sugar. Pressure cook 50-55 mins. Serve boiled (after pressure cooking and resting) with ssamjang (spicy dipping sauce), kimchi, and lettuce leaves for wrapping.
- Mexican Carnitas-Style: Use orange juice, lime juice, cumin, oregano, garlic, and onion. Pressure cook 50 mins. After NPR, shred the meat (it should fall apart easily) and crisp it up in a skillet with some of the cooking liquid for tacos or burrito bowls.
- Simple Herb-Roasted: Use chicken broth, garlic, rosemary, thyme, and a splash of apple cider vinegar. Pressure cook 45 mins. Perfect for slicing and serving with roasted vegetables and pan gravy made from the cooking liquid.
Pro Tip: After pressure cooking and removing the pork belly, you can reduce the cooking liquid on the stovetop (if your pot is safe) to make a delicious, glossy sauce. Skim off excess fat first if desired.
Serving Your Pressure Cooker Pork Belly
How you serve it depends on your preparation:
- Sliced: For roast-style or bossam, slice against the grain into 1/4 to 1/2 inch thick pieces. Serve with the reduced sauce, steamed rice, and pickled vegetables.
- Shredded: For carnitas or sandwiches, use two forks to pull the tender meat apart. Toss with some of the reduced cooking liquid. Serve in tortillas with salsa, or on bread with slaw.
- Whole Slab (Crispy Skin Highlight): Present the whole crisped slab at the table for dramatic effect. Let everyone slice off pieces as they wish, accompanied by simple sides like mashed potatoes or roasted root vegetables.
The versatility is endless. That perfectly cooked pork belly is your blank canvas.
Avoiding Common Pitfalls: Troubleshooting Guide
Even with the best intentions, things can go sideways. Here’s how to avoid the most common pressure cooker pork belly mistakes and fix them if they happen.
Mistake 1: Not Enough Liquid
Problem: Burning smell, “Burn” error on electric pots, undercooked meat, scorched bottom. Why it Happens: Forgetting the minimum 1 cup liquid, or using too little due to searing fond taking up space. Solution: Always measure your liquid after deglazing. If you get a burn error, do not proceed. Carefully discard the burnt contents (if salvageable, scrape off burnt bits from the very bottom), clean the pot thoroughly, and start over with the correct liquid amount. Prevention is key – measure!
Mistake 2: Skipping the Natural Release (NPR)
Problem: Tough, stringy, or unevenly cooked meat; greasy texture. Why it Happens: Impatience! Quick release shocks the meat. Solution: Set a timer for 15-20 minutes NPR and walk away. This is non-negotiable for pork belly. If you accidentally QR, the meat might be salvageable by returning it to the pot with a splash of liquid and pressure cooking for 5-10 more minutes, but texture will likely suffer.
Mistake 3: Undercooking Due to Thickness
Problem: Meat is still tough and chewy, especially in the center. Why it Happens: Using the standard 45-60 min time for a very thick slab (over 2.5 inches). Solution: Measure your pork belly! For thick pieces, add 10-15 minutes per extra 1/2 inch of thickness. If you suspect undercooking after NPR (meat feels firm), return it to the pot, add a splash of liquid if needed, and pressure cook for another 10-15 minutes.
Mistake 4: Soggy Skin (No Crisp)
Problem: Skin is soft and unappetizing after pressure cooking. Why it Happens: Skipping the final crisp-up step, or not drying the skin sufficiently before searing/crisping. Solution: The pressure cooker tenderizes, but never crisps the skin. You must broil, air fry, or pan-fry the skin-side after cooking and resting. Pat the skin bone dry with paper towels right before the final crisp step – this is crucial for crackling.
Mistake 5: Overcooking to Mush
Problem: Meat falls apart completely, loses shape, becomes dry despite being tender. Why it Happens: Cooking too long, especially for a thinner slab or when aiming for sliced presentation. Solution: Stick to the time range for your thickness. If you prefer sliced pork belly, aim for the lower end (45-50 mins for 1.5-2″). Use a meat thermometer – 195°F-200°F (90°C-93°C) is ideal for slicing. If it’s overcooked, shred it for tacos or sandwiches – it’s still delicious!
Conclusion: Your Foolproof Path to Perfect Pork Belly
Cooking pork belly in a pressure cooker isn’t just a time-saver; it’s a game-changer that unlocks incredible depth of flavor and texture previously reserved for all-day braises. By understanding how long to cook pork belly in pressure cooker – recognizing that 45-60 minutes under pressure for a standard slab, coupled with a mandatory 15-20 minute natural release, is the golden rule – you’ve conquered the biggest hurdle. Remember, thickness is king, natural release is non-negotiable, and that final crisp-up transforms tender meat into a truly sensational dish.
Don’t be intimidated. Embrace the scoring, master the sear (it’s worth it!), measure your liquid, and respect the NPR. Experiment with flavors – try that Dongpo-inspired braise or Korean bossam. The pressure cooker handles the heavy lifting, melting collagen into luxurious gelatin while infusing the meat with your chosen aromatics. In less time than it takes to preheat a conventional oven, you’ll have pork belly that’s fall-apart tender underneath and boasting an irresistible, shatteringly crisp skin. It’s restaurant-quality results with weeknight ease. So, grab that pork belly, fire up your pressure cooker, and discover why this method is the secret weapon for pork belly perfection. Your taste buds (and your schedule) will thank you.
Frequently Asked Questions
Can I cook frozen pork belly in the pressure cooker?
Yes, but it requires adjustments. Add 5-10 minutes to your pressure cooking time. Ensure the frozen slab fits comfortably in the pot without touching the sides excessively. You cannot sear frozen pork belly effectively, so skip that step and add extra aromatics to the liquid for flavor. Always ensure the internal temperature reaches at least 195°F (90°C) for tenderness.
What liquid can I use besides water or broth?
Get creative! Beer (especially lagers or stouts), apple cider, pineapple juice, coconut milk, or even strong brewed tea add wonderful complexity. Wine (red or white) is excellent but use it sparingly (1/2 cup max) mixed with broth or water, as the acidity can be overpowering. Avoid sugary sodas as they can burn.
My pork belly is still tough after cooking. What went wrong?
The most likely culprit is undercooking, often due to a slab thicker than 2 inches not getting enough time. Measure your pork belly next time and add 10-15 minutes per extra 1/2 inch of thickness. Ensure you allowed the full 15-20 minute natural pressure release (NPR) – skipping this makes meat tough. Verify the internal temperature reached at least 195°F (90°C).
Can I skip searing the pork belly before pressure cooking?
You can, but you’ll miss out on significant depth of flavor. Searing creates the Maillard reaction, developing complex savory notes that plain boiling doesn’t achieve. If skipping sear, boost flavor with extra aromatics (more garlic, ginger, spices) and consider using a richer liquid like full-fat coconut milk or adding a tablespoon of tomato paste to the liquid.
How do I store and reheat leftover pressure cooker pork belly?
Store cooked, cooled pork belly (sliced or whole) in an airtight container with some of the cooking liquid to keep it moist. Refrigerate for up to 4 days. Reheat gently in a covered dish in the oven (300°F/150°C) with a splash of liquid, or in a skillet over low heat with a bit of oil or broth. Avoid microwaving if you want to maintain the crispy skin – reheat the meat portion separately and re-crisp the skin under the broiler for a minute.
Why is my pork belly greasy after pressure cooking?
This usually happens if the skin wasn’t scored deeply enough, preventing fat from rendering out properly during cooking, or if you skipped the final crisping step where excess surface fat gets rendered off. Ensure you scored the skin down to the meat before cooking. After pressure cooking and resting, pat the skin extremely dry and broil/air fry it – this renders the final layer of fat and creates crispness, eliminating greasiness.