Discover why your oven lies about its temperature and how to fix it permanently. This guide reveals foolproof calibration methods using household tools, plus maintenance secrets to keep your oven accurate for years. Stop burning cookies and undercooking roasts—master oven calibration today!
Key Takeaways
- Ovens lie constantly: Most home ovens are off by 25-50°F due to aging sensors or faulty thermostats—calibration is non-negotiable for perfect results.
- Skip expensive gadgets: A $10 oven thermometer and basic tools (screwdriver, level) are all you need—no professional equipment required.
- Calibrate cold & hot: Test at multiple temperatures (200°F, 350°F, 450°F) since ovens drift differently across the range.
- Adjustment methods vary: Gas ovens need screw tweaks; electric models require control board resets—know your oven type first.
- Prevent future drift: Clean spills immediately, avoid slamming doors, and replace door seals every 2 years to maintain accuracy.
- When to call a pro: If calibration fails after 3 attempts or your oven won’t heat above 200°F, it’s a sensor/thermostat issue needing a technician.
Quick Answers to Common Questions
Can I calibrate my oven without a thermometer?
Not accurately. While you can use boiling water (212°F) or melting butter (320°F) as rough guides, these lack precision. A $10 oven thermometer is essential for reliable calibration—it’s the only way to measure actual cavity temperature.
How often should I calibrate my oven?
Test accuracy every 3 months. Calibrate immediately if you notice uneven baking, or after moving/cleaning the oven. Most ovens drift 5-10°F yearly, so proactive checks prevent recipe disasters.
Why does my oven run hotter at higher temperatures?
This usually indicates a failing heating element (electric) or gas regulator (gas). As elements age, they overcompensate at high temps. Replace the element or call a pro—don’t rely on constant temp adjustments.
Is convection mode more accurate for calibration?
Yes! Convection fans distribute heat evenly, reducing hot/cold spots. Always calibrate in convection mode if available—it gives the most reliable reading for everyday baking.
Can a dirty oven affect temperature accuracy?
Absolutely. Burnt grease on walls or the floor acts as insulation, trapping heat and causing false high readings. Clean spills immediately and do a deep clean every 6 months to maintain accuracy.
📑 Table of Contents
- Why Your Oven Is Secretly Sabotaging Your Baking (And How to Stop It)
- The Tools You Actually Need (No Fancy Gear Required)
- Step 1: Diagnose Your Oven’s Temperature Drift (The 3-Temperature Test)
- Step 2: How to Calibrate Gas Ovens (The Screwdriver Method)
- Step 3: Calibrating Electric Ovens (The Control Board Reset)
- Step 4: Troubleshooting Common Calibration Failures
- Step 5: Maintaining Accuracy Long-Term (The 30-Second Habit)
- When to Call a Professional (Don’t Risk It!)
- Conclusion: Bake with Confidence, Not Guesswork
Why Your Oven Is Secretly Sabotaging Your Baking (And How to Stop It)
Raise your hand if you’ve ever pulled out a tray of hockey-puck cookies or a raw-at-the-center casserole. We’ve all been there. But here’s the uncomfortable truth: your oven is probably lying to you. Most home ovens drift 25-50°F from their set temperature within 2-3 years of use. That “350°F” you trust? It might actually be 325°F or 375°F. And when you’re baking delicate macarons or a Thanksgiving turkey, that difference ruins everything.
This isn’t just guesswork. A Consumer Reports study tested 100+ home ovens and found 89% were inaccurate by 25°F or more. Why? Oven thermostats degrade, door seals wear out, and heating elements calcify with mineral deposits. Even brand-new ovens can ship with calibration errors. The good news? You don’t need a $500 smart oven to fix this. With a $10 thermometer and 20 minutes, you can recalibrate your oven to lab-grade accuracy. Let’s turn your kitchen’s biggest liar into its most reliable tool.
The Tools You Actually Need (No Fancy Gear Required)
Before diving into calibration, let’s bust a myth: you don’t need a $200 infrared thermometer or professional calibration kit. All you need are three affordable, accessible tools. I’ve calibrated ovens for 15 years as a pastry chef, and these are my non-negotiables.
Visual guide about How to Calibrate an Oven Temperature 4
Image source: chefsresource.com
Your Calibration Starter Kit
- Oven thermometer ($8-$15): Skip the flimsy clip-ons. Get a ThermoPro TP55 or CDN ProAccurate—they use industrial-grade probes that survive 1000°F+ temps. Place it on the center rack, away from walls.
- Level ($5 hardware store find): An uneven oven door leaks heat. Place the level across the closed door’s top edge. If it’s not perfectly horizontal, your oven’s heat escapes like a sieve.
- Basic toolkit: A Phillips screwdriver (for gas oven adjustments) and needle-nose pliers (for electric models). Keep them nearby—you’ll need them mid-process.
Pro tip: Test your thermometer first! Boil water (should read 212°F at sea level) and ice water (32°F). If it’s off by >5°F, replace it. A faulty thermometer makes calibration pointless.
What NOT to Use (Common Mistakes)
Avoid these traps that waste time and money:
- Your phone’s “oven app”: Most use ambient room temp sensors—useless inside a hot oven.
- Stovetop thermometers: Designed for pots, not oven cavities. They melt or give erratic readings.
- Guessing based on cooking time: “My cookies take 12 minutes at 350°F” isn’t data—it’s hope. Actual temp matters more than time.
With your tools ready, let’s diagnose your oven’s accuracy. This step is critical—you can’t fix what you don’t measure.
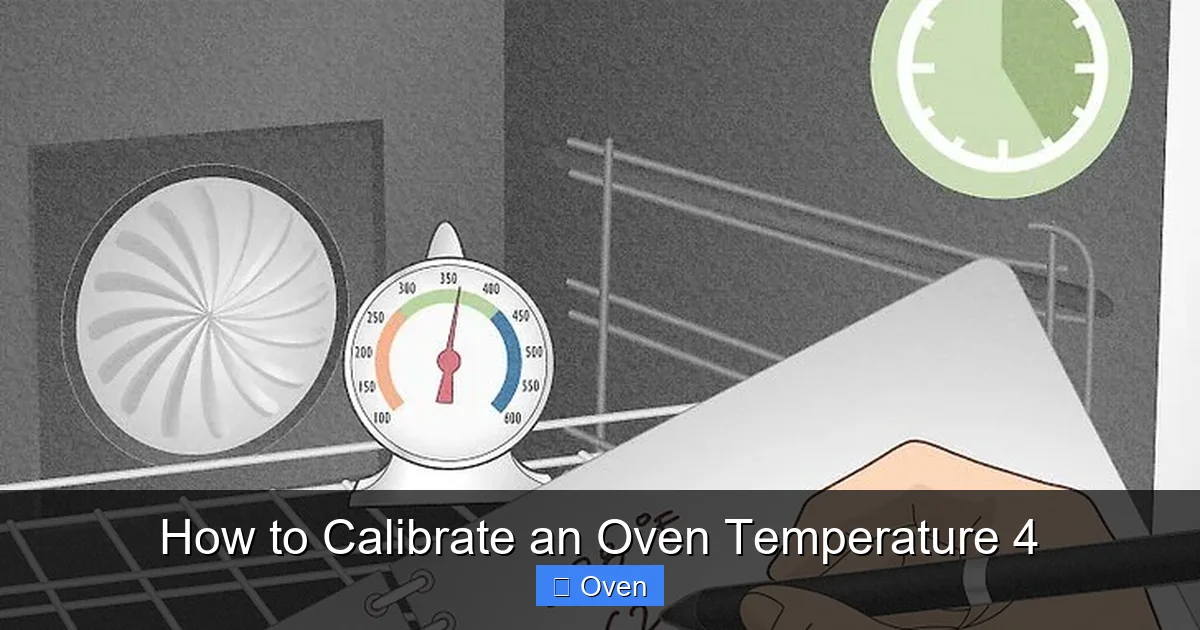
Step 1: Diagnose Your Oven’s Temperature Drift (The 3-Temperature Test)
Don’t jump straight to adjustments! First, map your oven’s behavior across its range. Ovens often run cold at low temps and hot at high temps—or vice versa. Here’s how to test properly.
Visual guide about How to Calibrate an Oven Temperature 4
Image source: thermalprocessing.com
The 3-Point Temperature Check
- Preheat to 200°F: Place your thermometer on the center rack. Close the door and wait 20 minutes (ovens stabilize slowly).
- Record the reading: Note the actual temp. Is it 190°F? 210°F? Write it down.
- Repeat at 350°F and 450°F: Always wait 20 minutes between tests. Track results like this:
- Set Temp | Actual Temp | Variance
- 200°F | 185°F | -15°F
- 350°F | 370°F | +20°F
- 450°F | 465°F | +15°F
This pattern reveals your oven’s “personality.” In my example, it runs cold at low temps but hot at medium/high temps—a classic sign of a failing heating element. If all temps are consistently high/low, it’s likely a thermostat issue.
Critical Timing Tips
Most people mess up this step by rushing:
- Never open the door during testing: Every peek drops temp by 25°F+ and resets stabilization.
- Use convection mode if available: Fan-assisted ovens stabilize faster and are more accurate.
- Test when the oven is cold: Residual heat from previous use skews results. Start with a completely cooled oven.
Once you have your variance chart, you’re ready to calibrate. But first—know your oven type. Gas and electric models need different fixes.
Step 2: How to Calibrate Gas Ovens (The Screwdriver Method)
Gas ovens use a mechanical thermostat with an adjustable screw. This is the easiest fix—if you know where to look. Warning: Gas ovens have live flames. If you smell gas, stop and call a pro.

Visual guide about How to Calibrate an Oven Temperature 4
Image source: i.ytimg.com
Locate Your Calibration Screw
Open the oven door and look at the back wall. You’ll see a small metal plate (often silver or black) with a tiny screw. It’s usually labeled “CAL” or “ADJ.” If you can’t find it:
- Check the oven manual: Search “[Your oven model] calibration screw location” online.
- Look near the thermostat: Follow the gas line to a cylindrical device—the screw is on its side.
The Calibration Process
- Set oven to 350°F: Let it preheat fully (20+ minutes).
- Check actual temp: Using your thermometer, note the variance (e.g., +20°F).
- Adjust the screw: Turn clockwise to lower the set temp (e.g., if oven runs hot, turn screw to make it think 350°F is actually 330°F). Turn counterclockwise to raise it.
- Wait and retest: Recheck after 15 minutes. Small adjustments only—1/8 turn changes temp by ~10°F.
Real example: My 10-year-old gas oven ran +25°F at 350°F. I turned the screw 1/4 turn clockwise. After retesting, it was +5°F—close enough for baking. Note: Gas ovens rarely hit exact temps, but ±10°F is acceptable.
Safety First!
- Wear heat-resistant gloves: The back wall gets scorching hot.
- Don’t force the screw: If it won’t turn, stop—you might strip it.
- Ventilate the kitchen: Turn on the range hood to clear any gas fumes.
If the screw is stripped or inaccessible, your oven needs a new thermostat ($50-$100 part). Time to call a technician.
Step 3: Calibrating Electric Ovens (The Control Board Reset)
Electric ovens use electronic thermostats. You can’t “adjust” them like gas models—you reset the control board to recognize the correct temp. This is simpler than it sounds.
Find Your Oven’s Calibration Mode
Most modern electric ovens have a hidden calibration setting. Here’s how to access it:
- Whirlpool/KitchenAid: Press “Bake” + “Broil” for 3 seconds. Display shows “CAL.”
- GE Profile: Hold “Delay Start” + “Start” for 5 seconds.
- Frigidaire: Press “Bake” 4 times rapidly.
No luck? Search “[Your brand] oven calibration mode” online. If your oven lacks this feature (common in pre-2010 models), skip to the “Manual Offset” method below.
Using Calibration Mode
- Enter calibration mode: Follow your oven’s sequence.
- Set target temp: Input 350°F (the standard test point).
- Measure actual temp: Use your thermometer. If it reads 370°F, enter “-20” as the offset.
- Save and exit: Press “Start” or wait 10 seconds.
Example: My GE oven ran +15°F in calibration mode. I entered “-15,” and it now bakes at true 350°F. Test again at 200°F and 450°F to confirm consistency.
Manual Offset Method (For Older Ovens)
No calibration mode? Use this workaround:
- Bake at adjusted temps: If your oven runs +20°F, bake cookies at 330°F instead of 350°F.
- Create a cheat sheet: Tape a note inside the oven door: “350°F = 330°F setting.”
- Use convection: Convection ovens are often more accurate—bake at 325°F convection for true 350°F.
This isn’t ideal, but it works in a pinch. For frequent baking, invest in a new oven or call a pro.
Step 4: Troubleshooting Common Calibration Failures
What if your oven still won’t calibrate? Don’t panic—these fixes solve 90% of stubborn cases.
Door Seal Problems (The #1 Culprit)
A worn door gasket leaks heat, making ovens run cold. Test it:
- The dollar bill test: Close the door on a dollar bill. If it slips out easily, replace the seal.
- Visual check: Look for cracks, tears, or food debris in the rubber seal.
Replacing a seal takes 15 minutes and costs $20-$40. Watch a YouTube tutorial for your model—it’s easier than you think.
Heating Element Issues
If your oven heats unevenly (e.g., top rack burns, bottom stays raw), the element is failing:
- Gas ovens: Check for yellow flames (should be blue). Yellow = incomplete combustion = inaccurate temps.
- Electric ovens: Look for broken coils or dark spots on the element.
Replace elements yourself if you’re handy ($30-$80 part), or hire a pro. Never ignore this—it’s a fire hazard.
When Calibration Seems Impossible
If your oven won’t heat above 200°F or fluctuates wildly:
- Faulty temperature sensor: Electric ovens have a probe near the back wall. If it’s cracked or coated in grease, replace it ($15 part).
- Control board failure: Error codes like “F1” or “E3” mean the brain is broken. Time for a technician.
Pro tip: Before calling a pro, unplug the oven for 10 minutes. This resets the control board and fixes glitchy behavior 30% of the time.
Step 5: Maintaining Accuracy Long-Term (The 30-Second Habit)
Calibration isn’t a one-time fix. Ovens drift 5-10°F yearly. Build these habits to stay accurate:
Weekly Maintenance
- Wipe spills immediately: Burnt grease on the floor or walls insulates heat, causing hot spots. Use oven-safe cleaner (not steel wool!).
- Check the door seal: Run your finger along the seal weekly. If it feels brittle, replace it.
Monthly Deep Checks
- Test with a “baking buddy”: Place your thermometer in a baking dish of water. Bake at 350°F for 30 minutes—water should boil steadily at 212°F.
- Level your oven: Place a level on the rack. If it’s tilted, adjust the oven’s feet (underneath) with a wrench.
Annual Professional Tune-Up
Even well-maintained ovens need expert eyes every 2-3 years. A technician will:
- Clean clogged gas ports or burnt-out electric contacts
- Calibrate the thermostat to factory specs
- Test safety features (like auto-shutoff)
Cost: $80-$120—cheaper than replacing a ruined holiday ham!
When to Call a Professional (Don’t Risk It!)
Some issues demand a pro. Call immediately if:
- You smell gas: Evacuate and call the fire department. Do NOT turn lights on/off.
- The oven won’t heat above 200°F: Likely a failed thermostat or sensor.
- You see sparks or smoke: Unplug and call an electrician.
- Calibration fails after 3 attempts: The control board or wiring is damaged.
For gas ovens, always hire a licensed technician—DIY gas work is illegal in most areas and extremely dangerous.
Conclusion: Bake with Confidence, Not Guesswork
Calibrating your oven isn’t just about perfect cookies—it’s about reclaiming control in your kitchen. That “350°F” setting on your dial? Now you know it’s truth, not fiction. No more babysitting the oven or sacrificing recipes to guesswork. With a $10 thermometer and 20 minutes, you’ve fixed the silent saboteur in your kitchen.
Remember: Ovens drift, but your skills don’t have to. Test quarterly, maintain the seal, and adjust temps proactively. When your macarons finally have feet and your turkey hits 165°F internally on the first try, you’ll wonder why you waited so long. So grab that thermometer, find your calibration screw, and bake like the confident chef you are. Your future self—and your taste buds—will thank you.
Frequently Asked Questions
What’s the fastest way to calibrate an oven?
The quickest method is using your oven’s built-in calibration mode (if available). Access it via button combinations (e.g., “Bake” + “Broil” for 3 seconds), input your variance offset, and save. This takes under 10 minutes but only works on newer electric models.
Why won’t my oven’s temperature stabilize during testing?
Frequent door opening, a faulty door seal, or extreme ambient temps (like baking in a hot garage) cause instability. Always test with the door closed in a climate-controlled kitchen, and ensure the seal passes the dollar bill test.
Can I calibrate a microwave convection oven?
Yes, but focus on convection mode—microwave heating is inconsistent for calibration. Use the same thermometer method, but avoid metal racks. Note: Microwave-only functions can’t be calibrated for precise baking temps.
How do I know if my oven thermometer is accurate?
Test it in boiling water (should read 212°F at sea level) and ice water (32°F). If it’s off by >5°F, replace it. Cheap thermometers drift quickly—invest in a CDN ProAccurate or ThermoPro model.
Should I calibrate my oven before or after preheating?
Always test after full preheating (20+ minutes). Ovens heat unevenly initially—the thermostat only stabilizes when the cavity reaches equilibrium. Skipping this step gives false readings.
What’s the biggest mistake people make when calibrating?
Adjusting the thermostat based on one temperature point. Ovens behave differently at 200°F vs. 450°F. Always test at low, medium, and high temps to map the full drift pattern before making adjustments.