Master oven-baked chicken breast at 350°F with this essential guide! Discover the precise cooking time range (typically 20-30 minutes) based on thickness and whether it’s boneless or bone-in. Learn why using a meat thermometer is non-negotiable for perfect, safe, and juicy results every single time.
Key Takeaways
- Thickness is King: A standard 1-inch thick boneless chicken breast usually takes 20-25 minutes at 350°F. Thicker cuts need more time; thinner cuts cook faster.
- Thermometer is Essential: Relying solely on time leads to dry chicken. Always cook to an internal temperature of 165°F (74°C) measured at the thickest part.
- Resting is Crucial: Let chicken rest for 5-10 minutes after baking. This allows juices to redistribute, preventing them from spilling out when cut.
- Bone-In Takes Longer: Bone-in, skin-on breasts generally need 35-45 minutes at 350°F due to the bone acting as an insulator.
- Prep Matters: Patting breasts dry ensures better browning. Pounding thicker parts to even thickness promotes uniform cooking.
- Oven Variances Exist: Know your oven! Hot spots or calibration issues can affect timing. Rotate the pan halfway if needed.
- Seasoning Boosts Flavor: Simple salt, pepper, and herbs rubbed on the surface (or under the skin for bone-in) make a huge difference in taste.
Quick Answers to Common Questions
Can I bake frozen chicken breast at 350°F?
No, baking frozen chicken breast is not recommended. It leads to uneven cooking (dry outside, raw inside) and is a food safety risk. Always thaw chicken completely in the refrigerator before baking.
Why is my chicken breast still pink at 165°F?
Pink color in chicken cooked to 165°F is harmless and caused by myoglobin. Safety is determined solely by internal temperature, not color. If it’s at 165°F, it’s safe to eat.
How much longer does bone-in chicken take?
Bone-in, skin-on chicken breasts typically take 10-20 minutes longer than boneless, skinless breasts of similar size at 350°F. Expect 35-45 minutes total. Always use a thermometer.
Can I cover the chicken with foil while baking?
Covering with foil traps steam, preventing browning. It’s generally not needed for boneless breasts at 350°F. If your oven runs very hot or you have very thick breasts, you can tent loosely with foil for the last 10-15 minutes to prevent over-browning while the center cooks.
What’s the best way to pound chicken breasts evenly?
Place breasts between two sheets of plastic wrap or inside a zip-top bag. Use a meat mallet, heavy skillet, or rolling pin. Pound gently from the center outwards to an even thickness (about 1 inch), being careful not to tear the meat.
📑 Table of Contents
- The Ultimate Guide to Perfect Chicken Breast in Oven at 350°F
- Why Timing Isn’t Fixed: The Factors That Dictate Your Bake Time
- The Non-Negotiable Tool: Your Instant-Read Meat Thermometer
- Step-by-Step: Baking Perfect Chicken Breast at 350°F
- Troubleshooting Common Chicken Breast Problems
- Flavor Variations and Marinades for 350°F Baking
- Storing and Reheating Leftover Baked Chicken Breast
- Conclusion: Confidence in Every Bite
The Ultimate Guide to Perfect Chicken Breast in Oven at 350°F
We’ve all been there. You follow a recipe, set the timer, and pull out what should be a delicious, juicy chicken breast… only to find it dry, bland, and utterly disappointing. It’s a common kitchen tragedy, especially when baking chicken in the oven. The culprit? Often, it’s simply not knowing exactly how long chicken breast in oven 350 should cook. Timing isn’t one-size-fits-all, and guessing leads to frustration. But fear not! This guide cuts through the confusion. We’ll dive deep into the factors that determine the perfect bake time, the non-negotiable tool you need, and the simple steps to achieve consistently tender, flavorful, and safe chicken breast every single time you preheat that oven to 350 degrees Fahrenheit.
Why 350°F? It’s the sweet spot for baking chicken breast. It’s hot enough to cook the chicken through safely without drying it out excessively, yet gentle enough to allow even heat penetration, especially for thicker cuts. Higher temperatures (like 400°F or 425°F) can lead to burnt exteriors and raw interiors if you’re not careful. Lower temperatures take significantly longer and might not achieve that desirable slight browning. 350°F strikes that perfect balance for reliable results. Understanding how long chicken breast in oven 350 truly takes, however, requires looking beyond just the clock. It’s about the chicken itself, your oven, and a few key techniques. Let’s unlock the secrets.
Why Timing Isn’t Fixed: The Factors That Dictate Your Bake Time
You might find recipes stating “bake for 25 minutes.” While that’s a common starting point, blindly following it is a recipe for disaster (pun intended!). Several critical factors influence how long chicken breast in oven 350 needs to cook perfectly. Ignoring these is the fastest route to dry chicken.
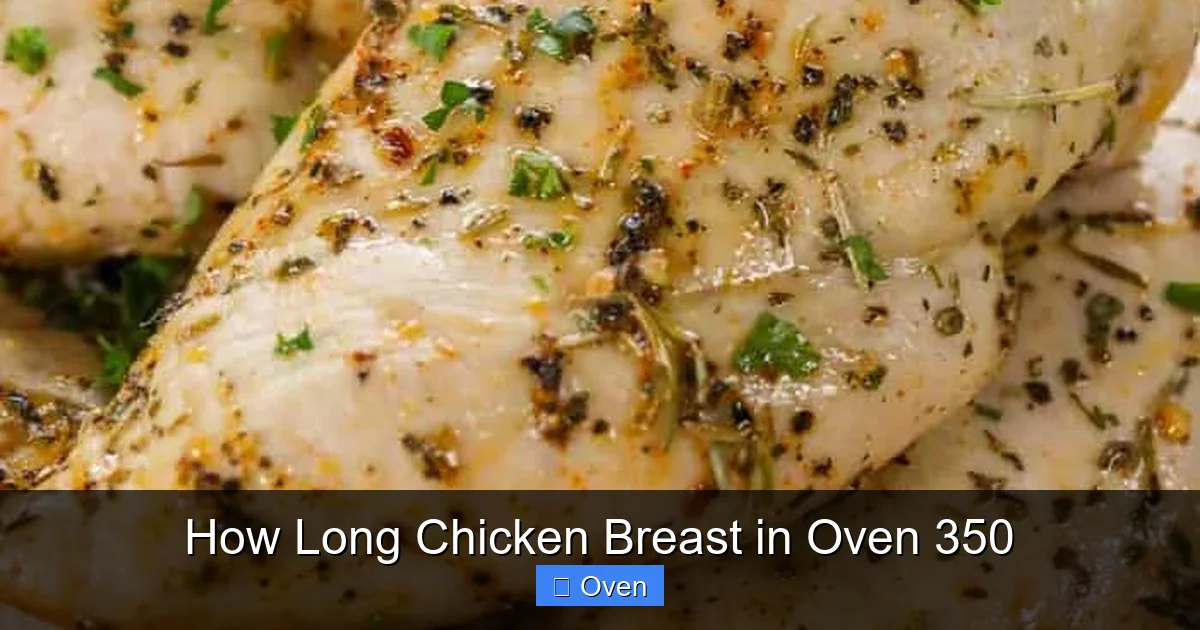
Visual guide about How Long Chicken Breast in Oven 350
Image source: cdn.apartmenttherapy.info
The Most Important Factor: Thickness
This is the absolute game-changer. A thin, pounded chicken cutlet (about 1/2 inch thick) will cook through in 12-15 minutes. A standard, untouched boneless, skinless breast, typically around 1 to 1.5 inches thick at its widest point, usually takes 20-25 minutes. A thick, premium-cut breast (1.75 inches or more) can easily need 30 minutes or longer. Why? Heat penetrates from the outside in. A thicker piece simply has more distance for the heat to travel to reach the center and hit that safe 165°F internal temperature. If you have breasts of varying thicknesses on the same pan, you’ll likely have uneven results – the thin ones will be overcooked by the time the thick ones are done.
Bone-In vs. Boneless: A Significant Difference
Bone-in, skin-on chicken breasts behave very differently from boneless, skinless ones. The bone acts as an insulator, slowing down the heat transfer to the meat. Consequently, bone-in breasts take considerably longer to cook through. While a boneless breast might be perfect at 25 minutes, a bone-in breast of similar overall size could easily need 35-45 minutes at 350°F. The skin also renders fat, which bastes the meat, but adds to the cooking time. If you prefer bone-in for flavor and moisture, be prepared to adjust your timing upwards significantly. Always prioritize the internal temperature over a fixed time for bone-in cuts.
Starting Temperature: Frozen vs. Thawed
Attempting to bake frozen chicken breast straight from the freezer at 350°F is strongly discouraged. It leads to uneven cooking – the outside can become dry and overcooked while the inside remains frozen or undercooked. This is a food safety risk and guarantees poor texture. Always thaw chicken breast completely in the refrigerator before baking. If you’re short on time, use the cold water thawing method (submerged in a leak-proof bag, changing water every 30 minutes), but never thaw at room temperature. Starting with properly thawed chicken ensures even heat penetration and predictable timing. Knowing how long chicken breast in oven 350 takes assumes the chicken is thawed.
Your Oven’s Personality: Hot Spots and Calibration
No two ovens are exactly alike. Some run hot, some run cool. Many have hot spots where one area cooks faster than another. This is why rotating your baking dish halfway through the estimated cooking time is a good practice. If your oven consistently runs hot, your chicken might be done 5 minutes earlier than expected. If it runs cool, it might need 5 minutes more. Getting to know your specific oven’s quirks is part of the mastery. An oven thermometer is a cheap and invaluable tool to check if your oven’s dial is accurate.
The Pan and Preparation
Using a dark, heavy-duty baking dish or sheet pan can promote better browning than a light-colored one. However, the type of pan itself doesn’t drastically alter the core cooking time for the chicken’s internal temperature. More impactful is how you prepare the chicken. Patting the breasts extremely dry with paper towels before seasoning is crucial. Moisture on the surface creates steam, which prevents the Maillard reaction (browning) from happening properly. If you’re using a marinade or oil, ensure excess is patted off. Also, if your breasts are uneven, place the thicker end towards the center of the pan where heat might be slightly more intense, or consider pounding the thicker part gently to even it out.
The Non-Negotiable Tool: Your Instant-Read Meat Thermometer
Let’s be crystal clear: An instant-read meat thermometer is the single most important tool for perfectly cooked chicken breast, bar none. Relying solely on cooking time, color, or texture guesses is how dry chicken happens. Here’s why it’s essential and how to use it correctly.
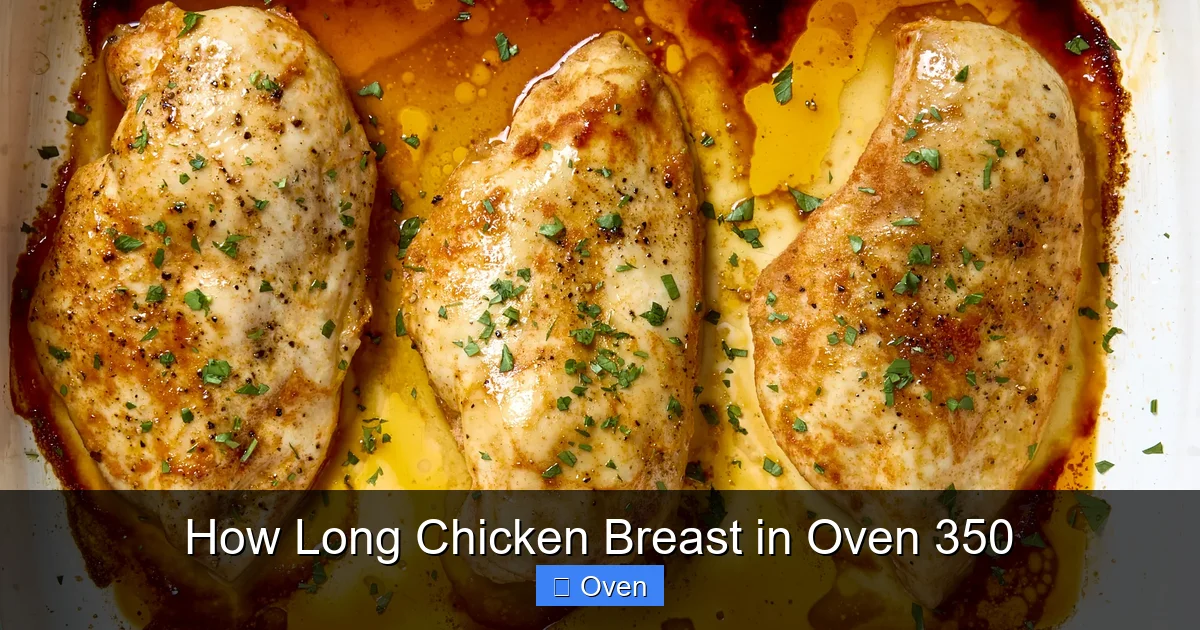
Visual guide about How Long Chicken Breast in Oven 350
Image source: recipetineats.com
Why Time Alone Fails
As we’ve established, thickness, bone presence, oven variances, and starting temperature all cause significant timing fluctuations. A recipe saying “25 minutes” might be perfect for *their* specific chicken and oven, but not yours. Chicken cooked to the correct internal temperature will always be safe and optimally juicy. Chicken cooked for the “right” time but not to 165°F might be unsafe. Chicken cooked past 165°F, even by a few degrees, starts losing moisture rapidly. The thermometer removes all guesswork.
How to Use Your Thermometer Correctly
Insert the probe into the absolute thickest part of the breast, making sure it doesn’t touch the bone (if bone-in) or the pan. For boneless breasts, aim for the geometric center. Wait for the reading to stabilize (usually 5-10 seconds for a good instant-read). The magic number is 165°F (74°C). This is the temperature recommended by the USDA for safe consumption, as it instantly kills harmful bacteria like Salmonella and Campylobacter. Some chefs argue that pulling chicken at 160°F and letting it rest allows carryover cooking to reach 165°F safely, resulting in slightly more moisture. While technically possible for very experienced cooks, for home cooks aiming for guaranteed safety and ease, hitting 165°F directly is the simplest and most reliable method. Remember, the temperature will rise 5-10°F during the resting period.
Choosing a Good Thermometer
Don’t skimp. Look for an instant-read thermometer with a thin probe (for easy insertion without large holes) and a fast readout (under 10 seconds). Digital models are generally more accurate and faster than analog dial types. Thermoworks Thermapen is the gold standard (though pricey), but many excellent, affordable options exist from brands like ThermoPro, Lavatools, and CDN. This small investment will transform your chicken cooking forever. It takes the mystery out of how long chicken breast in oven 350 truly needs to bake.
Step-by-Step: Baking Perfect Chicken Breast at 350°F
Now that you understand the why, let’s walk through the foolproof process for baking juicy, flavorful chicken breast at 350°F. This method works for boneless, skinless breasts – the most common type.
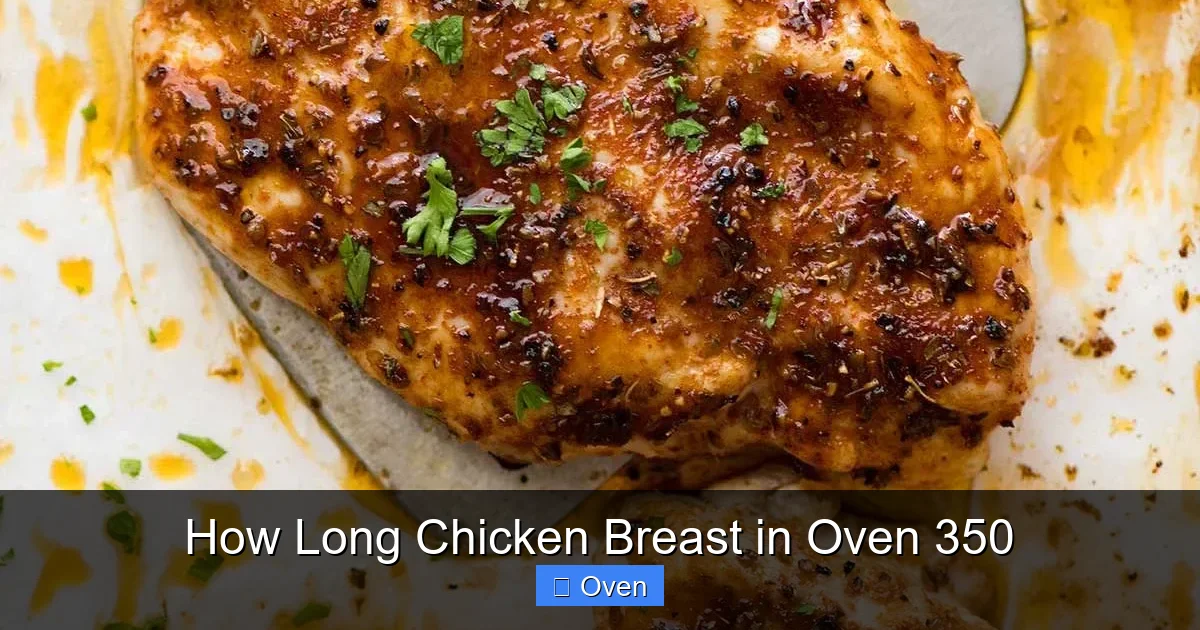
Visual guide about How Long Chicken Breast in Oven 350
Image source: spendwithpennies.com
Prep is Everything (5 Minutes)
Preheat your oven to 350°F (175°C). While it heats, take your thawed chicken breasts out of the fridge. Pat them thoroughly dry with paper towels – this step cannot be skipped for good browning. If the breasts are very thick (over 1.5 inches) or uneven, place them between two sheets of plastic wrap or in a zip-top bag and gently pound the thicker end with a meat mallet or heavy pan to an even thickness (aim for about 1 inch). This ensures even cooking. Season generously on both sides with salt and freshly ground black pepper. You can also add dried herbs like thyme, rosemary, or oregano, or a simple garlic powder. For extra flavor, rub a thin layer of olive oil or melted butter over the seasoned breasts – this helps conduct heat and promotes browning.
Baking Like a Pro (20-30 Minutes)
Place the seasoned chicken breasts on a baking sheet or in a baking dish. You can line the pan with parchment paper for easy cleanup, but it’s not strictly necessary. If you want crispy skin (for bone-in), place them skin-side up. For boneless, skinless, the side doesn’t matter as much. Leave a little space between each breast for even air circulation. Place the pan in the center rack of your preheated oven. Set your timer for the minimum estimated time based on thickness (e.g., 20 minutes for 1-inch thick). Do not walk away! Starting at the minimum time, check the internal temperature every 3-5 minutes using your instant-read thermometer. Insert it into the thickest part of the breast. When it reads 165°F, the chicken is done. Remember, it will continue to cook slightly from residual heat during resting.
The Critical Resting Phase (5-10 Minutes)
This is where many people go wrong. As soon as the chicken hits 165°F, remove the pan from the oven. Do not cut into it immediately! Transfer the chicken breasts to a clean plate or cutting board (you can tent loosely with foil if you’re worried about them cooling too much, but it’s not essential). Let them rest for at least 5 minutes, ideally 7-10 minutes. During this time, the juices that have been driven to the center by the heat begin to redistribute throughout the meat fibers. If you cut too soon, all those precious juices spill out onto the cutting board, leaving you with dry chicken. Resting allows the meat to reabsorb the juices, resulting in a much moister final product. This resting period is a vital part of the process, not downtime.
Serving Suggestions
After resting, slice the chicken against the grain (this shortens the muscle fibers, making it more tender) or serve it whole. It’s incredibly versatile! Serve it over a bed of roasted vegetables, alongside a simple green salad, sliced into grain bowls, chopped for tacos, or diced for sandwiches. A squeeze of fresh lemon juice or a simple pan sauce made from the drippings (deglaze the pan with a splash of broth or wine, simmer, and strain) elevates it beautifully.
Troubleshooting Common Chicken Breast Problems
Even with the best intentions, things can go sideways. Here’s how to diagnose and fix the most common issues when baking chicken breast at 350°F.
My Chicken is Dry and Tough
This is the #1 complaint. The primary cause is overcooking. Chicken breast meat has very little fat, so once it surpasses 165°F, moisture loss accelerates rapidly. Solution: Use a thermometer! Pull it at 165°F. Ensure you’re resting it properly. If you consistently find it dry even at 165°F, your oven might run very hot – verify with an oven thermometer. Also, check if your breasts are excessively thick; pounding them thinner helps. Avoid cooking bone-in breasts for the same time as boneless.
My Chicken is Still Pink Inside
First, check the temperature with your thermometer. If it’s at or above 165°F, the pink color is harmless. Myoglobin, the protein in meat, can remain pink even when fully cooked, especially in younger chickens or if the meat was exposed to certain gases in packaging. Safety is determined by temperature, not color. If the temperature is below 165°F and it’s pink, it needs more time in the oven. Insert the thermometer and continue baking in 3-5 minute increments until it reaches 165°F.
My Chicken is Undercooked in the Middle but Done on the Outside
This screams uneven thickness or a very thick cut. Solution: Pound thicker parts to even them out before baking. If it happens mid-bake, you can loosely tent the outside with foil to prevent further browning while the center catches up. For future batches, prioritize even thickness. Bone-in breasts are also prone to this due to the bone’s insulating effect – ensure you’re allowing enough extra time.
My Chicken Didn’t Brown
The most likely culprit is moisture on the surface. Did you pat the breasts extremely dry? Steam prevents browning. Solution: Next time, be obsessive about drying them. Also, ensure your oven is fully preheated before putting the chicken in. A thin layer of oil or butter helps conduct heat for better browning. Avoid overcrowding the pan, which lowers the pan’s temperature and creates steam.
My Chicken Stuck to the Pan
This usually happens if the pan wasn’t prepared properly or if you tried to move the chicken too soon. Solution: Use parchment paper or a well-oiled baking dish/sheet. Let the chicken rest in the pan for 2-3 minutes after baking before attempting to move it – this allows the proteins to release slightly from the surface. A thin metal spatula can help gently lift it.
Flavor Variations and Marinades for 350°F Baking
Plain baked chicken breast can be bland. The good news is that 350°F is a fantastic temperature for infusing flavor! Here are some delicious ways to elevate your chicken.
Simple Dry Rubs (Best for Boneless, Skinless)
Dry rubs are quick, easy, and create great flavor and texture. Combine your favorite spices with a little salt and maybe a touch of sugar (like brown sugar or smoked paprika) for caramelization. Popular combinations:
- Classic Herb: 1 tsp garlic powder, 1 tsp onion powder, 1 tsp dried thyme, 1 tsp dried oregano, 1/2 tsp black pepper, 1 tsp salt.
- Smoky Paprika: 1 tbsp smoked paprika, 1 tsp garlic powder, 1 tsp onion powder, 1/2 tsp cumin, 1/2 tsp black pepper, 1 tsp salt.
- Lemon Pepper: 2 tbsp lemon zest (or 1 tbsp lemon pepper seasoning), 1 tsp garlic powder, 1 tsp dried dill, 1 tsp salt.
Rub the mixture generously all over the dried chicken breasts before baking. The rub forms a delicious crust.
Quick Marinades (30 Minutes to 2 Hours)
Marinades add moisture and flavor penetration. Avoid long marinades with acidic components (like lemon juice or vinegar) as they can start to “cook” the surface, making it mushy. Stick to 30 minutes to 2 hours for best texture.
- Garlic-Herb: 1/4 cup olive oil, 3 minced garlic cloves, 2 tbsp chopped fresh rosemary & thyme, 1 tbsp lemon juice, salt & pepper.
- Honey-Soy: 3 tbsp soy sauce, 2 tbsp honey, 1 tbsp rice vinegar, 1 tbsp sesame oil, 1 tsp grated ginger, 1 minced garlic clove.
- Yogurt & Spice: 1/2 cup plain Greek yogurt, 1 tbsp curry powder, 1 tsp cumin, 1 tsp garlic powder, salt. (Yogurt tenderizes beautifully).
Place chicken and marinade in a zip-top bag, squeeze out air, and refrigerate. Turn occasionally. Pat very dry before baking to ensure browning.
Compound Butters (For Bone-In, Skin-On or Boneless)
Place flavored butter under the skin of bone-in breasts or on top of boneless breasts for incredible richness and flavor that bastes the meat as it melts.
- Garlic-Herb Butter: Soften 4 tbsp butter, mix with 2 minced garlic cloves, 1 tbsp chopped fresh parsley, 1 tsp chopped fresh thyme, salt & pepper.
- Lemon-Herb Butter: Soften 4 tbsp butter, mix with 1 tbsp lemon zest, 1 tbsp chopped fresh dill, 1 tbsp chopped fresh chives, salt.
Gently loosen the skin on bone-in breasts with your fingers and spread the butter underneath. For boneless, place a pat on top before baking.
Pan Sauces: Using the Drippings
Don’t waste those flavorful drippings! After removing the chicken and resting it, pour off excess fat (leave about 1 tbsp), then place the pan on the stovetop over medium heat. Add 1/2 cup chicken broth, wine, or water. Scrape up any browned bits (fond) from the bottom of the pan with a wooden spoon. Simmer for 3-5 minutes until slightly reduced. Strain if desired. Stir in a pat of cold butter for shine. Season with salt, pepper, and fresh herbs. Pour over the rested chicken.
Storing and Reheating Leftover Baked Chicken Breast
Proper storage and reheating are key to enjoying leftover chicken without it turning dry and rubbery.
Storing for Freshness
Allow cooked chicken breast to cool completely to room temperature (no more than 2 hours). Then, store it in an airtight container. You can store it:
- In the refrigerator: For up to 3-4 days.
- In the freezer: For up to 2-3 months (best quality). Slice or chop before freezing for easier use later. Wrap tightly in plastic wrap or freezer paper, then place in a freezer bag, squeezing out as much air as possible.
Label containers with the date.
Reheating Without Drying Out
Reheating is where leftovers often go wrong. Avoid the microwave if possible, as it dries chicken out quickly. Here are better methods:
- Oven (Best for Texture): Preheat oven to 250-300°F (120-150°C). Place chicken in a baking dish. Add a splash of broth, water, or the leftover pan sauce to the dish. Cover tightly with foil. Heat for 15-25 minutes, until warmed through (internal temp 165°F). The low heat and added moisture prevent drying.
- Stovetop (Good for Sliced/Chopped): Heat a small amount of oil or broth in a skillet over medium-low heat. Add chicken, cover, and heat gently for 5-10 minutes, stirring occasionally, until warmed through. Add a splash of liquid if it seems dry.
- Microwave (Use with Caution): If you must use the microwave, place chicken on a microwave-safe dish. Add a tablespoon of broth or water. Cover tightly with a damp paper towel or microwave-safe lid. Heat in 30-second intervals on 50% power, checking and stirring/flipping until warm. This minimizes drying.
Never reheat chicken more than once. Only reheat the portion you plan to eat immediately.
Conclusion: Confidence in Every Bite
Mastering how long chicken breast in oven 350 truly takes is simpler than you think, and it all boils down to understanding the variables and using the right tool. Ditch the guesswork and the dry chicken forever. Remember the golden rules: prioritize thickness (pound for evenness!), always use an instant-read thermometer to hit 165°F, and never skip the resting phase. Factor in whether your chicken is boneless or bone-in, and know your oven’s personality.
Baking chicken breast at 350°F is a reliable, hands-off method that yields fantastic results when done right. It’s perfect for busy weeknights, meal prep, or impressive dinners. With the knowledge from this guide – the importance of prep, the critical role of the thermometer, the impact of resting, and the solutions to common problems – you’re equipped to bake perfect chicken breast every single time. Experiment with the flavor variations to keep things exciting. Soon, you’ll move beyond just knowing the time and develop an intuitive sense for when your chicken is ready. Say goodbye to dry, disappointing chicken and hello to consistently juicy, flavorful, and safe oven-baked perfection. Your oven, set to 350°F, is now your most reliable tool for foolproof chicken breast. Happy baking!
Frequently Asked Questions
What is the exact time for chicken breast at 350°F?
There is no single exact time. A standard 1-inch thick boneless, skinless breast usually takes 20-25 minutes. However, thickness, bone presence, oven variations, and starting temperature cause significant differences. Always cook to 165°F internally.
Is 350°F the best temperature for baking chicken breast?
Yes, 350°F is widely considered ideal. It’s hot enough to cook safely and brown the exterior without excessive drying, yet gentle enough for even heat penetration, especially for thicker cuts. Higher temps risk burnt exteriors/raw interiors; lower temps take too long.
Can I cook chicken breast at 350°F without drying it out?
Absolutely! The keys are: using a meat thermometer to pull it at exactly 165°F (not higher), resting it for 5-10 minutes after baking, ensuring even thickness (pound if needed), and avoiding overcooking. Proper technique makes dryness preventable.
How do I know when chicken breast is done without a thermometer?
While not recommended, you can check: juices should run clear (not pink), the meat should feel firm to touch (not springy), and the thickest part should no longer be translucent. However, these methods are unreliable. A thermometer is the only safe and accurate way to ensure doneness and juiciness.
Why does my chicken breast take longer than the recipe says?
Common reasons include: thicker chicken than the recipe assumed, bone-in instead of boneless, oven running cooler than set, starting with colder chicken (not fully thawed or straight from fridge), or overcrowding the pan reducing oven temperature.
Can I bake chicken breast at 350°F with vegetables?
Yes! Toss root vegetables (potatoes, carrots, onions) with oil, salt, and pepper. Spread on a baking sheet. Place chicken breasts on top or nestled among them. Bake at 350°F. The chicken will likely be done before harder vegetables, so you may need to remove it and continue cooking the veggies, or choose quicker-cooking veggies like asparagus or zucchini added later.