Neglecting your oven style air fryer cleaning leads to stubborn grease, unpleasant odors, and even smoke during cooking. This guide provides clear, step-by-step instructions using safe methods to tackle every part, from the drip tray to the heating element area. Keep your air fryer performing perfectly and your food tasting great with regular maintenance.
Key Takeaways
- Clean Immediately After Use: Wipe the interior and remove the drip tray while warm (not hot) to prevent grease from hardening and becoming impossible to remove later.
- Deep Clean Weekly or Bi-Weekly: Even with quick wipes, schedule a thorough cleaning of all removable parts and the interior cavity at least once a week, especially after cooking fatty foods like bacon or chicken.
- Avoid Abrasives & Harsh Chemicals: Never use steel wool, scouring pads, or oven cleaners inside your air fryer. They damage non-stick coatings and leave harmful residues. Stick to soft cloths, sponges, and mild detergents.
- Never Submerge the Main Unit: The control panel, heating element housing, and electrical components must stay dry. Only clean the exterior with a damp cloth; never immerse the entire appliance in water.
- Dry Completely Before Reassembly: Ensure every part, especially the drip tray and interior surfaces, is 100% dry before putting the air fryer back together to prevent rust and electrical hazards.
- Check the Manual First: Always consult your specific model’s user manual for any unique cleaning instructions, dishwasher safety for parts, or warranty considerations.
Quick Answers to Common Questions
Can I put the drip tray and basket in the dishwasher?
Many oven style air fryer drip trays and baskets are dishwasher safe, usually on the top rack. However, always check your specific model’s user manual first. Some non-stick coatings or plastic parts may warp or degrade in the dishwasher. If unsure, hand washing with warm soapy water is always the safest bet.
Why does my air fryer smoke when I turn it on?
Smoke during preheating or cooking is almost always caused by burnt-on grease or food residue on the heating element or interior surfaces. This happens when cleaning is neglected, especially after cooking fatty foods. A thorough deep clean, focusing on the area around the heating element housing and the drip tray, will resolve this. If smoke persists after cleaning, unplug and contact the manufacturer.
How often should I deep clean my oven style air fryer?
As a general rule, perform a deep clean at least once a week. However, if you frequently cook greasy foods like bacon, chicken wings, or sausages, you may need to deep clean after every 2-3 uses or immediately after those specific meals. The quick wipe-down after every use is essential regardless.
Can I use oven cleaner inside my air fryer?
Absolutely not! Oven cleaners contain harsh chemicals that can damage the non-stick coatings, plastic components, and leave toxic residues that contaminate your food. They can also void your warranty. Stick to mild dish soap, baking soda paste, and white vinegar solutions for safe and effective cleaning.
What’s the best way to clean around the heating element?
Never spray water or cleaner directly near the heating element. Use a microfiber cloth lightly dampened with warm, soapy water (wrung out extremely well) to gently dab or wipe the area. For stubborn grease, apply a baking soda paste with a soft brush, let it sit, then gently scrub. Always follow with a clean, damp cloth to remove residue and a dry cloth to ensure no moisture remains. Patience and gentle methods are crucial here.
📑 Table of Contents
- Why Cleaning Your Oven Style Air Fryer Isn’t Just a Chore (It’s Essential!)
- What You’ll Need: Your Air Fryer Cleaning Toolkit
- Step-by-Step Cleaning: From Quick Wipe to Deep Clean
- Tackling the Toughest Grease: Oven-Style Air Fryer Deep Cleaning Hacks
- Drying and Reassembly: The Critical Final Steps
- Maintaining Your Sparkling Air Fryer: Pro Tips for Long-Term Ease
- Conclusion: A Clean Air Fryer is a Happy (and Healthy) Air Fryer
Why Cleaning Your Oven Style Air Fryer Isn’t Just a Chore (It’s Essential!)
So, you’ve got this sleek, countertop marvel – your oven style air fryer. It’s been churning out crispy fries, juicy chicken, and maybe even some impressive baked goods. But lately, you’ve noticed something… off. Maybe there’s a faint smoky smell when it preheats, or the food doesn’t seem as crispy as it used to. Perhaps you’re seeing stubborn, dark splatters stuck to the interior walls. Sound familiar? That’s your air fryer crying out for a proper clean.
Unlike a traditional oven, the compact, high-heat environment of an air fryer is a grease magnet. Every time you cook fatty foods – think bacon, sausages, chicken wings, or even roasted vegetables with oil – tiny droplets of grease and food particles get splattered onto the interior surfaces, the heating element housing, and especially the drip tray. If left unchecked, this buildup doesn’t just look gross; it becomes a serious problem. Burnt-on grease can smoke profusely during preheating or cooking, filling your kitchen with an unpleasant odor and potentially triggering smoke alarms. It can also insulate the heating element, making your air fryer less efficient and causing uneven cooking. Worst of all, that charred residue can impart a bitter, off-flavor to your otherwise delicious food. Cleaning isn’t just about aesthetics; it’s fundamental to safety, performance, and taste.
Ignoring cleaning leads to a vicious cycle. The more grease builds up, the harder it is to remove later. What starts as a quick wipe-down after one meal can turn into a major scrubbing session weeks down the line, requiring harsh methods that might damage your appliance. Regular, proper cleaning breaks this cycle. It keeps your air fryer operating at peak efficiency, ensures your food tastes as intended (not like last week’s dinner), prevents dangerous smoke, and significantly extends the life of your investment. Think of it as essential maintenance, like changing the oil in your car. A little effort now saves you big headaches and potentially costly repairs later. Let’s dive into exactly how to keep your oven style air fryer sparkling clean and performing flawlessly.
What You’ll Need: Your Air Fryer Cleaning Toolkit
Before you start tackling that grease, gather your supplies. Having everything ready makes the process smooth and prevents you from scrambling mid-clean. The good news is you likely already have most of these items lying around your kitchen. No need for expensive specialty cleaners!
Visual guide about How to Clean an Oven Style Air Fryer
Image source: m.media-amazon.com
Essential Supplies
- Microfiber Cloths or Soft Sponges: These are your best friends. They’re gentle on non-stick surfaces and effectively lift grease without scratching. Avoid anything abrasive like steel wool or green scrub pads – they’ll ruin coatings.
- Mild Dish Soap: A standard, phosphate-free dish soap like Dawn or similar is perfect. It cuts grease effectively without leaving harsh residues. Avoid strong degreasers or oven cleaners – they’re too harsh.
- Warm Water: Always use warm (not scalding hot) water for cleaning solutions and rinsing. Hot water can sometimes set grease stains.
- Soft-Bristled Brush (Optional but Helpful): A dedicated, clean toothbrush or a small nylon brush is excellent for getting into crevices around the heating element housing or the edges of the drip tray. Ensure it’s soft-bristled.
- Baking Soda (For Tough Grease): This gentle abrasive and deodorizer is fantastic for making a paste to tackle stubborn, baked-on grease without scratching.
- White Vinegar (For Deodorizing & Light Cleaning): Useful for a final wipe-down to remove soap residue and neutralize odors, or for a light descaling if you have hard water (though less common in air fryers than kettles).
- Dry Towels: You’ll need several clean, dry towels for thorough drying – crucial before reassembly.
What NOT to Use
- Abrasive Cleaners (Steel Wool, Scouring Pads): These will scratch and ruin the non-stick coating on drip trays and interior surfaces, making them harder to clean next time and potentially flaking off into your food.
- Oven Cleaners or Heavy-Duty Degreasers: These chemicals are far too harsh. They can damage plastic components, leave toxic residues that contaminate your food, and void your warranty.
- Harsh Chemical Disinfectants: Bleach or similar strong chemicals are unnecessary and risky. They can react with grease or leave dangerous residues. Mild soap and water are sufficient for cleaning food contact surfaces.
- Putting the Main Unit in Water: Never submerge the control panel, the main housing containing the fan and heating element, or the electrical cord in water. This will cause irreparable damage and is a serious electrical hazard.
Having this simple toolkit ready means you can clean efficiently and safely. Remember, the goal is effective cleaning without damaging your appliance. Now, let’s get into the step-by-step process.
Step-by-Step Cleaning: From Quick Wipe to Deep Clean
Cleaning your oven style air fryer isn’t a one-size-fits-all task. It depends on how dirty it is. We’ll cover both the essential quick clean you should do after *every* use and the deeper clean needed weekly or bi-weekly. Always unplug the air fryer and let it cool down completely before starting any cleaning. Safety first!
Visual guide about How to Clean an Oven Style Air Fryer
Image source: airfryerworld.com
The Essential Quick Clean (After Every Use)
This takes just 2-3 minutes but makes a massive difference in preventing buildup. Do this while the air fryer is still warm (but not hot to the touch – wait 10-15 minutes after cooking).
- Remove the Drip Tray and Food Basket: Pull out the main cooking chamber (the basket or drawer). Lift out the drip tray located underneath it. This is where most grease collects.
- Empty and Rinse: Discard any large food debris from the basket and drip tray into the trash. Rinse both parts under warm running water. A quick rinse often removes loose particles.
- Wipe the Interior Cavity: Take a damp microfiber cloth (lightly dampened with warm water, maybe a tiny drop of soap) and wipe down the interior walls, ceiling, and floor of the main cooking chamber. Focus on areas where grease splatters are visible, especially near the top where the heating element is housed. Don’t forget the sides and back. This removes fresh grease before it hardens.
- Wipe the Exterior: Use a separate damp cloth to wipe down the outside of the air fryer, including the control panel (be gentle, avoid excessive moisture near buttons), the handle, and the outer casing. A dry cloth can follow to prevent water spots.
- Quick Basket/Tray Clean: Give the basket and drip tray a quick wash with warm, soapy water and a soft sponge. Rinse thoroughly. If they’re dishwasher safe (check your manual!), you can pop them in for this quick clean.
- Dry and Reassemble: Dry the basket, drip tray, and interior cavity *completely* with a clean towel before sliding everything back in. Never put wet parts back into the main unit.
This routine prevents 80% of cleaning headaches. It’s the single most important habit for air fryer longevity.
The Weekly Deep Clean (Tackling Built-Up Grease)
Even with quick cleans, grease accumulates over time, especially around the heating element housing and on the drip tray. Schedule this for once a week, or immediately after cooking particularly greasy foods.
- Unplug and Cool Completely: This is non-negotiable. Ensure the air fryer is stone cold to the touch.
- Remove All Parts: Take out the food basket and the drip tray. If your model has a separate rack or other accessories, remove those too.
- Clean the Drip Tray Thoroughly: This is usually the dirtiest part. Fill your sink with warm, soapy water. Let the drip tray soak for 10-15 minutes to loosen grease. Scrub gently with a soft sponge or brush. For stubborn, baked-on grease, make a paste of baking soda and water. Apply it to the greasy areas, let it sit for 15-30 minutes, then scrub gently. Rinse extremely well. *Check your manual: Some drip trays are dishwasher safe (top rack), others are not.*
- Clean the Food Basket: Wash the basket similarly to the drip tray. Pay attention to corners and any grooves. Baking soda paste works wonders here too for stuck-on bits. Rinse thoroughly. *Dishwasher safety varies – manual is key.*
- Deep Clean the Interior Cavity: This is the trickiest part. Never spray water or cleaner directly into the main unit. Dampen a microfiber cloth with warm, soapy water (very little soap, well wrung out – it should be damp, not wet). Wipe all interior surfaces: walls, ceiling, floor, and especially the area around the heating element housing (the metal coil or element you see at the top). Be meticulous but gentle. For greasy spots near the element, dip a corner of the cloth in the soapy water, wring it *very* well, and dab/lightly wipe. Avoid getting water into the element housing vents if possible. For persistent grease in crevices, use a soft-bristled brush dipped in soapy water, wrung out well. Wipe again with a clean, damp cloth (water only) to remove soap residue, then immediately dry *thoroughly* with a dry microfiber cloth. A final wipe with a cloth lightly dampened with white vinegar can help neutralize odors and remove any lingering soap film, followed by a dry wipe.
- Clean Accessories: Wash any racks, skewers, or other included accessories with warm, soapy water. Dry completely.
- Clean the Exterior Thoroughly: Wipe down the entire outside, including the control panel (use a barely damp cloth, avoid pooling water), handle, and vents. Pay attention to grease splatters on the front window or door. Dry with a clean cloth.
- Final Drying is CRITICAL: Ensure *every single part* – the interior cavity, basket, drip tray, accessories – is 100% bone dry. Use dry towels and allow extra air drying time if needed. Moisture trapped inside can cause rust or electrical issues.
- Reassemble: Once everything is completely dry, slide the drip tray back in, then the food basket. Plug in and do a quick 5-minute test run (empty) to ensure everything is working and dry.
This deep clean might take 20-30 minutes, but it keeps your air fryer healthy. Don’t skip the drying step!
Tackling the Toughest Grease: Oven-Style Air Fryer Deep Cleaning Hacks
Sometimes, despite your best efforts with regular cleaning, you hit a wall. That layer of grease on the drip tray looks like ancient tar, or there’s a dark, sticky film clinging to the interior walls near the heating element. Don’t panic! Before you consider drastic measures, try these safe and effective deep cleaning hacks specifically designed for oven-style air fryers. Remember, patience and the right gentle methods are key – no harsh chemicals!
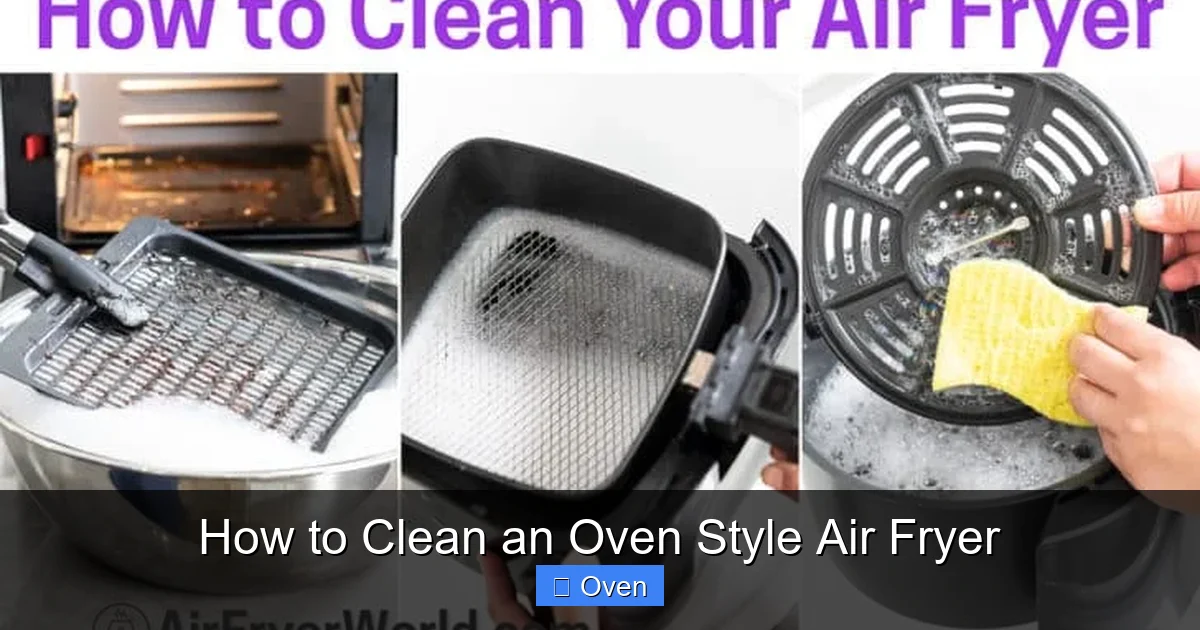
Visual guide about How to Clean an Oven Style Air Fryer
Image source: airfryerworld.com
Baking Soda Paste: Your Gentle Powerhouse
This is the MVP for tough, baked-on grease. Baking soda is a mild abrasive that lifts grime without scratching, and it’s a natural deodorizer.
- Make the Paste: Mix 3-4 tablespoons of baking soda with just enough warm water to form a thick, spreadable paste (like toothpaste). You want it to stick, not run.
- Apply Strategically: Using a soft cloth, old toothbrush, or your fingers (wear gloves if you prefer), apply the paste liberally to the greasy areas. Focus on the drip tray, the interior walls, and especially the nooks and crannies around the heating element housing. Avoid getting large amounts directly into the element housing vents.
- Let it Work: This is crucial! Cover the paste-covered areas with plastic wrap or just leave it be, but let it sit for at least 30 minutes, or even overnight for really stubborn buildup. The paste will dry out and work its magic, breaking down the grease.
- Gentle Scrubbing: After it’s sat, use a soft-bristled brush (toothbrush works great) or a damp microfiber cloth to gently scrub the paste. The grease should start lifting. Reapply paste to stubborn spots if needed.
- Rinse Thoroughly: Wipe away all paste residue with a clean, damp cloth, then dry immediately and completely. No baking soda taste will remain if rinsed well.
This method is safe for non-stick surfaces and incredibly effective. It’s far better than risking damage with abrasives.
Vinegar Solution for Deodorizing and Light Descale
While not a heavy grease cutter like baking soda paste, white vinegar is excellent for the final step. It cuts through any lingering soap film, neutralizes odors (that “air fryer smell”!), and can help with minor mineral deposits if you have hard water (though less common than in kettles).
- Dilute Properly: Mix equal parts white vinegar and warm water in a spray bottle (e.g., 1/2 cup vinegar + 1/2 cup water). Never use undiluted vinegar directly on surfaces, as it can be too strong.
- Spray Lightly: Lightly mist the solution onto a clean microfiber cloth – do not spray directly into the air fryer cavity. The cloth should be damp, not soaking wet.
- Wipe Down: Use the vinegar-dampened cloth to wipe the interior surfaces (walls, ceiling, floor), the cleaned drip tray, and the food basket. This removes soap residue and odors.
- Final Dry Wipe: Immediately follow with a clean, dry microfiber cloth to remove all moisture and vinegar smell. The vinegar odor dissipates completely as it dries.
This step leaves your air fryer smelling fresh and ensures no chemical taste transfers to your food.
When to Call It Quits (and Seek Professional Help)
There are limits to what home cleaning can achieve. If you encounter:
- Severe Rust: Significant rust on the drip tray or interior metal parts (beyond surface spots you can scrub off with baking soda). This can compromise safety and food quality. Replacement parts might be needed.
- Damaged Non-Stick Coating: Large flakes or peeling coating on the drip tray or basket. Continuing to use it can lead to coating in your food. Replace the part.
- Persistent Smoke or Burning Smell: Even after a thorough deep clean, if your air fryer still smokes excessively or smells like burning plastic during use, unplug it immediately. This could indicate an electrical issue or debris *inside* the heating element housing that you cannot safely access. Contact the manufacturer for support or a qualified appliance repair technician. Do not attempt to disassemble the main unit yourself.
Knowing when to stop cleaning and seek professional help prevents further damage and ensures your safety. Don’t risk using an appliance that’s malfunctioning due to deep-seated grease or damage.
Drying and Reassembly: The Critical Final Steps
You’ve scrubbed, wiped, and battled the grease. You’re almost done! But skipping or rushing the drying and reassembly steps can undo all your hard work and potentially damage your air fryer. This phase is absolutely critical for safety and longevity. Think of it as the seal on a jar – if it’s not done right, everything inside spoils.
Why Drying is Non-Negotiable
Moisture is the enemy of your air fryer’s internal components. Here’s why thorough drying is so important:
- Prevents Rust: The drip tray and any exposed metal parts inside the cavity are susceptible to rust if left damp. Rust flakes can contaminate your food and degrade the appliance’s structure.
- Avoids Electrical Hazards: Water and electricity are a dangerous mix. Moisture trapped near the heating element, fan motor, or wiring can cause short circuits, malfunctions, or even electrical shocks when you plug it back in. This is a serious safety risk.
- Eliminates Musty Odors: Dampness creates the perfect environment for mold and mildew to grow inside the cavity, leading to persistent unpleasant smells that transfer to your food.
- Ensures Proper Function: Residual moisture can interfere with the heating element’s performance or cause erratic behavior in electronic controls.
Never assume “it feels dry.” Take the extra time to ensure it’s 100% bone dry.
Effective Drying Techniques
Don’t just leave parts sitting on the counter and hope for the best. Use these methods for guaranteed dryness:
- Towel Drying: After washing, immediately use clean, absorbent microfiber towels or cotton dish towels to blot and wipe every surface of the drip tray, food basket, and accessories. Pay special attention to corners, grooves, and the underside of parts. Change towels as they get damp.
- Air Drying (The Gold Standard): Place all cleaned and towel-dried parts upside down on a clean rack or towel in a well-ventilated area, away from direct sunlight or heat sources (which can warp plastic). Allow them to air dry completely. This can take 1-2 hours for baskets/trays, and significantly longer (several hours to overnight) for the *interior cavity* of the main unit after wiping. Patience is key here.
- Interior Cavity Drying: After wiping the inside with damp cloths, use a *dry* microfiber cloth to wipe every surface again. Then, leave the air fryer door open and place a fan nearby (not directly blasting hard into it) to circulate air through the cavity for several hours. You can also place a clean, dry towel inside the cavity (not touching the heating element!) to absorb residual moisture, replacing it as it gets damp. Check periodically – it should feel completely dry to the touch with no cool spots.
- Avoid Heat Guns or Hair Dryers: While tempting, these can melt plastic components or force moisture deeper into crevices. Stick to air drying and towels.
Safe Reassembly Checklist
Only reassemble when you are 100% certain everything is dry. Follow this checklist:
- Drip Tray: Ensure it’s completely dry inside and out. Slide it firmly back into the bottom of the cavity until it seats properly.
- Food Basket: Make sure it’s dry. Place it back into the cavity, ensuring it sits level and slides in/out smoothly without catching.
- Accessories: Any racks or tools should be dry and placed correctly inside the basket.
- Exterior: Give the outside one last quick dry wipe if needed.
- Final Check: Before plugging in, visually inspect the interior cavity one more time. Run your hand (carefully!) along the walls and floor – it should feel completely dry and cool. No dampness, no cool spots.
- Test Run: Plug in the air fryer. Run it empty for 5 minutes at a medium temperature (e.g., 350°F/175°C). This ensures everything is dry and functioning correctly. If you smell anything odd (burning, plastic), unplug immediately and recheck for moisture.
Rushing this step is the fastest way to ruin your cleaning effort and potentially your air fryer. Take the time – it’s worth it for a safe, long-lasting appliance.
Maintaining Your Sparkling Air Fryer: Pro Tips for Long-Term Ease
You’ve mastered the deep clean, but the real secret to never dreading oven style air fryer cleaning is consistent, simple maintenance. Think of it like brushing your teeth – a little effort daily prevents major dental work later. These pro tips will keep your air fryer performing like new with minimal fuss.
The Power of the Immediate Wipe
This cannot be overstated. The single biggest difference between an easy clean and a nightmare scrub session is tackling grease while it’s still warm and soft. After you’ve removed your food:
- While the air fryer is cooling (but still warm to the touch, ~10-15 mins after unplugging), take 60 seconds to wipe the interior walls and ceiling with a *barely* damp microfiber cloth. Focus on visible splatters.
- Remove the drip tray and give it a quick rinse under warm water. A quick soap scrub if needed, then dry.
- This prevents grease from polymerizing (hardening into a plastic-like substance) and makes your weekly deep clean infinitely easier. It’s the habit that saves you hours of scrubbing later.
Strategic Cooking to Minimize Mess
You can’t avoid grease entirely, but you can reduce the splatter:
- Pat Food Dry: Before cooking, pat meats and vegetables dry with paper towels. Excess surface moisture causes more splattering.
- Don’t Overcrowd: Cook in batches if needed. Overcrowding traps steam, leading to less crispiness and more splatter as food releases moisture and fat.
- Use Liners Wisely: Parchment paper with holes (or specially designed air fryer liners) can catch drips, especially for saucy foods or small items. Never use regular parchment without holes or foil that blocks airflow completely – it can cause dangerous overheating. Always ensure proper ventilation.
- Choose Leaner Cuts (When Possible): Opt for chicken breasts over thighs, or trim excess fat from meats before cooking.
Your Cleaning Schedule Made Simple
Consistency beats intensity. Stick to this easy schedule:
- After Every Use: Quick wipe of interior cavity (while warm), rinse drip tray/basket, dry exterior. (2-3 mins)
- Weekly: Full deep clean of drip tray, basket, and interior cavity. (20-30 mins)
- Monthly: Extra attention to the area around the heating element housing with baking soda paste if needed. Check for any lingering odors.
- After Greasy Meals (Bacon, Wings, etc.): Do the weekly deep clean immediately after, don’t wait.
Set a recurring reminder on your phone if it helps. Making it routine removes the mental barrier.
Storing Parts Correctly
How you store cleaned parts impacts future cleaning:
- Ensure drip trays and baskets are *completely* dry before storing them back in the air fryer or in a cupboard.
- If storing separately, keep them in a well-ventilated area, not stacked tightly while damp.
- Never store a damp basket inside the main unit – it traps moisture.
Know Your Manual Inside Out
Your specific model might have quirks:
- Double-check which parts are dishwasher safe (usually the basket and drip tray, often top rack only).
- Note any specific warnings about cleaning near certain components.
- Understand the warranty terms regarding cleaning – using harsh chemicals might void it.
- Keep the manual handy (or saved as a PDF) for quick reference.
By weaving these simple habits into your cooking routine, cleaning your oven style air fryer transforms from a dreaded chore into a quick, almost effortless part of enjoying your delicious, healthy meals. The payoff – a consistently great-tasting, safe, and long-lasting appliance – is absolutely worth the minimal effort.
Conclusion: A Clean Air Fryer is a Happy (and Healthy) Air Fryer
Cleaning your oven style air fryer might not be the most glamorous part of owning one, but it’s undeniably the most important factor in unlocking its full potential. We’ve journeyed through the why (safety, performance, taste), the how (step-by-step guides for quick and deep cleans), and the pro tips for making it effortless. Remember, that stubborn grease isn’t just unsightly; it’s a barrier between you and perfectly crispy, flavorful food, and a potential fire hazard lurking in your kitchen.
The key takeaway is consistency over intensity. That 2-minute wipe-down after dinner is infinitely more effective and less painful than a 30-minute battle with carbonized bacon grease a month later. Embrace the immediate wipe, stick to your weekly deep clean schedule, and always, *always* prioritize thorough drying. Your air fryer isn’t just a cooking appliance; it’s an investment in convenient, healthy eating. Treating it with the care it deserves – using gentle methods like baking soda paste and avoiding harsh abrasives – ensures it rewards you with delicious results for years to come. No more smoky preheats, no more off-flavors, just reliable, efficient cooking. So, the next time you pull out your air fryer, take that extra minute to give it a quick clean. Your future self (and your taste buds) will thank you. Happy (and clean) air frying!
Frequently Asked Questions
How do I remove burnt food from the air fryer basket?
For burnt food in the basket, soak it in warm, soapy water for 15-30 minutes to loosen the debris. Then, gently scrub with a soft sponge or brush. For stubborn residue, make a thick paste of baking soda and water, apply it to the burnt areas, let it sit for an hour or more, then scrub gently. Avoid abrasive pads that can scratch the non-stick coating.
Can I use vinegar to clean my air fryer interior?
Yes, diluted white vinegar is safe and effective for the final wipe-down. Mix equal parts vinegar and water, dampen a microfiber cloth (do not spray directly inside), and wipe the interior surfaces. It helps remove soap residue, neutralize odors, and leaves a fresh smell. Always follow with a dry cloth to remove all moisture.
Is it safe to clean the air fryer while it’s still warm?
It’s safe and highly recommended to do the quick wipe-down of the interior cavity and drip tray removal while the air fryer is warm (not hot), about 10-15 minutes after unplugging. This makes grease easier to remove. However, for deep cleaning involving water or soaking parts, always wait until the appliance is completely cool to the touch for safety.
Why is my air fryer leaving a weird taste on food?
A strange or off-taste on food is usually caused by old, burnt grease or food residue inside the air fryer, particularly around the heating element or on the drip tray. This residue gets heated and imparts flavors to your food. A thorough deep clean, focusing on removing all built-up grease, will eliminate this problem.
How do I clean the air fryer door/window?
Clean the exterior glass door with a damp microfiber cloth and mild dish soap. For interior splatters on the glass, wipe with a cloth dampened with the vinegar solution (equal parts vinegar and water) or baking soda paste for tough spots. Avoid abrasive cleaners. Dry thoroughly with a clean cloth to prevent streaks.
What should I do if water gets inside the main unit?
If water accidentally gets inside the main cavity near the electronics or heating element, unplug the air fryer immediately. Leave the door open and allow it to air dry completely for at least 24-48 hours in a well-ventilated area, possibly with a fan nearby. Do not attempt to use it until you are 100% certain it is dry. If you suspect significant water ingress, contact the manufacturer for advice.