
Mastering chicken wing cook times in your toaster oven air fryer is simpler than you think! This guide breaks down exact timing based on wing size, temperature, and quantity for foolproof crispy results. Stop guessing and start serving perfect wings every single time.
Key Takeaways
- Temperature is critical: 380°F-400°F (193°C-204°C) is the sweet spot for crispy skin without burning
- Size matters most: Small wings cook in 10-12 mins, large/drumettes need 14-18 mins at 400°F
- Flip halfway through: Essential for even cooking and preventing soggy bottoms
- Sauce at the end: Toss wings in sauce during the last 2-3 minutes to avoid burning sugars
- Rest before serving: Let wings sit 2-3 minutes after cooking for juicier results
- Don’t overcrowd: Cook in single layers with space between wings for proper air circulation
Quick Answers to Common Questions
Can I cook frozen chicken wings in a toaster oven air fryer?
Yes! Cook frozen wings straight from the freezer. Increase cook time by 3-5 minutes compared to thawed wings. Ensure they’re in a single layer and pat dry after 5 minutes if excess liquid pools. Always check internal temperature reaches 160°F.
Why are my air fryer wings soggy?
Soggy wings usually mean overcrowding the basket (steaming instead of crisping), not drying wings thoroughly before cooking, or adding sauce too early. Always pat wings bone-dry, cook in a single layer with space, and sauce only in the last 2-3 minutes.
Do I need to preheat my toaster oven air fryer for wings?
Absolutely! Preheating for 3-5 minutes ensures even cooking and proper crisping from the first second. Starting cold leads to longer cook times and uneven results. It’s a small step with a big impact.
Can I use baking powder to make wings crispier?
Yes! Toss dried wings with 1 tsp baking powder and 1 tsp cornstarch per pound before oiling. Baking powder raises pH, helping proteins crisp faster and creating an extra-crispy, almost fried-like texture. Don’t skip the drying step first!
How do I know when wings are done without a thermometer?
While a thermometer is best, look for: clear juices running from the thickest part when pierced, meat pulling easily from the bone, and internal temp of 160°F (carryover cooks to 165°F). If unsure, cook 1-2 minutes longer – better slightly over than under.
📑 Table of Contents
- Why Your Toaster Oven Air Fryer is the Ultimate Wing Weapon
- The Golden Rules: Factors That Dictate Your Cook Time
- Your Step-by-Step Guide to Perfect Air Fryer Wings
- Avoiding the Wing Wrecking Crew: Common Mistakes
- Beyond the Basics: Flavor Variations & Pro Tips
- Your Wing Mastery Checklist
- Conclusion: Crispy, Juicy Wings Are Yours for the Taking
Why Your Toaster Oven Air Fryer is the Ultimate Wing Weapon
Hey there, wing lover! Tired of rubbery, soggy, or unevenly cooked chicken wings? You’re not alone. That sad takeout box or disappointing oven batch can really kill the vibe. But here’s the game-changer: your toaster oven air fryer is actually the PERFECT tool for restaurant-quality wings at home. Seriously! It combines the intense, direct heat of a traditional air fryer with the larger capacity of a toaster oven. This means you can cook more wings at once without sacrificing that magical crispiness we all crave.
Unlike deep frying (which is messy and heavy) or baking (which often leaves wings steamed and soft), the air fryer function uses rapid, circulating hot air. This mimics professional convection ovens, crisping the skin beautifully while locking in juices. The best part? It’s incredibly fast. While traditional methods might take 45+ minutes, your toaster oven air fryer can have wings ready in 15-20 minutes flat. No more waiting around! But here’s the catch: getting that perfect timing down is crucial. Cook them too long and they’re dry leather. Too short and they’re raw in the middle. That’s exactly why knowing how long to cook chicken wings in toaster oven air fryer makes all the difference between wing greatness and wing regret.
The Golden Rules: Factors That Dictate Your Cook Time
Before we dive into exact numbers, let’s talk reality. There’s no single magic time that works for everyone. Your perfect cook time depends on several key factors. Ignoring these is the #1 reason people end up with disappointing wings. Think of it like baking a cake – you wouldn’t use the same time for a cupcake as a layer cake, right? Wings work the same way.

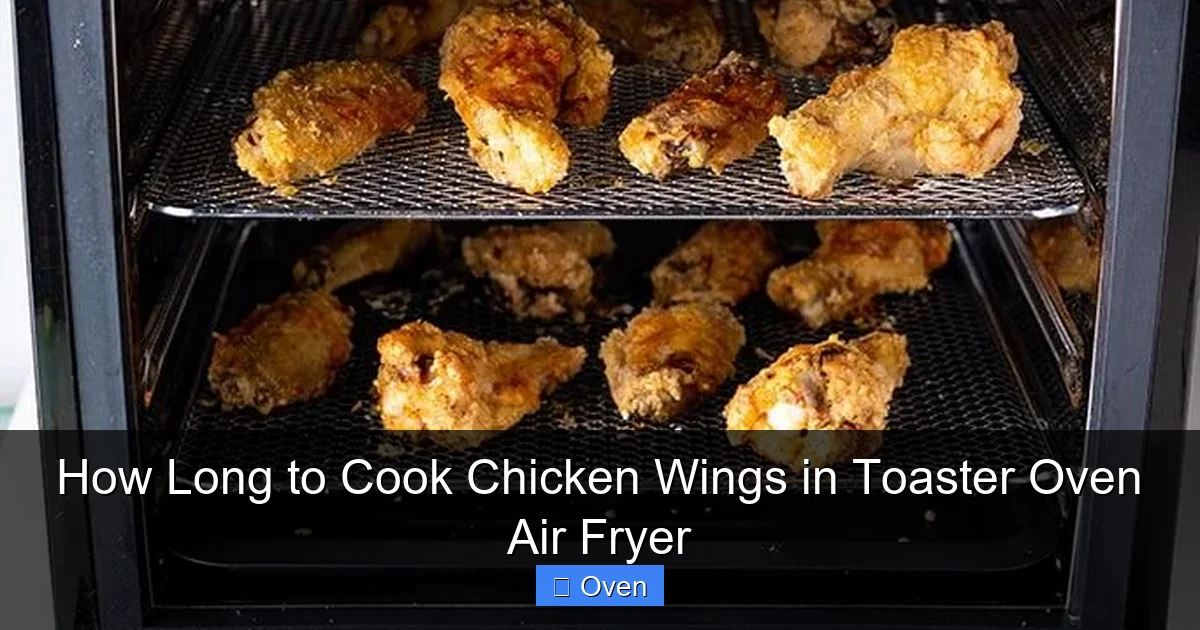
Visual guide about How Long to Cook Chicken Wings in Toaster Oven Air Fryer
Image source: wellplated.com
Wing Size and Cut: The Biggest Time Variable
This is HUGE. Not all wings are created equal! A standard “wing” from the grocery store is usually cut into three parts: the drumette (meaty, like a mini drumstick), the wingette (the flat part with two bones), and the tip (often discarded). But here’s what really matters:
- Small wings/wingettes: These thin, flat pieces cook FAST. At 400°F, they’re usually done in 10-12 minutes. They have less meat and more surface area relative to volume, so heat penetrates quickly.
- Large drumettes: These meaty chunks need more time. Expect 14-18 minutes at 400°F. Their thickness means heat takes longer to reach the center without overcooking the outside.
- Whole wings (uncut): Less common, but if you find them, treat them like large drumettes – 16-20 minutes. The bone in the middle acts as an insulator.
Pro Tip: For consistent results, try to buy wings that are similar in size. If your batch has a mix of tiny wingettes and giant drumettes, cook the smaller pieces separately or take them out earlier. Patience pays off!
Your Toaster Oven Air Fryer’s Personality
Not all air fryers are twins! Different brands and models have varying wattages, fan strengths, and cavity sizes. A powerful 1800W model might cook 2 minutes faster than a 1500W one at the same temperature. Older units might lose efficiency. Always consider:
- Preheating is non-negotiable: Just like a regular oven, your air fryer needs 3-5 minutes to hit the target temp. Starting cold adds 2-3 minutes to your cook time and leads to uneven results.
- Know your hot spots: Some areas in the basket get hotter. Rotate the basket or flip wings more frequently if you notice uneven browning.
- Quantity impacts time: Cooking a full basket takes slightly longer than a half-full one. Air needs space to circulate! Overcrowding = steamed wings, not crispy ones.
Real Talk: Your first batch is a learning experience. Start checking 2 minutes before the minimum time we suggest. You’ll quickly learn your machine’s quirks.
The Temperature Tango: Finding Your Sweet Spot
Temperature isn’t just a number – it’s the conductor of your wing symphony. Too low, and you get soggy, undercooked wings. Too high, and the outside burns before the inside cooks. Here’s the breakdown:
- 380°F (193°C): Great for larger drumettes or if you’re worried about burning. Cook time increases by 2-4 minutes. Wings will be juicy but slightly less crispy.
- 400°F (204°C): The goldilocks zone for most toaster oven air fryers. This is where we get that perfect balance: crispy skin in minimal time without excessive drying. Ideal for standard wing sizes.
- 425°F (218°C) or higher: Use with caution! Only recommended for very small wingettes or if you want *extreme* crispness (like for dry rubs). Risk of burning is high, especially with sugary sauces. Reduce cook time by 2-3 minutes.
Critical Note: Always use an oven-safe meat thermometer! Wing doneness isn’t just about time – it’s about internal temperature. Chicken is safe at 165°F (74°C), but for juicy wings, pull them out at 160°F (71°C). They’ll carryover cook to 165°F while resting. Guessing leads to dry wings.
Your Step-by-Step Guide to Perfect Air Fryer Wings
Ready to put it all together? This is the foolproof method we use for consistently amazing wings. Follow these steps, and you’ll master how long to cook chicken wings in toaster oven air fryer in no time.
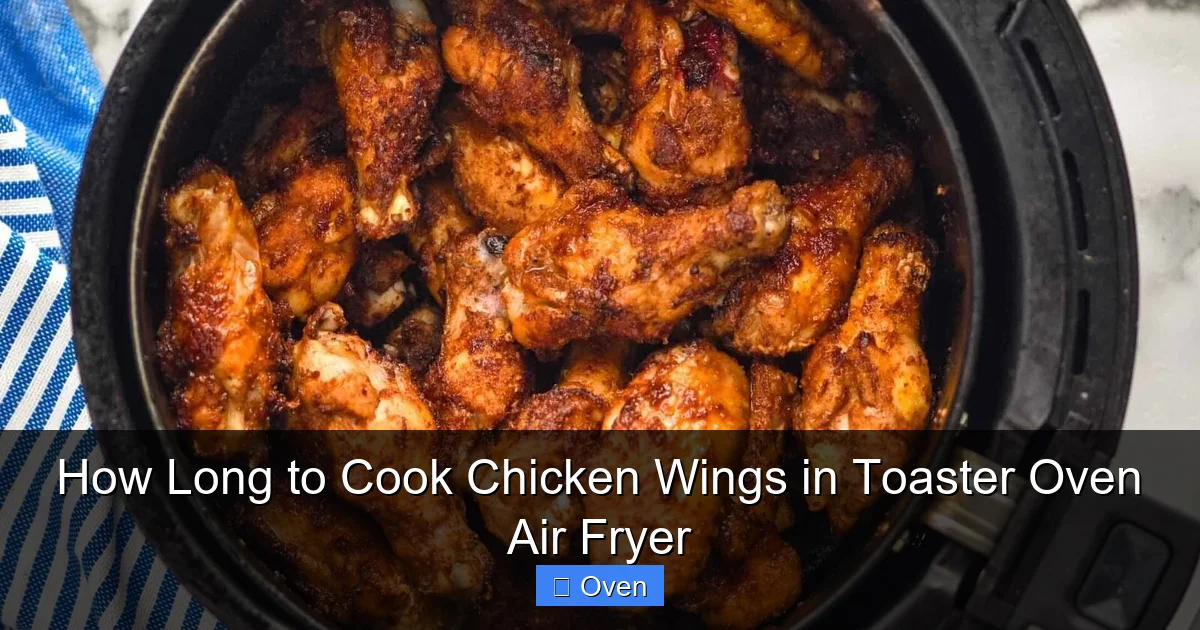
Visual guide about How Long to Cook Chicken Wings in Toaster Oven Air Fryer
Image source: i.pinimg.com
Prep is Everything: Don’t Skip These Steps!
Rushing prep is the fast track to mediocre wings. Take 5 minutes here for restaurant results:
- Dry them THOROUGHLY: This is CRUCIAL for crispiness. Pat wings dry inside and out with paper towels. Moisture is the enemy of crisp! For next-level crunch, toss dried wings with 1 tsp baking powder and 1 tsp cornstarch per pound (skip salt here – we’ll add it later). The baking powder raises pH, helping proteins crisp faster.
- Season simply: Toss wings with 1-2 tbsp oil (avocado or canola work best), salt, pepper, and any dry rub you like. Avoid wet marinades at this stage – they add moisture. Pro tip: Add garlic powder or onion powder for depth.
- Prep your basket: Lightly spray the air fryer basket with oil. Don’t line it with foil – it blocks airflow! Arrange wings in a single layer with space between them. Overcrowding = disaster.
Why this works: Drying and the baking powder/cornstarch trick create a drier surface that crisps instantly in the hot air. Oil helps conduct heat and prevents sticking.
The Cooking Process: Timing Breakdown
Now for the main event! Here’s your timing cheat sheet based on standard 400°F cooking. Remember: these are starting points. ALWAYS check early!
- Small wingettes (1-1.5 inches thick): 10-12 minutes total. Flip at 5-6 minutes. Check at 9 minutes.
- Standard drumettes/wingettes (mixed batch): 12-15 minutes total. Flip at 6-7 minutes. Check at 10 minutes.
- Large drumettes (2+ inches thick): 14-18 minutes total. Flip at 7-8 minutes. Check at 12 minutes.
- Frozen wings (thawed is ALWAYS better, but if needed): Add 3-5 minutes to the above times. Ensure they’re in a single layer – no stacking!
The Flip is Non-Negotiable: Halfway through cooking, open the basket (carefully – it’s HOT!), flip each wing over. This ensures even browning and prevents the bottom from steaming. Don’t skip this!
Sauce Smart: When and How to Add Flavor
This is where many wing warriors go wrong. Adding sauce too early is a recipe for burnt, sticky, sad wings. Sugar and acids in sauces caramelize FAST at high heat.
- Dry rubs: Apply before cooking. They can handle the full cook time.
- Wet sauces (BBQ, buffalo, teriyaki): Toss wings in sauce during the LAST 2-3 minutes of cooking. Yes, it’s messy! Use tongs to coat them evenly in the basket. The residual heat will set the sauce without burning it.
- Alternative method: Cook wings plain until done. Toss in a bowl with sauce right before serving. This gives you more control and prevents basket gunk.
Pro Sauce Tip: For extra glossy, sticky wings, toss cooked wings in a bowl with 1 tbsp melted butter mixed with your sauce. The butter helps the sauce adhere beautifully.
The Resting Ritual: Why 2 Minutes Matters
Pulling wings straight from the basket seems tempting, but resting is science! When you take wings out:
- Internal temperature rises 5°F (carryover cooking)
- Juices redistribute throughout the meat
- Excess surface moisture evaporates slightly
Skipping this means cutting into dry, juice-less wings. Set them on a wire rack (not a plate – traps steam) for 2-3 minutes. Cover loosely with foil if needed, but don’t seal it tight or they’ll get soggy. This tiny wait makes a massive difference in juiciness.
Avoiding the Wing Wrecking Crew: Common Mistakes
Even with great timing, a few missteps can ruin your wings. Let’s dodge these bullets:
Visual guide about How Long to Cook Chicken Wings in Toaster Oven Air Fryer
Image source: storables.com
Mistake #1: Overcrowding the Basket
Piling wings on top of each other seems efficient, but it’s the #1 crispiness killer. Wings need space for hot air to circulate. If they’re touching, they steam instead of crisp. Solution: Cook in batches. Yes, it takes longer overall, but the results are WORTH IT. Your guests will thank you.
Mistake #2: Ignoring the Thermometer
“They look done!” is a dangerous game. Visual cues lie, especially with dark sauces. A $10 instant-read thermometer is the best wing investment you’ll make. Insert into the thickest part of a drumette, avoiding bone. 160°F = perfect. 165°F = safe but potentially drier.
Mistake #3: Sauce Too Early
We said it before, but it bears repeating. Adding BBQ sauce at the start turns your wings into charcoal briquettes. The sugar burns at 320°F – long before your wings are cooked through. Reserve saucing for the final minutes or post-cook.
Mistake #4: Skipping the Dry Brine
Just 30 minutes in the fridge with salt (1 tsp per pound) does wonders. Salt draws out moisture, which then gets reabsorbed with salt, seasoning the meat deeply and helping it retain juices during cooking. It’s a pro trick for incredibly tender wings.
Mistake #5: Not Cleaning the Basket
Sugary sauces baked on become cement. Clean the basket IMMEDIATELY after use while it’s still warm (not hot!). Soak in hot, soapy water. Burnt-on gunk affects future cooks and can impart off-flavors.
Beyond the Basics: Flavor Variations & Pro Tips
Mastered the timing? Let’s level up your wing game with some creative twists and expert hacks.
Dry Rub Dynamite
Dry rubs are perfect for air frying – no burning risk! Try these combos (toss wings in oil first, then rub):
- Smoky Paprika: 2 tsp smoked paprika, 1 tsp garlic powder, 1 tsp onion powder, 1/2 tsp cayenne, 1 tsp brown sugar, salt & pepper.
- Lemon Herb: 2 tsp dried oregano, 1 tsp dried thyme, 1 tbsp lemon zest, 1 tsp garlic powder, salt & pepper.
- Everything Bagel: 2 tbsp everything bagel seasoning, 1 tsp garlic powder, 1 tbsp sesame seeds.
Pro Tip: Apply rubs at least 15 minutes before cooking (or up to 24 hours refrigerated) for deeper flavor penetration.
Sauce Savers: Avoiding the Burn
Love sticky sauces but hate the burn? Try these:
- Dilute sugary sauces: Mix BBQ or teriyaki with equal parts water or broth before tossing.
- Butter is your friend: Toss cooked wings in melted butter first, THEN sauce. Butter creates a barrier.
- Low-sugar alternatives: Use hot sauce (like Frank’s) mixed with butter for classic buffalo – it’s less likely to burn than sugary BBQ.
Game Changer: For Korean-style wings, toss cooked wings in a sauce made with gochujang, soy sauce, honey, rice vinegar, and sesame oil. The honey caramelizes nicely in the final minutes.
Frozen Wing Rescue
Forgot to thaw? Don’t panic! Frozen wings work in air fryers, but adjust:
- Do NOT thaw – cook straight from frozen.
- Increase cook time by 3-5 minutes.
- Ensure wings are in a single layer (no stacking).
- Check internal temp – they may need an extra minute or two.
Warning: Frozen wings release more moisture, so pat them dry with paper towels after the first 5 minutes of cooking if you see excess liquid pooling.
Reheating Like a Pro
Got leftovers? Air fryers are THE BEST for reheating wings!
- Preheat air fryer to 350°F.
- Place wings in single layer.
- Cook 3-5 minutes until heated through and recrisped.
No more soggy microwave wings! This method restores crispiness better than a regular oven.
Your Wing Mastery Checklist
Let’s wrap this up with a simple checklist to ensure wing perfection every time you fire up that toaster oven air fryer:
- Dry wings thoroughly (paper towels + optional baking powder)
- Season with oil and dry rub (salt included)
- Preheat air fryer 3-5 minutes to 400°F
- Arrange in single layer with space between wings
- Cook for base time (10-18 mins depending on size)
- Flip wings halfway through cooking
- Check temp at minimum time (160°F internal)
- Sauce in last 2-3 minutes (if using wet sauce)
- Rest 2-3 minutes on wire rack
- Serve immediately!
Following this flow takes the guesswork out of how long to cook chicken wings in toaster oven air fryer. It’s not about memorizing one number – it’s about understanding the variables and adjusting. Once you do this a couple of times, you’ll develop an instinct for your machine.
Conclusion: Crispy, Juicy Wings Are Yours for the Taking
There you have it – your complete roadmap to mastering chicken wings in your toaster oven air fryer! It’s not magic, but it is incredibly satisfying. Ditch the uncertainty and embrace the crispy, juicy, finger-licking-good results you deserve. Remember, the key isn’t just the clock – it’s understanding your wing size, respecting your air fryer’s power, and nailing that sauce timing.
Think of your first few batches as practice. Maybe your drumettes need an extra minute, or your machine runs a bit hot. That’s normal! Keep that thermometer handy, don’t overcrowd the basket, and always rest those wings. Before you know it, you’ll be the go-to wing hero for game days, parties, or just because Tuesday deserves awesome wings. So preheat that air fryer, dry those wings, and get ready to enjoy the best wings you’ve ever made at home. Your taste buds (and your friends) will thank you. Now go forth and wing it!
Frequently Asked Questions
What’s the best temperature for chicken wings in a toaster oven air fryer?
400°F (204°C) is ideal for most wing sizes and toaster oven air fryers. It provides the perfect balance of crisping the skin quickly without drying out the meat or burning. Use 380°F for larger drumettes if concerned about drying, or 425°F only for very small wingettes with dry rubs.
How long do small chicken wings take in a toaster oven air fryer?
Small wingettes (about 1-1.5 inches thick) typically cook in 10-12 minutes at 400°F. Always flip them at the 5-6 minute mark and start checking for doneness at 9 minutes. Internal temperature should reach 160°F.
Can I put sauce on wings before air frying?
It’s not recommended for most wet sauces (BBQ, teriyaki, sweet chili) as the sugars burn quickly at high heat. Apply these sauces during the last 2-3 minutes of cooking. Dry rubs are perfectly safe to apply before cooking.
Why do my wings take longer than the recipe says?
Common reasons include: overcrowding the basket, cooking frozen wings without adjusting time, a lower-wattage air fryer, not preheating properly, or very large drumettes. Always use a meat thermometer for accuracy and adjust based on your specific machine and wing size.
How do I store and reheat leftover air fryer wings?
Store cooled wings in an airtight container in the fridge for up to 3 days. Reheat in the air fryer at 350°F for 3-5 minutes until hot and recrisped – this method works far better than a microwave or oven for restoring texture.
Can I cook bone-in, skin-on chicken pieces other than wings?
Absolutely! The same principles apply. Chicken thighs and drumsticks work great – increase cook time to 20-25 minutes at 400°F, flipping halfway. Breasts take 12-16 minutes but are more prone to drying; consider pounding to even thickness or using a marinade.