Master chicken breast in your Ninja Foodi Air Fryer Oven with precise timing based on thickness and doneness. Typically 12-20 minutes at 375°F-400°F, always hitting 165°F internally for safety. Resting is key for juicy results!
Key Takeaways
- Core Temperature is Crucial: Always cook chicken breast to an internal temperature of 165°F (74°C) measured at the thickest part for safety.
- Thickness Dictates Time: A standard 1-inch thick breast takes 12-16 minutes at 375°F-400°F; thicker pieces need 18-22 minutes.
- Preheat for Best Results: Always preheat your Ninja Foodi Air Fryer Oven for 3-5 minutes before adding chicken for even cooking.
- Rest Before Cutting: Let cooked chicken rest for 5-10 minutes tented with foil; this allows juices to redistribute for maximum moisture.
- Frozen Requires Adjustment: Frozen chicken breasts need 5-8 extra minutes and should be cooked from frozen (no thawing needed).
- Marinate for Flavor & Moisture: Even a quick 15-30 minute marinade significantly improves taste and helps prevent dryness.
- Use the Right Mode: “Air Fry” or “Convection Bake” are ideal; avoid “Roast” for standard chicken breast cooking.
Quick Answers to Common Questions
Can I cook frozen chicken breast directly in the Ninja Foodi Air Fryer Oven?
Yes! Cooking frozen chicken breast is perfectly safe and convenient in the Ninja Foodi Air Fryer Oven. Simply add 5-8 minutes to the standard cooking time for fresh chicken of the same thickness. Pat frozen breasts very lightly with a paper towel to remove excess surface ice before seasoning and cooking. Always ensure the internal temperature reaches 165°F.
What’s the best temperature setting for chicken breast in the Ninja Foodi?
375°F is the ideal starting temperature for most boneless, skinless chicken breasts. It cooks them thoroughly without excessive drying. If you prefer slightly more browning or crispness (especially on skin-on breasts), you can use 400°F, but monitor closely to prevent burning and be prepared to cook for a slightly shorter time.
How do I prevent chicken breast from drying out in the air fryer?
Prevent dryness by: 1) Always cooking to 165°F internally (not longer), 2) Resting for 5-10 minutes after cooking, 3) Using a marinade or brine for at least 30 minutes, 4) Avoiding excessively high temperatures (stick to 375°F), and 5) Not overcrowding the rack to ensure even cooking.
Can I use the “Roast” function instead of “Air Fry” for chicken breast?
While possible, “Air Fry” or “Convection Bake” are generally better choices for standard chicken breast. “Air Fry” provides the most intense convection for faster cooking and better browning. “Convection Bake” is slightly gentler and excellent for even cooking. “Roast” is typically designed for larger cuts like whole chickens and may not be as efficient for individual breasts.
How long should I rest chicken breast after cooking in the air fryer?
Always rest cooked chicken breast for a minimum of 5 minutes, but ideally 7-10 minutes, tented loosely with foil. This resting period is crucial as it allows the juices to redistribute throughout the meat. Cutting into it immediately releases those juices, resulting in dry chicken.
📑 Table of Contents
- The Ultimate Guide to Perfect Chicken Breast in Your Ninja Foodi Air Fryer Oven
- Why Timing Isn’t One-Size-Fits-All: Understanding the Variables
- Step-by-Step: Cooking Perfect Chicken Breast Every Time
- Mastering Doneness: The Only Reliable Method
- Troubleshooting Common Chicken Breast Issues
- Flavor Boosters: Marinades, Rubs, and Sauces
- Beyond Basic: Creative Ninja Foodi Chicken Breast Ideas
- Conclusion: Your Path to Perfect Air Fryer Chicken Breast
The Ultimate Guide to Perfect Chicken Breast in Your Ninja Foodi Air Fryer Oven
So, you’ve got your shiny new Ninja Foodi Air Fryer Oven, and you’re staring at a package of chicken breasts, wondering, “How long do I actually cook these things?” It’s a question that plagues countless home cooks. Chicken breast is a weeknight staple – lean, versatile, and packed with protein. But it’s also notoriously easy to overcook, turning that promising meal into a dry, rubbery disappointment. The good news? Your Ninja Foodi Air Fryer Oven is actually one of the best tools for cooking chicken breast perfectly, consistently. The powerful convection fan circulates hot air rapidly, cooking food faster and more evenly than a traditional oven, while the air fry function gives you that desirable slight crispness on the outside without deep frying.
Forget the guesswork and the dry chicken disasters. This guide cuts through the confusion. We’re diving deep into the specifics of how long to cook chicken breast in your Ninja Foodi Air Fryer Oven. We’ll cover everything from understanding why timing varies, to the exact steps for foolproof results, troubleshooting common issues, and even some delicious flavor ideas. Whether you’re cooking fresh, frozen, thin-cut, or stuffed breasts, you’ll find the precise timing and techniques you need. The goal? Tender, juicy, flavorful chicken breast every single time, cooked safely and efficiently in your countertop powerhouse. Let’s get cooking!
Why Timing Isn’t One-Size-Fits-All: Understanding the Variables
Before you even think about setting the timer, it’s vital to understand that there’s no single magic number for “how long to cook chicken breast in ninja foodi air fryer oven.” Several key factors dramatically influence the cooking time. Ignoring these is the #1 reason people end up with dry or undercooked chicken. Let’s break down the biggest variables:
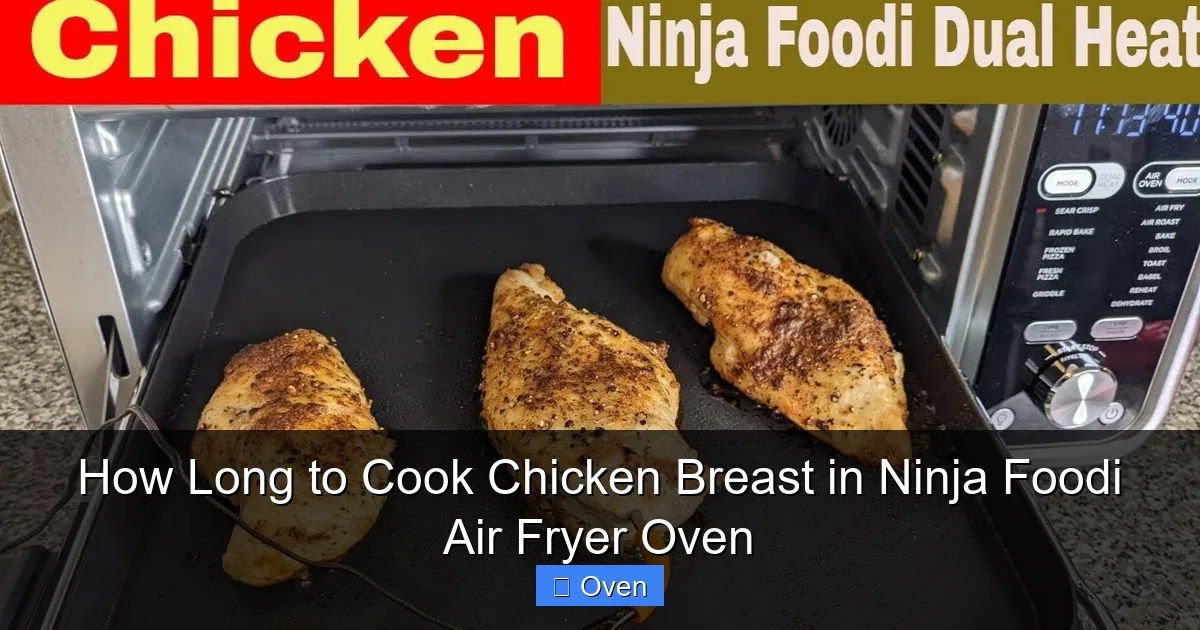
Visual guide about How Long to Cook Chicken Breast in Ninja Foodi Air Fryer Oven
Image source: i.ytimg.com
Chicken Breast Thickness: The #1 Factor
This is the absolute game-changer. A thin, pounded cutlet cooks in a fraction of the time of a thick, bone-in breast. Most grocery store chicken breasts are around 1 to 1.5 inches thick at their widest point. Here’s a rough guideline:
- Thin Cutlets (1/2 inch or less): Often labeled “cutlets” or “tenders.” Cook time: 6-10 minutes at 375°F-400°F.
- Standard Boneless, Skinless (1 inch thick): The most common type. Cook time: 12-16 minutes at 375°F-400°F.
- Thick Boneless, Skinless (1.5 inches or more): Often called “jumbo” breasts. Cook time: 18-22 minutes at 375°F-400°F.
- Bone-In, Skin-On: Significantly longer due to the bone acting as an insulator. Cook time: 25-35 minutes at 375°F-400°F (skin may need extra crisping time).
Pro Tip: If your breasts are uneven, place the thicker end towards the outer edge of the rack (where heat is often slightly more intense) and the thinner end towards the center. You can also slightly overlap them if necessary, but avoid stacking.
Fresh vs. Frozen: A Significant Time Difference
Cooking from frozen is incredibly convenient, but it absolutely adds time. The Ninja Foodi Air Fryer Oven handles frozen chicken well, but you must adjust the timing.
- Fresh/Thawed Chicken: Follow the standard timing guidelines above based on thickness.
- Frozen Chicken: Add 5-8 minutes to the standard cooking time for fresh chicken of the same thickness. For example, a standard 1-inch frozen breast might take 17-24 minutes instead of 12-16. Crucially, do not thaw frozen chicken on the counter! Cooking from frozen is safe in the air fryer oven as long as it reaches 165°F internally. Patting frozen breasts *very lightly* with a paper towel can help remove excess surface ice crystals for better browning.
Desired Doneness & Starting Temperature
While 165°F is the non-negotiable safety target, how you cook it affects texture:
- Cold from Fridge: Takes slightly longer to cook through than chicken brought closer to room temperature (let it sit for 15-20 minutes before cooking).
- Marinated Chicken: Marinades (especially acidic ones like lemon or vinegar) can slightly “cook” the surface, potentially reducing time by 1-2 minutes, but the core timing remains driven by thickness. More importantly, marinades add flavor and moisture.
- Stuffed Chicken Breasts: Filling (like spinach, cheese, sun-dried tomatoes) adds mass and moisture, increasing cook time by 3-6 minutes. Ensure the filling is cold when assembling.
Your Ninja Foodi Oven’s Specifics
While generally consistent, slight variations exist between models (like the AF101, AF161, SP101, etc.) and even between individual units. Always rely on an instant-read thermometer rather than just the timer. Also, consider:
- Rack Position: The middle rack position is usually ideal for even cooking. Avoid the top rack unless specifically crisping skin.
- Oven Load: Cooking multiple breasts at once is fine, but don’t overcrowd the rack. Ensure air can circulate around each piece. Cooking one large breast might take slightly less time than two smaller ones side-by-side.
- Preheating: Always preheat! This is critical for even cooking and achieving good browning. Preheat for 3-5 minutes at your target temperature (375°F-400°F) before adding the chicken.
Step-by-Step: Cooking Perfect Chicken Breast Every Time
Now that you understand the variables, let’s walk through the foolproof process for cooking chicken breast in your Ninja Foodi Air Fryer Oven. Following these steps ensures juicy, safe results.

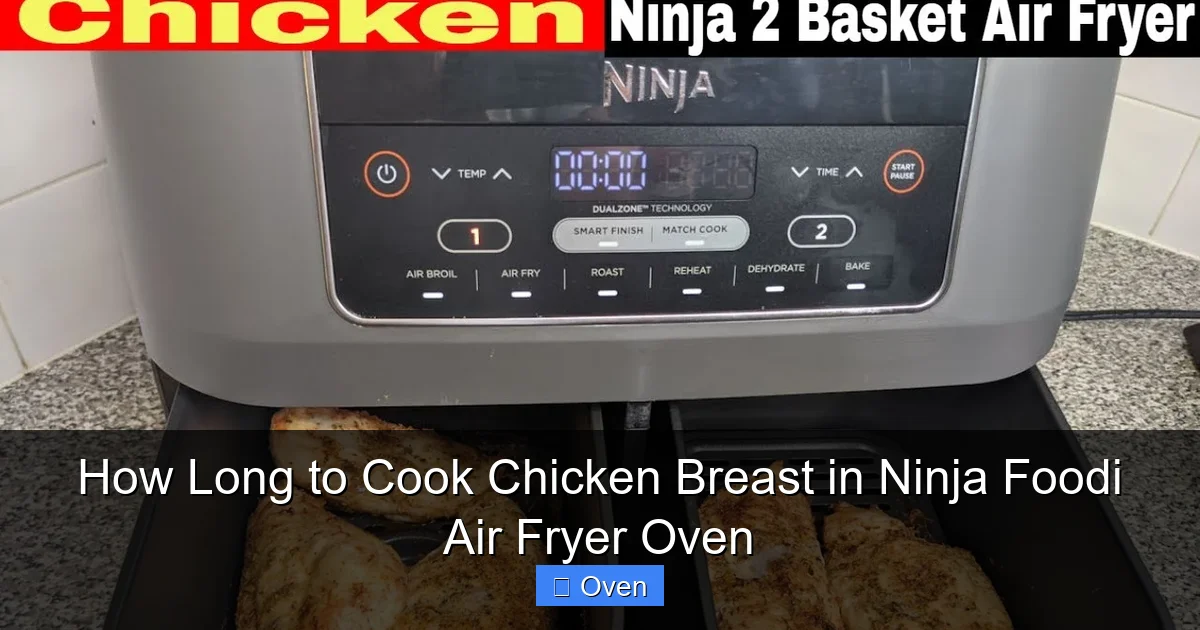
Visual guide about How Long to Cook Chicken Breast in Ninja Foodi Air Fryer Oven
Image source: wellplated.com
Preparation is Key
Don’t skip this stage! Proper prep makes a huge difference.
- Pat Dry: Use paper towels to thoroughly dry the surface of the chicken breasts. Moisture is the enemy of browning and crisping.
- Season Generously: Season both sides well with salt and pepper. This is your foundation of flavor. Don’t be shy! You can also add garlic powder, onion powder, paprika, dried herbs (thyme, oregano), or a simple lemon-pepper blend. For maximum flavor, consider a marinade (see tips below).
- Optional – Pound for Evenness: If your breasts are very thick or uneven, place them between plastic wrap or in a zip-top bag and gently pound the thicker end with a meat mallet or rolling pin to an even 1-inch thickness. This ensures they cook uniformly.
- Bring to Temp (Optional but Recommended): Let seasoned chicken sit at room temperature for 15-20 minutes while the oven preheats. This promotes more even cooking.
Setting Up Your Ninja Foodi Air Fryer Oven
Getting the oven ready correctly is crucial for the right cook time.
- Preheat: Select the “Air Fry” or “Convection Bake” function (both work well; Air Fry is slightly more intense). Set the temperature to 375°F for standard cooking or 400°F if you want a bit more browning/crispness (especially useful for skin-on). Preheat for 3-5 minutes. This step is non-negotiable for accurate timing.
- Prepare the Rack: Lightly spray the air fryer rack with cooking oil (avocado, canola, olive oil spray) to prevent sticking. Place the seasoned chicken breasts on the rack, ensuring they aren’t touching each other for proper air circulation.
- Insert Thermometer (Highly Recommended): If you have an instant-read meat thermometer, insert the probe into the thickest part of the largest breast, making sure it’s not touching bone. This is the single best way to know when it’s done.
The Cooking Process: Timing & Monitoring
This is where your understanding of the variables comes into play.
- Start the Timer: Based on your chicken’s thickness (see guidelines above), set your initial timer. For a standard 1-inch fresh breast, start with 14 minutes at 375°F.
- Check Early & Often (After Initial Time): Do not just set it and forget it! After the initial estimated time (e.g., 14 minutes for a 1-inch breast), carefully open the oven (watch for steam!) and check the internal temperature with your instant-read thermometer. If you don’t have one, gently press the thickest part with tongs – it should feel firm but still slightly yielding, and any juices should run clear (though color is not a reliable indicator).
- Adjust Time as Needed: If it hasn’t reached 165°F, add 2-3 minutes and check again. Repeat until done. Remember, carryover cooking will continue to raise the temp by 5-10°F after removal from the oven.
- Optional – Crisp the Skin (If Applicable): If cooking bone-in, skin-on breasts, you might want extra crispy skin. After the chicken is nearly cooked through (around 150°F internal), switch to the “Air Fry” function at 400°F for the last 3-5 minutes, watching closely to prevent burning.
The Critical Resting Phase
This step is often overlooked but is absolutely essential for juicy chicken.
- Remove from Oven: Once the internal temperature reaches 165°F, carefully remove the chicken breasts from the oven using tongs.
- Tent & Rest: Immediately transfer the chicken to a clean plate or cutting board. Loosely tent it with aluminum foil. Let it rest for 5-10 minutes.
- Why Rest? Resting allows the juices, which have been driven to the center by the intense heat, to redistribute throughout the meat. Cutting into the chicken immediately releases all those precious juices onto the plate, leaving the meat dry. Resting ensures every bite is moist.
Mastering Doneness: The Only Reliable Method
While timing guidelines are helpful starting points, relying solely on the clock is a recipe for disappointment. The only foolproof way to know your chicken breast is cooked perfectly and safely is by using an instant-read meat thermometer. Here’s why and how:

Visual guide about How Long to Cook Chicken Breast in Ninja Foodi Air Fryer Oven
Image source: i.ytimg.com
Why Temperature Trumps Time
As we’ve established, thickness, starting temp, frozen state, and even minor oven variations mean cook times can differ significantly. A thermometer removes all guesswork:
- Safety First: Chicken must reach 165°F (74°C) internally to destroy harmful bacteria like Salmonella. This is non-negotiable for food safety.
- Perfect Texture: Cooking to the exact safe temperature (165°F) ensures the chicken is done but not overcooked. Every extra minute above 165°F increases the risk of dryness.
- Consistency: Whether you’re cooking one breast or six, thick or thin, fresh or frozen, the thermometer gives you consistent results every time.
Thermometer Tip: Invest in a good instant-read thermometer (like ThermoPro or ThermoPop). They are inexpensive, fast (reads in 2-5 seconds), and indispensable for perfect protein. Don’t rely on the oven’s timer or the color of the chicken (it can be pink near the bone even when fully cooked).
How to Take the Temperature Correctly
Using the thermometer properly is key:
- Insert into the Thickest Part: Push the probe straight into the absolute center of the thickest section of the breast.
- Avoid Bone and Fat: Make sure the probe tip isn’t touching bone (which conducts heat faster) or a large piece of fat (which can give a false reading).
- Check Multiple Pieces: If cooking several breasts of varying sizes, check the thickest one first, then the others. The thickest will be the last to reach temperature.
- Account for Carryover Cooking: Remember that the internal temperature will continue to rise by 5-10°F after you remove the chicken from the oven. Pull it out when it hits 160-162°F if you’re very precise, but 165°F at removal is perfectly safe and accounts for this rise.
What if it’s not done? If after your initial time estimate it’s still below 165°F, simply return it to the oven and check again every 2-3 minutes. Don’t rush this step – undercooked chicken is dangerous.
Troubleshooting Common Chicken Breast Issues
Even with the best intentions, things can go sideways. Here’s how to fix the most common problems when cooking chicken breast in your Ninja Foodi Air Fryer Oven:
Dry, Tough Chicken Breast
This is the #1 complaint. Usually caused by overcooking.
- Cause: Cooking too long, cooking at too high a temperature, not resting, starting with very lean chicken.
- Solutions:
- Always use a thermometer and pull at 165°F.
- Lower the temperature slightly (try 365°F instead of 375°F) for longer if you tend to overcook.
- Never skip the resting phase (5-10 minutes).
- Brine or marinate for at least 30 minutes (or up to 4 hours) before cooking. A simple brine (1/4 cup salt + 4 cups water) works wonders.
- Add moisture during cooking: Place a small oven-safe dish of water on the lower rack, or brush the chicken with a little oil or melted butter halfway through cooking.
Undercooked or Pink Chicken
Safety hazard! Never serve undercooked chicken.
- Cause: Not cooking long enough, inaccurate thermometer, checking too early, very thick breasts cooked at too low a temp.
- Solutions:
- Always use a calibrated thermometer and verify it hits 165°F in the thickest part.
- Don’t shorten the initial time estimate based on thickness. Start with the guideline time.
- If it’s pink but at 165°F: This can happen near bones due to myoglobin. It’s safe! The temperature is the only reliable indicator.
- For very thick breasts: Consider pounding to even thickness or butterflying them.
Poor Browning or Crisping
The air fryer should give nice color, but sometimes it falls flat.
- Cause: Chicken not patted dry, overcrowded rack, oven not preheated, cooking at too low a temperature, skin not scored (if applicable).
- Solutions:
- Pat the chicken EXTREMELY dry with paper towels before seasoning.
- Ensure proper air circulation – don’t overcrowd the rack.
- Always preheat the oven for 3-5 minutes.
- Increase the temperature to 400°F for the last 3-5 minutes of cooking.
- For skin-on: Score the skin lightly in a crosshatch pattern before cooking to help fat render and crisp.
- Brush with oil or melted butter before cooking to promote browning.
Chicken Sticking to the Rack
Frustrating, but preventable.
- Cause: Insufficient oil on the rack, chicken not seared/patted dry, removing too early.
- Solutions:
- Generously spray the rack with high-smoke-point oil (avocado, canola) before adding chicken.
- Pat chicken very dry – moisture causes sticking.
- Let it sear for 2-3 minutes after placing in the preheated oven before attempting to move it. It will release naturally when ready.
- Use sturdy tongs to gently lift, don’t scrape.
Flavor Boosters: Marinades, Rubs, and Sauces
Plain chicken breast can be bland. The Ninja Foodi Air Fryer Oven is perfect for infusing flavor quickly. Here are some easy, delicious ideas:
Quick & Easy Marinades (15-60 minutes)
Marinades add flavor and moisture. Even a short soak makes a difference.
- Lemon-Herb: 1/4 cup olive oil, juice of 1 lemon, 2 cloves minced garlic, 1 tbsp chopped fresh rosemary & thyme, salt & pepper. Great for Mediterranean flavors.
- Honey-Soy-Ginger: 3 tbsp soy sauce, 2 tbsp honey, 1 tbsp rice vinegar, 1 tbsp grated ginger, 2 cloves minced garlic, 1 tsp sesame oil. Perfect Asian-inspired glaze.
- BBQ: 1/2 cup your favorite BBQ sauce, 1 tbsp apple cider vinegar, 1 tsp smoked paprika, 1/2 tsp garlic powder. Brush on during the last 5 minutes of cooking.
- Yogurt & Spice: 1/2 cup plain Greek yogurt, 1 tbsp curry powder, 1 tsp cumin, 1/2 tsp turmeric, 1 minced garlic clove, salt. Tenderizes and adds complex flavor.
Marinating Tip: Place chicken and marinade in a zip-top bag, squeeze out air, and refrigerate. Massage gently to coat. Don’t marinate acidic marinades (lemon, vinegar) for more than 2 hours, as they can start to “cook” the surface.
Dry Rubs (Apply Right Before Cooking)
Dry rubs create a delicious crust and are super quick.
- Classic BBQ Rub: 1 tbsp brown sugar, 1 tbsp paprika, 1 tsp garlic powder, 1 tsp onion powder, 1/2 tsp black pepper, 1/2 tsp salt, 1/4 tsp cayenne (optional).
- Italian Herb: 1 tbsp dried oregano, 1 tbsp dried basil, 1 tsp garlic powder, 1 tsp onion powder, 1/2 tsp dried thyme, 1/2 tsp salt, 1/4 tsp black pepper.
- Lemon-Pepper: 2 tbsp coarse black pepper, 1 tbsp lemon zest, 1 tsp garlic powder, 1 tsp salt.
- Taco Seasoning: 1 tbsp chili powder, 1 tsp cumin, 1/2 tsp garlic powder, 1/2 tsp onion powder, 1/2 tsp dried oregano, 1/4 tsp cayenne, 1/2 tsp salt.
Rub Tip: Pat chicken dry, then press the rub firmly onto all surfaces. Let sit for 10-15 minutes while the oven preheats.
Finishing Sauces & Glazes
Add a final layer of flavor after cooking or during the last few minutes.
- Pan Sauce: After removing chicken, add 1/2 cup broth (chicken or vegetable) to the hot rack/basket. Scrape up any browned bits (fond). Simmer for 2-3 minutes, then stir in 1 tbsp butter or cream. Pour over rested chicken.
- Simple Butter-Herb: Toss rested chicken with melted butter and chopped fresh herbs (parsley, chives, dill).
- Glaze During Cooking: Brush honey, maple syrup, BBQ sauce, or teriyaki sauce onto the chicken during the last 3-5 minutes of cooking. Watch closely to prevent burning.
Pro Flavor Tip: Combine methods! Use a dry rub for the base flavor, then add a quick pan sauce or finishing butter for extra richness.
Beyond Basic: Creative Ninja Foodi Chicken Breast Ideas
Once you’ve mastered the basics, unleash your creativity! The air fryer oven is perfect for these:
Stuffed Chicken Breasts
Impressive and delicious. Butterfly a thick breast, fill with your favorite ingredients, secure with toothpicks, and cook.
- Mediterranean: Spinach, sun-dried tomatoes, feta cheese, garlic.
- Pesto & Mozzarella: Basil pesto, fresh mozzarella balls, sliced tomato.
- Buffalo Chicken: Cream cheese, shredded cheddar, cooked bacon bits, buffalo sauce (add sauce after cooking).
- Cooking Time: Add 3-6 minutes to standard time. Ensure filling is cold and chicken reaches 165°F internally.
Chicken “Steaks” or Cutlets
Pound thick breasts to 1/2 inch thickness for quick-cooking cutlets.
- Breaded: Dredge in flour, dip in beaten egg, coat in seasoned breadcrumbs (panko works great). Spray lightly with oil. Cook at 375°F for 8-12 minutes, flipping halfway, until golden and 165°F.
- Herb-Crusted: Press a mixture of breadcrumbs, grated Parmesan, and dried herbs onto the pounded breast. Cook as above.
- Perfect for: Chicken parmesan (top with sauce & mozzarella, broil 1-2 min), chicken fried “steak,” or simple pan-fried style.
Sheet Pan Chicken & Veggies
Cook a complete meal in one go! Toss chopped vegetables (broccoli, bell peppers, zucchini, potatoes, carrots) with oil, salt, and pepper. Spread on the air fryer rack. Place seasoned chicken breasts on top or nestled among the veggies.
- Timing: Veggies generally cook faster than chicken. Start veggies first for 5-7 minutes, then add chicken. Total time usually 15-22 minutes, depending on veggie size and chicken thickness. Check chicken temp!
- Flavor Sync: Use complementary seasonings for both chicken and veggies (e.g., lemon-herb for both, or BBQ rub on chicken with sweet potatoes).
Shredded Chicken for Tacos, Salads, or Sandwiches
Cook larger breasts (or multiple) at 375°F until 165°F (18-22 min for thick). Rest, then shred with two forks. Toss with your favorite sauce (BBQ, buffalo, taco seasoning, salsa verde) right in the warm chicken. Ready in minutes for quick meals.
Conclusion: Your Path to Perfect Air Fryer Chicken Breast
Cooking chicken breast in your Ninja Foodi Air Fryer Oven doesn’t have to be a gamble. By understanding the critical factors that influence timing – primarily thickness, frozen vs. fresh status, and the non-negotiable requirement of reaching 165°F internally – you’ve already set yourself up for success. Remember, the magic number isn’t found on a single timer setting; it’s found with your instant-read thermometer.
Embrace the process: pat that chicken dry, season it generously, preheat your oven diligently, monitor the temperature closely, and always, always let it rest. These simple steps transform a potentially dry, bland piece of protein into a juicy, flavorful centerpiece for any meal. Whether you’re whipping up quick weeknight cutlets, impressive stuffed breasts, or a full sheet-pan dinner, your Ninja Foodi Air Fryer Oven, used correctly, is your secret weapon for consistently perfect chicken.
Don’t be afraid to experiment with marinades, rubs, and creative preparations once you’ve mastered the fundamentals. The convenience and speed of the air fryer oven make it easy to try new things. So, toss that package of chicken breasts into your cart with confidence. You now have the knowledge to cook them perfectly, safely, and deliciously, every single time. Happy air frying!
Frequently Asked Questions
What is the absolute minimum time to cook a chicken breast in the Ninja Foodi Air Fryer Oven?
The absolute minimum time depends entirely on thickness. For very thin cutlets (1/2 inch or less), it can be as little as 6 minutes at 400°F. However, for standard 1-inch thick breasts, 12 minutes is the absolute minimum you should ever try, and even then, you must verify it reached 165°F internally. Relying solely on minimum times risks undercooking.
Can I cook bone-in, skin-on chicken breasts in the Ninja Foodi Air Fryer Oven?
Yes, bone-in, skin-on chicken breasts cook beautifully in the Ninja Foodi Air Fryer Oven. Expect a longer cooking time, typically 25-35 minutes at 375°F-400°F. The bone slows cooking, but the air fryer crisps the skin nicely. For extra crispy skin, switch to 400°F Air Fry mode for the last 5 minutes. Always check the internal temperature near the bone reaches 165°F.
Why is my chicken breast still pink after cooking to 165°F?
Pinkness near the bone in chicken cooked to a safe 165°F internal temperature is normal and safe. It’s caused by a protein called myoglobin reacting with heat, especially in younger chickens or near bones where oxygen is present. The internal temperature is the only reliable indicator of safety, not color. As long as 165°F is reached in the thickest part, it’s safe to eat.
Do I need to flip chicken breast when cooking in the Ninja Foodi Air Fryer Oven?
Flipping is generally not necessary for boneless, skinless chicken breasts in the Ninja Foodi Air Fryer Oven due to the powerful, even convection airflow. However, if you are cooking very thick breasts, bone-in pieces, or breaded cutlets, flipping halfway through the cooking time can promote even browning on both sides. For standard breasts, focus on proper rack placement and preheating.
Can I cook multiple chicken breasts at once in the Ninja Foodi Air Fryer Oven?
Yes, you can cook multiple chicken breasts at once, which is one of the oven’s great conveniences. However, ensure they are similar in size and thickness for even cooking. Arrange them on the rack without touching each other to allow proper air circulation. You may need to add 1-3 minutes to the total cooking time compared to cooking a single breast, but always verify with a thermometer.
What’s the best way to store and reheat leftover air fryer chicken breast?
Store leftover cooked chicken breast in an airtight container in the refrigerator for up to 3-4 days. To reheat without drying it out, place it in the Ninja Foodi Air Fryer Oven at 300°F-325°F for 3-5 minutes, or until warmed through. You can also reheat gently in a covered skillet with a splash of broth or water over low heat. Avoid microwaving if possible, as it often dries chicken out.