Discover practical ways to transform regular ground coffee into instant-style convenience without expensive equipment. This guide covers cold brew concentrates, DIY freeze-drying, and smart storage techniques to preserve flavor. Enjoy café-quality coffee in seconds, anytime.
Key Takeaways
- Cold brew concentrate is simplest: Steep grounds in cold water for 12-24 hours, then strain and freeze into cubes for instant use
- Freeze-drying preserves best flavor: Spread brewed coffee thin on trays and freeze-dry for true instant coffee texture (requires equipment)
- Proper storage is critical: Keep homemade instant coffee in airtight containers away from light/heat to prevent staleness
- Ratios matter most: Use 1:4 coffee-to-water ratio for concentrates (1 tbsp grounds per ¼ cup water)
- Quality starts with beans: Freshly roasted, coarsely ground beans yield superior instant results
- Reconstitution technique affects taste: Always use hot (not boiling) water and stir thoroughly for smooth results
- Shelf life varies: Frozen concentrates last 3 months; freeze-dried powder lasts 6+ months if stored properly
Quick Answers to Common Questions
Can I use pre-ground coffee for homemade instant?
It’s not ideal. Pre-ground coffee loses volatile aromatics quickly and is often ground too fine, leading to bitter, muddy concentrates or powders. For best results, grind fresh beans just before brewing your concentrate.
How much homemade instant coffee equals one store-bought packet?
Generally, 1 teaspoon of freeze-dried powder or 1 cold brew concentrate cube makes a standard 6-8 oz cup. Adjust based on your concentrate strength and taste preference – start with less and add more.
Can I add milk or sugar before freezing/drying?
Not recommended. Dairy can spoil during storage and complicates the drying process. Sugar can caramelize or crystallize. Always add milk, cream, or sweetener when you reconstitute your instant coffee.
Why does my homemade instant coffee taste different than store-bought?
Store-bought instant often uses lower-grade beans, harsher processing (high-heat spray drying), and additives. Your homemade version uses quality beans, gentler methods (especially cold brew/freeze-dry), and no additives, resulting in brighter, more complex, and less “cooked” flavor.
Is homemade instant coffee healthier than store-bought?
Generally yes. You control the ingredients – no added sugars, preservatives, or anti-caking agents common in commercial instant. You also avoid potential contaminants from lower-quality beans sometimes used industrially.
📑 Table of Contents
- The Instant Coffee Dream: Fresh Brewed Taste in Seconds
- Why Regular Ground Coffee Isn’t “Instant” (And What Actually Works)
- Method 1: Cold Brew Concentrate (The Easiest & Most Flavorful)
- Method 2: DIY Freeze-Drying (Closest to Commercial Instant)
- Method 3: Oven/Dehydrator Drying (Budget-Friendly Alternative)
- Essential Tips for Success: Beans, Grind, Water & Storage
- Troubleshooting Common Problems
- Conclusion: Your Instant Coffee, Elevated
The Instant Coffee Dream: Fresh Brewed Taste in Seconds
We’ve all been there. That 6 a.m. alarm blares while your brain screams for caffeine. You stumble to the kitchen, fumbling with the coffee maker, waiting impatiently as it gurgles and drips. Meanwhile, your coworker casually drops an instant coffee packet into hot water and poof – coffee in 30 seconds. You wonder: “Why can’t my fresh ground beans work that fast?” What if I told you they absolutely can? The secret isn’t magic – it’s smart preparation. Making instant coffee from ground coffee isn’t about replicating store-bought freeze-dried crystals exactly. It’s about creating your own quick-brew solution using methods that preserve the rich flavor you love from freshly ground beans. Forget compromising taste for speed. This is your guide to having both.
Most people don’t realize that true commercial instant coffee undergoes intense processing – spray-drying or freeze-drying brewed coffee under high heat or vacuum conditions. You can’t perfectly mimic that in your kitchen. But here’s the exciting part: you can make something far better than basic instant coffee. Think of it as “homemade instant-style coffee” – a concentrate or powder that dissolves instantly, made with your favorite beans, no artificial additives, and packed with nuanced flavor. The key is understanding that we’re working with brewed coffee made from your grounds, then transforming it for instant use. This isn’t about grinding beans finer (that makes muddy coffee, not instant). It’s about brewing smart, then preserving smart. Ready to reclaim your mornings without sacrificing that third-wave coffee experience? Let’s dive in.
Why Regular Ground Coffee Isn’t “Instant” (And What Actually Works)
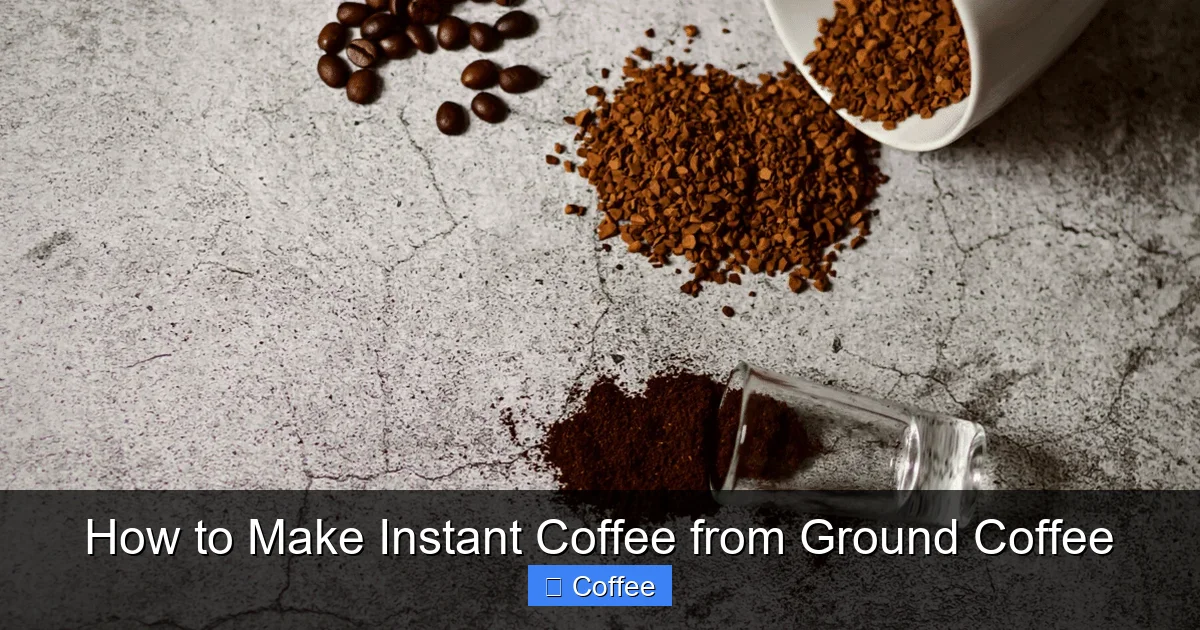
First, let’s clear up a major confusion. Simply grinding coffee beans finer does not make them instant. Instant coffee is defined by its ability to dissolve completely in hot water with zero residue. Regular ground coffee, no matter how fine, will always leave gritty sediment. That’s because instant coffee starts as brewed coffee liquid, which is then dehydrated. The process removes all the coffee solids, leaving only the soluble flavor compounds in a dry, dissolvable form.
Visual guide about How to Make Instant Coffee from Ground Coffee
Image source: cdn.shopify.com
When you try to make “instant” by just using super-fine grounds, you’re essentially making espresso-style coffee that’s way too strong and still requires filtering. It’s messy, slow, and tastes bitter. The real solution lies in pre-brewing your coffee using your preferred method (French press, pour-over, etc.), then concentrating and preserving that liquid. This is where the magic happens. You’re capturing the essence of your freshly brewed cup and locking it away for instant revival later. The methods we’ll explore focus on two main approaches: creating a super-concentrated liquid (like cold brew concentrate) that you dilute instantly, or actually dehydrating the brewed coffee into a powder or granules (closer to commercial instant).
The Core Principle: Brew First, Then Preserve
Forget trying to make instant coffee from dry grounds directly. The process always involves these steps:
- Brew your coffee normally using your favorite ground beans and method.
- Concentrate the brewed liquid (remove some water to make it stronger).
- Preserve the concentrate through freezing or drying for instant use later.
This is crucial. Skipping the brew step means you’re just dealing with dry coffee particles that won’t dissolve properly. The concentration step ensures that when you add hot water later, you get a full-strength cup, not a weak splash. Preservation keeps it fresh and ready to go. Understanding this flow is the foundation for all the methods that follow. It shifts your mindset from “how do I make these grounds instant?” to “how do I preserve this amazing brew I just made for instant enjoyment tomorrow?”
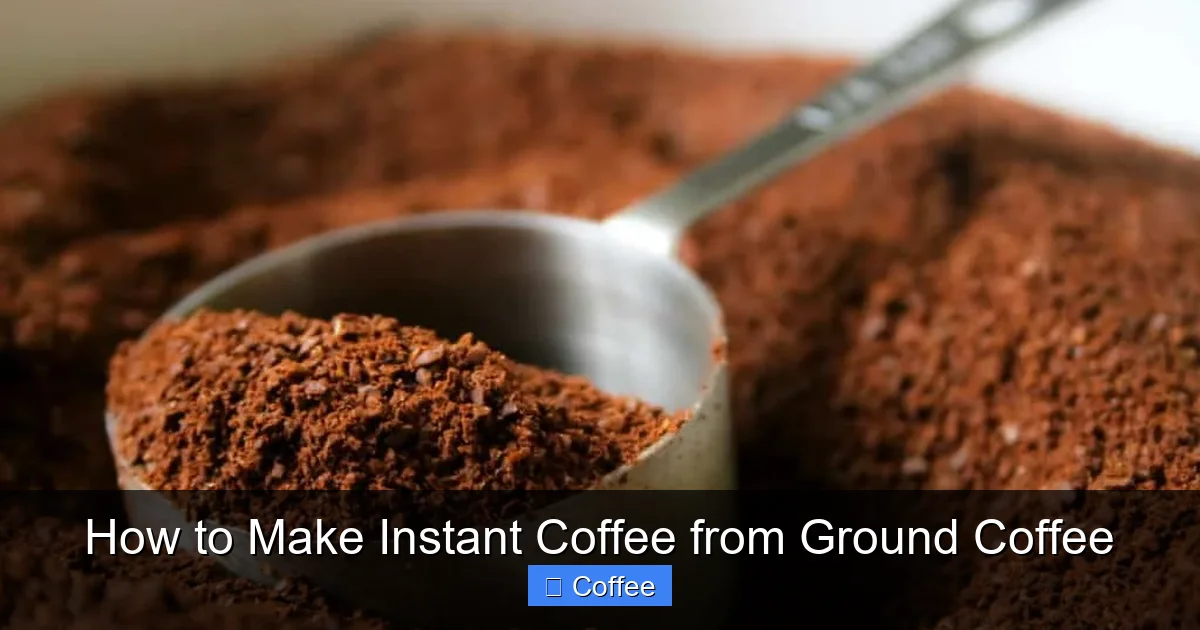
Method 1: Cold Brew Concentrate (The Easiest & Most Flavorful)
If you’re looking for the absolute simplest way to make instant coffee from ground coffee with minimal equipment and maximum flavor payoff, cold brew concentrate is your golden ticket. This method leverages time instead of heat, resulting in a smoother, less acidic concentrate that’s incredibly versatile. The best part? You likely already have everything you need.
Visual guide about How to Make Instant Coffee from Ground Coffee
Image source: homegrounds.co
Why Cold Brew Wins for Homemade “Instant”
Cold brewing extracts coffee slowly over 12-24 hours using room temperature or cold water. This gentle process minimizes the release of bitter acids and oils that hot brewing can pull out, especially with darker roasts. The result is a naturally sweeter, smoother concentrate with chocolatey or nutty notes that shine through. Because it’s already concentrated (typically 4-8x stronger than regular coffee), a small amount diluted with hot water makes a perfect instant-style cup. It’s also incredibly stable when frozen, retaining its flavor beautifully for months. No fancy machines, no heat degradation – just time and patience yielding incredible convenience.
Step-by-Step: Making Your Cold Brew Concentrate
Here’s how to turn your favorite ground coffee into instant gold:
- Grind: Use a coarse grind (like for French press). Fine grounds make muddy concentrate that’s hard to strain. Aim for sea salt-sized particles.
- Ratio: The magic ratio is 1 part coffee to 4 parts water by weight. For example: 50g (about ⅔ cup) coarse grounds to 200g (about 1 cup) cold filtered water. This yields a strong concentrate perfect for dilution.
- Steep: Combine grounds and water in a large jar or pitcher. Stir gently to ensure all grounds are wet. Cover and refrigerate for 12-24 hours. 16 hours is often the sweet spot for balanced flavor.
- Strain: Line a fine-mesh sieve with a coffee filter or cheesecloth. Place over a bowl. Slowly pour the concentrate through. Gently press the grounds with a spoon – don’t squeeze aggressively, as this releases bitterness. Discard the spent grounds.
- Store: Pour the strained concentrate into an airtight container. It will keep in the fridge for 2 weeks. For true “instant” convenience, proceed to freezing (next step).
Pro Tip: Use high-quality, freshly roasted beans. A medium or light roast works beautifully for cold brew, highlighting brighter notes. Avoid pre-ground coffee if possible – grind just before brewing for peak freshness.
Freezing for Instant Use: The Game Changer
This is where your cold brew transforms into true instant coffee. Freezing the concentrate locks in flavor and allows you to use exactly what you need, when you need it.
- Ice Cube Trays: Pour the strained concentrate into standard ice cube trays. Freeze solid (about 4-6 hours).
- Silicone Molds: For larger portions, use silicone molds (like those for broth or sauce). Makes thawing easier.
- Storage: Once frozen, pop cubes out and transfer to a heavy-duty freezer bag or airtight container. Squeeze out ALL air. Label with date.
How to Use: Grab 1-2 frozen concentrate cubes (depending on desired strength – 1 cube ≈ 1 shot espresso strength). Drop into your mug. Pour 6-8 oz of hot (not boiling) water over them. Stir vigorously for 10-15 seconds until fully dissolved and smooth. Add milk, cream, or sweetener if desired. Enjoy instantly! The cubes dissolve remarkably fast in hot water, giving you a rich, smooth cup that tastes remarkably close to fresh cold brew, but hot.
Why it Works: Freezing halts oxidation and staling. The concentrate’s low acidity means it freezes exceptionally well without developing off-flavors. You’re essentially having “flash-frozen” coffee flavor ready in seconds.
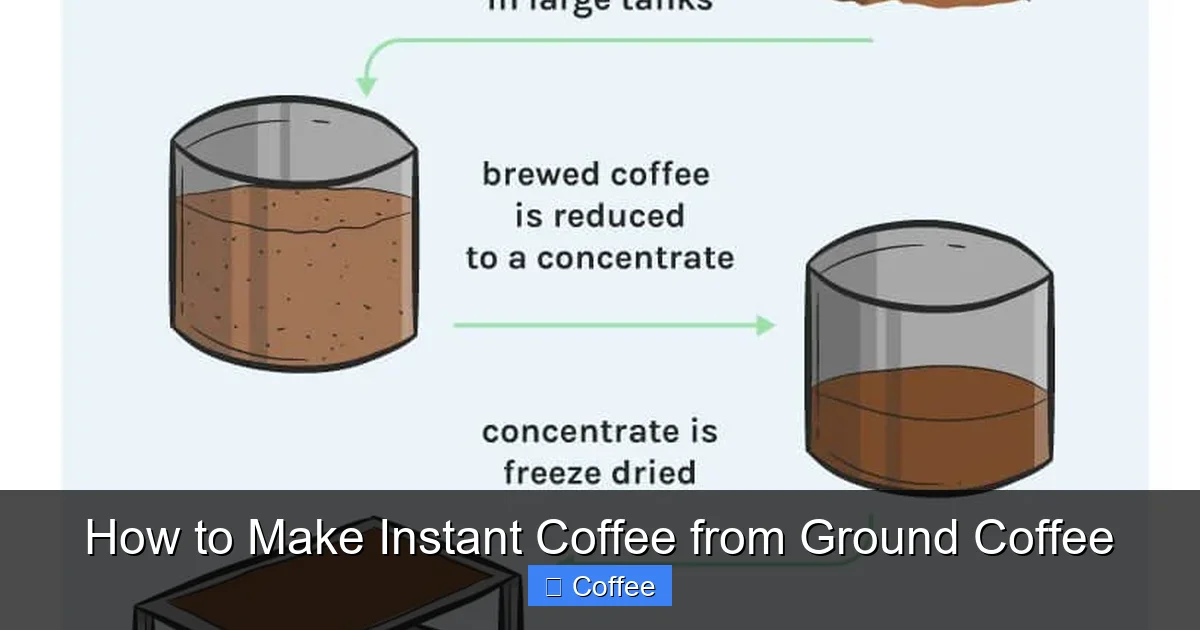
Method 2: DIY Freeze-Drying (Closest to Commercial Instant)
If you’re serious about making instant coffee from ground coffee that truly dissolves like store-bought packets (but tastes infinitely better), freeze-drying is the pinnacle method. It removes water by turning ice directly into vapor (sublimation), preserving the coffee’s cellular structure and volatile flavor compounds far better than heat drying. The result is light, porous granules or powder that dissolve instantly with no residue. While it requires specific equipment, the flavor payoff is unmatched for homemade instant.
Visual guide about How to Make Instant Coffee from Ground Coffee
Image source: twochimpscoffee.com
Understanding Freeze-Drying vs. Other Drying Methods
Why freeze-drying? Let’s compare:
- Freeze-Drying (Lyophilization): Brewed coffee is frozen solid, then placed under vacuum. Ice sublimates directly to vapor, leaving dry, intact coffee solids. Best flavor preservation, fastest dissolution, longest shelf life.
- Oven Drying / Dehydrator: Uses heat (even low heat) to evaporate water. High heat degrades delicate aromas, leading to flat, cooked, or caramelized flavors. Slower dissolution, potential for clumping.
- Air Drying: Simply leaving brewed coffee out to dry. Extremely slow, prone to mold/bacteria, results in very dark, stale-tasting flakes. Not recommended.
Freeze-drying is the gold standard because it operates at very low temperatures throughout the process. Heat is the enemy of nuanced coffee flavor – it drives off volatile compounds that give coffee its complexity (floral, fruity, winey notes). Freeze-drying minimizes this loss, capturing the true essence of your brew. The resulting powder is also incredibly light and porous, meaning hot water penetrates it instantly for complete dissolution.
Step-by-Step: Freeze-Drying Your Brewed Coffee
You’ll need a home freeze-dryer (like those from Harvest Right, Excalibur, or similar). Follow these steps:
- Brew Strong: Make a very strong batch of coffee using your preferred method (pour-over, AeroPress work great). Aim for a ratio of 1:3 coffee-to-water (e.g., 50g coffee to 150g water). This ensures your final powder isn’t too weak.
- Cool Completely: Let the brewed coffee cool to room temperature. Never put hot liquid into the freeze-dryer.
- Pre-Freeze (Optional but Recommended): Pour the cooled coffee into shallow, freezer-safe trays (silicone baking mats or parchment-lined trays work). Spread in a thin, even layer (¼ to ½ inch thick). Freeze solid (about 4-6 hours). This speeds up the freeze-dry cycle.
- Load the Freeze-Dryer: Transfer the frozen coffee sheets or liquid into the freeze-dryer trays. Don’t overfill – leave space for air circulation.
- Run the Cycle: Start the freeze-dry cycle. This typically takes 12-24 hours, depending on thickness and machine. The machine will freeze the contents further, then apply vacuum to sublimate the ice.
- Check for Dryness: When the cycle ends, the coffee should be completely dry, light, and crumbly. It should snap when bent, not feel cool or damp. If unsure, run an extra 1-2 hours.
- Break Up & Store: Break the dried sheets into small pieces or granules. For powder, pulse briefly in a clean coffee grinder or spice mill (do this quickly to avoid heat buildup). Store IMMEDIATELY in an airtight, opaque container with oxygen absorbers if possible. Keep in a cool, dark place.
How to Use: Add 1-2 teaspoons (adjust to taste) of your freeze-dried coffee to a mug. Pour 6-8 oz of hot water over it. Stir well. It should dissolve completely within seconds, leaving no sediment. The flavor will be remarkably close to your original strong brew, just concentrated.
Pro Tips: Brew with filtered water for best taste. Avoid adding milk/sugar before freeze-drying – it complicates the process and storage. Label containers with roast date and brew date. Freeze-dried coffee is incredibly stable – properly stored, it can last 1-2 years without significant flavor loss.
Method 3: Oven/Dehydrator Drying (Budget-Friendly Alternative)
Don’t have a freeze-dryer? Don’t worry! While not as perfect as freeze-drying, using a low-temperature oven or food dehydrator can still produce usable instant coffee powder from ground coffee. It’s more accessible and requires only basic kitchen tools. The trade-off is some flavor degradation due to heat, but with careful technique, you can still make a decent instant option.
Why Heat Drying Isn’t Ideal (But Can Work)
Heat is coffee’s flavor enemy. Even at low temperatures (below 140°F/60°C), prolonged exposure causes:
- Loss of volatile aromatic compounds (floral, fruity notes fade first)
- Development of cooked, caramelized, or “baked” flavors
- Potential for bitterness as acids break down
- Slower dissolution due to denser particle structure
However, by minimizing heat exposure time and temperature, you can mitigate some of this damage. The key is low and slow. This method works best with darker roasts, which are more heat-stable and have bolder flavors that hold up better. Light roasts will suffer more noticeable flavor loss.
Step-by-Step: Low-Temp Drying Method
Here’s how to maximize flavor when using heat:
- Brew Extra Strong: Use a 1:3 coffee-to-water ratio (e.g., 60g coffee to 180g water). Stronger brew = less powder needed later, minimizing heat exposure time per cup.
- Cool & Strain: Brew, then cool completely. Strain through a fine filter to remove any fine sediment (prevents bitterness in powder).
- Spread Thin: Pour the cooled coffee onto parchment-lined baking sheets or dehydrator trays. Spread into the thinnest possible even layer (⅛ to ¼ inch thick). Thinner layers dry faster and more evenly.
- Low-Temp Drying:**
- Oven Method: Set oven to its absolute lowest setting (usually 140-170°F / 60-75°C). Prop the door open slightly with a wooden spoon to allow moisture escape. Place trays in oven. Dry for 4-8 hours, checking frequently. Coffee is done when completely dry, brittle, and snaps cleanly.
- Dehydrator Method: Set dehydrator to 125-135°F (52-57°C). Dry for 6-12 hours, rotating trays occasionally for even drying. Check for dryness as above.
- Grind to Powder: Once completely cool, break up the dried sheets. Grind in a clean coffee grinder, spice mill, or high-powered blender in short bursts to avoid heat buildup. Sift through a fine mesh sieve to remove any large chunks (re-grind those).
- Store Immediately: Transfer powder to a completely airtight, opaque container. Add an oxygen absorber packet if you have one. Store in a cool, dark cupboard.
How to Use: Add 1-2 teaspoons to hot water. Stir vigorously. It may take slightly longer to dissolve fully than freeze-dried powder and might have a very slight “cooked” note, but it’s functional instant coffee made from your grounds. Expect a shelf life of 3-6 months.
Critical Tips: NEVER use boiling water for reconstitution – it amplifies any cooked flavors. Always use hot (195-205°F / 90-96°C) water. Monitor drying closely – over-drying makes it taste stale. Start with a small batch to test your setup.
Essential Tips for Success: Beans, Grind, Water & Storage
Even the best method fails with poor ingredients or storage. These factors make or break your homemade instant coffee experience. Treat them with the same care as your regular brew.
Choosing the Right Beans & Grind
Not all coffee is created equal for instant conversion:
- Freshness is Non-Negotiable: Use beans roasted within the last 2-4 weeks. Stale beans = stale instant coffee, no matter the method. Smell them – they should have a vibrant, aromatic scent, not musty or flat.
- Roast Level Matters: Medium roasts offer the best balance for most methods, preserving acidity and complexity. Dark roasts are more heat-stable for oven drying but can taste flat in cold brew. Light roasts shine in cold brew but suffer most in heat drying. Choose based on your primary method.
- Grind Consistency is Key:
- Cold Brew: Coarse grind (French press size). Prevents over-extraction and muddy concentrate.
- Hot Brew for Drying (Freeze/Oven): Medium-fine grind (like pour-over). Ensures strong extraction for the concentrate.
- Never Use Pre-Ground: It’s stale and often too fine, leading to bitterness and poor results.
Pro Tip: Grind your beans just before brewing the concentrate. Oxidation starts immediately after grinding, degrading flavor compounds you’re trying to preserve.
Water Quality: The Silent Flavor Killer
Water makes up 98-99% of your coffee. Bad water = bad coffee, even in instant form.
- Use Filtered Water: Tap water with chlorine, minerals (hard water), or impurities will taint your concentrate or powder. A simple carbon filter (like Brita) makes a huge difference.
- Avoid Distilled Water: It lacks minerals that help extract and carry flavor. Filtered tap or spring water is ideal.
- Consistency: Use the same water source for brewing your concentrate as you do for reconstituting. Sudden changes in mineral content affect taste.
Why it Matters for Instant: When you concentrate coffee, you’re also concentrating any off-flavors from the water. Freeze-drying or drying locks those flavors in. Starting with clean water ensures your instant coffee tastes clean and true to the bean.
Mastering Storage: Locking in Freshness
Homemade instant coffee is only as good as its storage. Oxygen, light, heat, and moisture are its enemies.
- Airtight is Mandatory: Use glass jars with rubber gaskets (like Mason jars) or high-quality plastic containers with locking lids. Vacuum sealers are excellent for powder.
- Opaque Containers: Light degrades coffee oils. Store in dark glass or opaque plastic. If using clear glass, keep it in a dark cupboard.
- Cool & Dark: Never store near the stove, dishwasher, or in direct sunlight. A cool pantry is ideal. Refrigeration can cause condensation issues; freezing is better for long-term powder storage.
- Minimize Air Exposure: For powders, press out air before sealing. Consider oxygen absorber packets (available online) for extra protection, especially for freeze-dried coffee.
- Label Everything: Note the coffee origin, roast date, brew date, and method used. Helps track freshness and flavor profiles.
Shelf Life Realities:
- Frozen Cold Brew Cubes: 3 months (best flavor within 6 weeks)
- Refrigerated Cold Brew Concentrate (liquid): 2 weeks
- Freeze-Dried Powder: 6-12+ months (properly stored)
- Oven/Dehydrator Powder: 3-6 months
Signs it’s Gone Bad: Sour, musty, or rancid smell; visible mold (discard immediately!); significant loss of aroma; clumping that won’t dissolve.
Troubleshooting Common Problems
Even with the best intentions, things can go sideways. Here’s how to fix the most frequent issues with homemade instant coffee:
Problem: My “Instant” Coffee Tastes Weak or Watery
Likely Cause: Your concentrate wasn’t strong enough before freezing/drying.
Solution:
- For cold brew: Use a stronger ratio next time (1:3 coffee:water instead of 1:4).
- For dried methods: Brew your initial coffee much stronger (1:2 or 1:3 ratio).
- When reconstituting: Use less water. Start with 4oz hot water per cube/teaspoon and adjust.
- Grind your beans finer for the initial brew (within reason – don’t make mud).
Pro Tip: Taste your concentrate before freezing/drying. It should taste intensely coffee-forward, almost too strong to drink straight. If it tastes weak now, it will be watery later.
Problem: It’s Bitter or Astringent
Likely Causes: Over-extraction during initial brew, fine sediment in powder, or using boiling water for reconstitution.
Solutions:
- Check Grind Size: For cold brew, ensure coarse grind. For hot brew, avoid powder-fine grind.
- Strain Thoroughly: Use a paper filter for the initial brew, especially for methods involving drying. Don’t squeeze the filter.
- Water Temperature: Always use hot (195-205°F / 90-96°C), NOT boiling water, to reconstitute. Boiling water extracts harsh compounds from the powder.
- Brew Time: For cold brew, don’t exceed 24 hours. For hot brew, don’t over-extract (follow standard brew times).
Pro Tip: If your powder is already bitter, try adding a tiny pinch of salt to the hot water before stirring in the coffee – it can mellow perceived bitterness.
Problem: The Powder Won’t Dissolve Completely (Gritty Residue)
Likely Causes: Incomplete drying, fine sediment not strained, or insufficient stirring.
Solutions:
- Strain Better: Use a paper filter (not just metal mesh) for the initial brew, especially if making powder.
- Ensure Complete Dryness: If using heat drying, make sure it’s fully dry and brittle before grinding. Moisture causes clumping.
- Grind Finer (Carefully): For powder methods, grind in short bursts to a finer consistency, but avoid heat buildup.
- Stir Vigorously: Use a small whisk or stir rapidly for 20-30 seconds after adding water. Let it sit for 10 seconds, then stir again.
- Pre-Dissolve Trick: Add a tiny splash of hot water to the powder first, stir into a paste, then add the rest of the water.
Pro Tip: Freeze-dried powder dissolves best. If grittiness persists with oven-dried powder, it might be inherent to the method – focus on perfecting your straining.
Problem: It Tastes Stale or Flat
Likely Causes: Old beans, poor storage, or oxidation during processing.
Solutions:
- Start Fresh: Use newly roasted beans (within 2 weeks).
- Grind Fresh: Grind beans immediately before brewing the concentrate.
- Improve Storage: Ensure containers are truly airtight. Use oxygen absorbers. Store in the darkest, coolest spot possible. Freeze powder for longest life.
- Reduce Batch Size: Make smaller batches more frequently to ensure you’re always using coffee at its peak.
- Check Water: Use fresh filtered water for both brewing and reconstituting.
Pro Tip: Smell your stored powder before using. If it lacks a vibrant coffee aroma and smells dusty or cardboard-like, it’s past its prime.
Conclusion: Your Instant Coffee, Elevated
Making instant coffee from ground coffee isn’t about replicating the generic, often lackluster taste of store-bought packets. It’s about taking control of your coffee experience. It’s about capturing the vibrant, complex flavors of your favorite freshly brewed cup and preserving them for those moments when time is non-negotiable. Whether you choose the simplicity of frozen cold brew cubes, the precision of DIY freeze-drying, or the accessibility of low-temp oven drying, you’re creating something truly special: instant coffee that tastes like coffee.
The beauty lies in the customization. You choose the beans – that single-origin Ethiopian with its berry notes, or the rich Sumatran blend. You control the strength, the roast level, the water quality. You eliminate additives and preservatives. The result isn’t just convenient; it’s a personal coffee ritual that fits seamlessly into your fast-paced life without demanding sacrifice. That morning rush? Now it’s a moment of quiet luxury. The unexpected afternoon slump? Solved with a cup that rivals your favorite café. You’ve transformed the humble ground coffee bean into a versatile, high-quality instant solution that puts you firmly in the driver’s seat of your caffeine destiny.
So, grab your favorite bag of beans, fire up your grinder, and give one of these methods a try. Start with the cold brew concentrate – it’s foolproof and delivers astonishing results with minimal effort. Feel the satisfaction of dropping a homemade cube into hot water and watching it dissolve into a rich, aromatic cup that tastes remarkably fresh. You’ll never look at instant coffee the same way again. You’re not just making coffee; you’re crafting convenience without compromise. Your perfect instant cup, made from the ground up, is waiting. Now go brew some freedom.
Frequently Asked Questions
How long does homemade instant coffee last?
Frozen cold brew cubes last 3 months (best within 6 weeks). Freeze-dried powder lasts 6-12+ months if stored airtight in a cool, dark place. Oven-dried powder lasts 3-6 months. Always smell before use – discard if sour or musty.
Can I make instant coffee with espresso grounds?
Yes, but adjust expectations. Espresso grounds are very fine, which can lead to sediment. Brew a strong ristretto (shorter shot), strain extremely well through a paper filter, then freeze or dry. The result will be intensely flavored but may have slight bitterness.
Do I need special equipment to make instant coffee from grounds?
For the easiest method (cold brew cubes), you only need a jar, filter, and ice cube trays. For true powder, a freeze-dryer is ideal but expensive; a low-temp oven or dehydrator works as a budget alternative.
Why is my cold brew concentrate bitter?
Common causes: grind too fine, steep time too long (over 24 hours), or water too warm. Use coarse grind, steep 12-18 hours max in the fridge, and ensure water is cold. Strain gently without pressing grounds.
Can I use instant coffee methods with flavored ground coffee?
Yes, but flavors (like vanilla or hazelnut) may not preserve perfectly during drying/freezing. Cold brew concentrate works best for flavored coffees. Avoid adding liquid flavorings before drying – they can cause spoilage or clumping.
Is homemade instant coffee less caffeinated?
It depends on your brew ratio. A standard cold brew concentrate (1:4) has more caffeine per ounce than regular coffee. When diluted 1:1 with hot water, it’s roughly equivalent to a standard cup. Freeze-dried powder from strong brew will also be comparable. Adjust strength to your caffeine needs.