Master the art of oven-baked chicken breast at 400°F with our foolproof timing guide. Learn why thickness matters more than weight, how to avoid dryness, and the critical internal temperature for safe, juicy results every single time.
Key Takeaways
- Thickness is king: A 1-inch thick breast cooks in 18-22 minutes at 400°F, while thicker pieces need 25-30+ minutes. Always measure thickness, not just weight.
- Internal temp is non-negotiable: Pull chicken at 160°F (carryover cooking brings it to 165°F). Use an instant-read thermometer for accuracy.
- Resting is essential: Let chicken rest 5-10 minutes after baking. This locks in juices and prevents dryness when sliced.
- Prep impacts time: Patting chicken dry and bringing it to room temperature ensures even cooking and better browning.
- 400°F is ideal: This high heat sears the outside quickly while cooking the inside gently, minimizing moisture loss compared to lower temps.
- Season generously: Salt draws out moisture initially, but a good crust forms during baking. Don’t skip seasoning under the skin for maximum flavor.
- Avoid common pitfalls: Overcrowding the pan, skipping the thermometer, or cutting into chicken too soon are the top reasons for dry results.
Quick Answers to Common Questions
Can I cook frozen chicken breast at 400°F?
Yes, but it requires significant adjustments. Add 50% more cooking time (e.g., 30-45 minutes for a 1-inch thick frozen breast). Always verify with a thermometer – frozen chicken takes much longer for the center to reach 160°F. For best results, thaw in the fridge overnight.
Why is my chicken breast always dry, even at 400°F?
Dryness usually stems from overcooking. The most common causes are relying solely on time (not thickness or thermometer), skipping the rest, or pulling chicken at 165°F+ instead of 160°F. Ensure you’re using a thermometer and pulling at 160°F.
Can I bake chicken breast covered with foil at 400°F?
Covering with foil traps steam, preventing browning and creating a boiled texture. Avoid covering during baking for crispy skin or a good sear. You can loosely tent with foil only during the resting phase.
How much time should I add for bone-in chicken breast?
Bone-in, skin-on chicken breasts typically take 5-10 minutes longer than boneless, skinless breasts of the same thickness at 400°F. The bone acts as an insulator, slowing heat transfer to the meat. Always rely on internal temperature (160°F).
Can I use a convection oven at 400°F?
Yes, but convection cooks faster and drier. Reduce the oven temperature by 25°F (to 375°F convection) OR reduce the cooking time by about 25%. Check for doneness 5-7 minutes earlier than the standard time and use your thermometer religiously.
📑 Table of Contents
- The Secret to Perfectly Juicy Oven-Baked Chicken Breast at 400°F
- Why 400°F is the Sweet Spot for Chicken Breast
- Factors That Actually Determine Your Cooking Time (It’s Not Just Weight!)
- Your Foolproof Step-by-Step Guide to Chicken Breast at 400°F
- How to Tell When Chicken Breast is Truly Done (Beyond the Timer)
- Top Mistakes That Ruin Oven-Baked Chicken Breast (And How to Fix Them)
- Creative Ways to Serve Your Perfectly Baked Chicken Breast
- Conclusion: Your Journey to Consistently Perfect Chicken Breast Starts Now
The Secret to Perfectly Juicy Oven-Baked Chicken Breast at 400°F
Let’s be honest: dry, rubbery chicken breast is the culinary equivalent of a deflated balloon. It’s sad, it’s disappointing, and it happens way too often, especially when baking in the oven. But what if I told you that cooking chicken breast at 400°F is actually one of the easiest ways to achieve tender, juicy, flavorful results? The key isn’t just the temperature – it’s understanding the how long chicken breast in oven 400 truly takes, and why timing isn’t one-size-fits-all.
Forget rigid timers based solely on weight. The biggest mistake home cooks make is assuming all chicken breasts cook the same. A plump, thick breast from the butcher will take significantly longer than a thin, pounded cutlet, even if they weigh the same. Baking at 400°F is fantastic because the high heat quickly sears the exterior, locking in juices, while gently cooking the interior. But this magic only works if you respect the variables. This guide cuts through the confusion. We’ll dive deep into the factors that dictate your cooking time, give you a reliable step-by-step method, and arm you with the knowledge to nail it every single time. No more guessing, no more dry chicken – just perfectly cooked, oven-baked perfection.
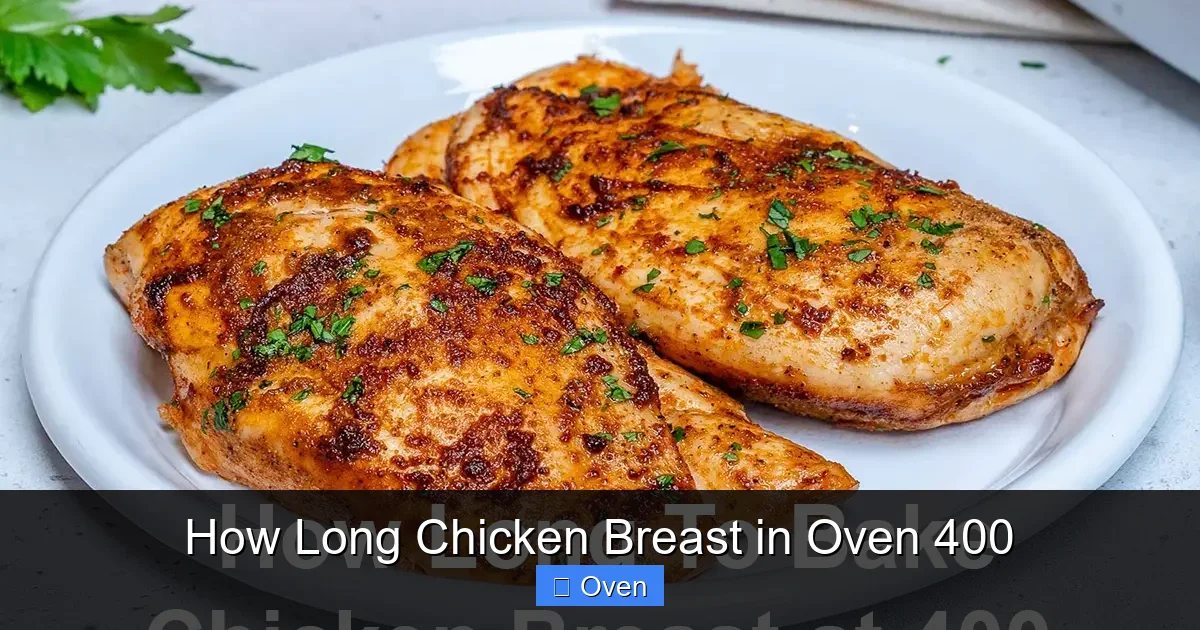
Why 400°F is the Sweet Spot for Chicken Breast
You might wonder, why 400°F specifically? Why not 350°F, 375°F, or even 425°F? The answer lies in the delicate balance between browning, cooking speed, and moisture retention.
Visual guide about How Long Chicken Breast in Oven 400
Image source: realsimplegood.com
The Science Behind the Perfect Sear and Cook
At 400°F, the Maillard reaction – that magical chemical process that creates complex, savory flavors and beautiful browning – happens rapidly on the surface of the chicken. This quick sear forms a flavorful crust that acts like a barrier, helping to seal in the precious juices inside. Crucially, this high heat also means the chicken cooks faster than it would at lower temperatures like 350°F. Faster cooking time directly translates to less opportunity for moisture to evaporate from the meat. While 350°F might take 30+ minutes for a thick breast, potentially drying it out, 400°F often gets the job done in 20-25 minutes, preserving that essential juiciness. It’s the Goldilocks zone: hot enough for great browning and speed, but not so hot that the outside burns before the inside cooks through.
Benefits Over Lower Temperatures
Cooking chicken breast at lower temperatures (like 325°F or 350°F) has its place, often for larger roasts or when you want very gentle, even cooking. However, for standard boneless, skinless chicken breasts, 400°F offers distinct advantages:
- Superior Browning: Achieves a beautiful golden crust much faster than lower temps, enhancing flavor significantly.
- Reduced Cooking Time: Cuts total bake time by 10-15 minutes compared to 350°F, minimizing moisture loss.
- Energy Efficiency: Uses less oven energy overall due to the shorter cooking duration.
- Better Texture: The quick sear helps maintain a tender interior texture, avoiding the sometimes “boiled” or overly soft texture that can happen with very slow, low-heat cooking.
While 425°F or 450°F can work for very thin cutlets (under 1/2 inch), it becomes risky for standard breasts, increasing the chance of burnt exteriors and raw interiors. 400°F strikes the perfect balance for most home ovens and typical chicken breast sizes.
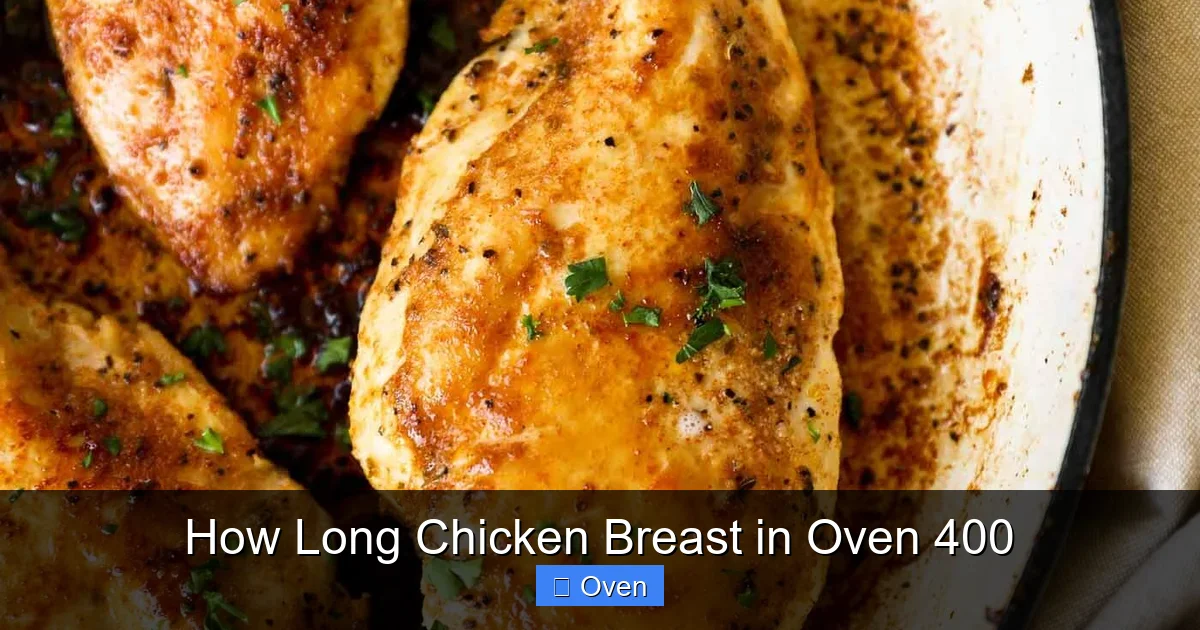
Factors That Actually Determine Your Cooking Time (It’s Not Just Weight!)
This is where most timing guides fail you. They slap a generic “20-25 minutes” on a package or recipe, ignoring the critical variables that make your chicken breast unique. Understanding these factors is the absolute key to mastering how long chicken breast in oven 400 truly needs.
Visual guide about How Long Chicken Breast in Oven 400
Image source: faucetfam.com
Thickness is the #1 Factor (Measure It!)
Forget the scale for a moment. The single most important factor dictating your cooking time is the thickness of the breast, measured at its thickest point. Heat penetrates from the outside in. A breast that’s 1.5 inches thick at the center will take significantly longer for the heat to reach the middle than a breast that’s only 3/4 inch thick, even if they weigh the same. Always use a ruler or the tines of a fork to measure the thickest part before you start. Here’s a rough guide:
- 3/4 inch thick: 12-16 minutes
- 1 inch thick: 18-22 minutes
- 1.25 inches thick: 22-26 minutes
- 1.5 inches thick: 25-30+ minutes
Pro Tip: If your breasts are uneven, place the thicker end towards the center of the pan where heat is slightly less intense, or consider pounding the thicker end gently with a meat mallet to even them out before seasoning.
Starting Temperature Matters
Chicken straight from the fridge (around 40°F) will take longer to cook through than chicken that has sat at room temperature for 20-30 minutes. Cold meat shocks the oven’s ambient temperature slightly and simply needs more time for the core to warm up. Taking your chicken out of the fridge 20-30 minutes before baking ensures more even cooking and can shave a minute or two off your total time. It also helps the seasoning adhere better.
Skin-On vs. Skinless
Skin-on chicken breasts generally cook slightly faster than skinless ones at the same thickness. The layer of fat under the skin renders out and bastes the meat as it cooks, contributing to moisture and potentially speeding up the internal temperature rise. However, the difference is usually only 1-3 minutes. If you’re using skin-on, you might find your chicken reaches 160°F a touch quicker than a skinless breast of identical thickness. Remember to pat the skin *very* dry before seasoning for maximum crispiness.
Your Oven’s True Temperature
Oven thermostats are notoriously inaccurate. What your dial says is 400°F might actually be 380°F or 420°F inside. This is why an oven thermometer is an indispensable tool, not a luxury. Place it in the center of your oven rack and preheat thoroughly (at least 20-30 minutes) before checking. If your oven runs cool, your chicken will take longer; if it runs hot, it could cook too fast and dry out. Knowing your oven’s true personality is crucial for accurate timing.
Pan Choice and Crowding
Using a heavy-duty baking sheet or roasting pan promotes better browning than a flimsy one. More importantly, never overcrowd the pan. Chicken needs space for hot air to circulate. If pieces are touching or piled up, they steam instead of sear, leading to soggy skin (if applicable) and uneven cooking. This steaming effect also slows down the overall cooking process. Use a pan large enough so each breast has at least an inch of space around it. If necessary, bake in batches.
Your Foolproof Step-by-Step Guide to Chicken Breast at 400°F
Now that you understand the variables, let’s put it all together with a reliable method. This process prioritizes juicy results and takes the guesswork out of how long chicken breast in oven 400 requires.

Visual guide about How Long Chicken Breast in Oven 400
Image source: i.pinimg.com
Prep is Everything: Setting Up for Success
Don’t skip these crucial steps – they make a massive difference:
- Preheat Thoroughly: Turn your oven to 400°F and let it preheat for at least 20-30 minutes. Use your oven thermometer to verify the temperature.
- Prep the Chicken: Pat the chicken breasts extremely dry all over with paper towels. This is non-negotiable for good browning. Remove any visible fat or sinew.
- Bring to Room Temp: Let the chicken sit uncovered on a plate for 20-30 minutes while the oven preheats.
- Season Generously: Season both sides (and under the skin if skin-on) liberally with salt and pepper. Add other dry spices (paprika, garlic powder, onion powder, dried herbs) if desired. For skin-on, gently loosen the skin with your fingers and rub some seasoning directly onto the meat. Drizzle lightly with olive oil or melted butter – this helps conduct heat and promotes browning, but don’t drown it.
- Choose Your Pan: Use a rimmed baking sheet or roasting pan. Line with foil or parchment for easy cleanup (optional, but helpful). Place a wire rack on the pan if you have one – this elevates the chicken, allowing hot air to circulate underneath for even cooking and better browning on all sides. If no rack, just place breasts directly on the pan.
The Baking Process: Timing and Technique
Place the seasoned chicken breasts on the prepared pan, ensuring space between them. Put the pan in the center of the preheated oven.
- Initial Bake: Bake undisturbed for the first 15-18 minutes (for average 1-inch thick breasts). Resist the urge to open the oven door! This lets heat escape and slows cooking.
- The Critical Check: At the 15-18 minute mark (or earlier for thinner breasts), it’s time to check the internal temperature. This is the most important step. Insert the probe of an instant-read thermometer into the thickest part of the breast, avoiding bone.
- Target Temperature: Remove the chicken from the oven when it reaches 160°F. Remember, carryover cooking (residual heat) will raise the internal temperature by 3-5°F as it rests. Pulling at 160°F ensures it hits the safe 165°F mark perfectly without overcooking.
- Resting is Mandatory: Transfer the chicken to a clean plate or cutting board. Tent loosely with foil (don’t seal tightly, or it steams) and let it rest for 5-10 minutes. This allows the juices, which have been driven to the center by the heat, to redistribute throughout the meat. Cutting too soon = juices running out = dry chicken.
Pro Timing Tip: If your chicken isn’t at 160°F after the initial bake time, return it to the oven and check every 2-3 minutes. Ovens vary, and thickness is king – don’t rely solely on a timer.
Why Resting is Non-Negotiable
Think of resting as the final, crucial step in the cooking process. During the intense heat of the oven, the muscle fibers in the chicken contract, squeezing out moisture towards the center. When you remove it from the heat, those fibers begin to relax. If you cut into the chicken immediately, all that precious, flavorful juice rushes out onto your cutting board, leaving the meat dry and bland. Resting for 5-10 minutes gives the fibers time to relax and reabsorb the juices. The result? Moist, tender chicken that stays juicy with every bite. Skipping this step is a surefire way to ruin otherwise perfectly cooked chicken.
How to Tell When Chicken Breast is Truly Done (Beyond the Timer)
Relying solely on a timer is a recipe for disaster. Ovens vary, chicken varies, and your specific piece is unique. Here’s how to know for absolute certainty your chicken is perfectly cooked.
The Only Reliable Method: Instant-Read Thermometer
This cannot be overstated: An instant-read thermometer is the single most important tool for perfect chicken. Guessing based on color or time is unreliable. Here’s how to use it correctly:
- Insert the probe into the absolute thickest part of the breast.
- Make sure the tip is centered in the meat, not touching bone (which reads hotter) or poking out the side.
- Wait for the reading to stabilize (usually 5-10 seconds for a good thermometer).
- Pull at 160°F: This is the magic number for oven-baked chicken breast. The residual heat will carry it to the safe 165°F internal temperature during resting.
Why 160°F and not 165°F? Chicken continues to cook after removal from the oven. Pulling at 165°F means it will likely hit 170°F+ during resting, which is the danger zone for dryness. 160°F is the sweet spot for safety and juiciness.
Visual and Textural Clues (Use WITH the Thermometer)
While the thermometer is king, these cues can support your judgment:
- Color: The exterior should be golden brown (if skinless, a nice sear; if skin-on, crispy and golden). The interior should be opaque white throughout, with no pinkness, especially near the bone if bone-in. However, some very slight pinkness near the bone in a juicy breast can be normal due to marrow leaching – always trust the thermometer over color.
- Juices: When pierced with a fork or knife, the juices should run clear, not pink or red. Again, this is secondary to temperature.
- Firmness: Gently press the thickest part with tongs or a fork. It should feel firm to the touch, not squishy or soft like raw chicken. It should spring back slightly when pressed.
Remember: These visual/textural cues are helpful indicators, but only the thermometer gives you a definitive, safe answer. Never skip the thermometer check.
Top Mistakes That Ruin Oven-Baked Chicken Breast (And How to Fix Them)
Even with the best intentions, things can go wrong. Knowing these common pitfalls helps you avoid them and troubleshoot if needed.
Mistake #1: Ignoring Thickness and Relying Solely on Weight/Timer
This is the #1 culprit behind dry or undercooked chicken. A 6oz breast that’s 1.5 inches thick takes much longer than a 6oz breast pounded to 1/2 inch. Solution: Always measure thickness. Use the timing ranges as a starting point, but always verify with a thermometer. Adjust time based on your specific pieces.
Mistake #2: Not Using a Thermometer
Guessing is gambling with your dinner. Color is unreliable (chicken can brown before it’s done, or look done while still pink inside). Timers are averages. Solution: Invest in a good instant-read thermometer ($10-$15). It’s the best kitchen tool you’ll buy for perfect proteins. Check at the minimum time for your thickness, then every 2-3 minutes.
Mistake #3: Cutting Into the Chicken Too Soon
Rushing to slice into that beautiful, golden breast means all the hard-earned juices spill out. Solution: Set a timer for 5-10 minutes after removing from the oven. Loosely tent with foil. Use this time to make a quick pan sauce or finish side dishes. The resting time is essential for juicy results.
Mistake #4: Overcrowding the Pan
Crowding causes steaming, not searing. Steamed chicken is bland and soggy, and it cooks unevenly. Solution: Use a large enough pan. Give each breast at least 1 inch of space on all sides. Bake in batches if necessary – it’s worth the extra few minutes for perfect results.
Mistake #5: Starting with Cold Chicken
Cold chicken from the fridge cooks unevenly and takes longer, increasing the risk of drying out the outside before the inside is done. Solution: Take chicken out of the fridge 20-30 minutes before baking. Pat it dry while it comes to temp.
Mistake #6: Skipping the Dry Pat-Down
Moisture on the surface is the enemy of browning. Water boils at 212°F, so the surface can’t get hot enough for the Maillard reaction (which starts around 285°F) until all surface moisture evaporates. Solution: Pat the chicken breasts thoroughly and repeatedly with paper towels until they feel completely dry to the touch. This step makes a huge difference in achieving that beautiful, flavorful crust.
Creative Ways to Serve Your Perfectly Baked Chicken Breast
Once you’ve mastered the perfect bake, the fun begins! Don’t just serve it plain. Here are some delicious ways to elevate your oven-baked chicken breast:
Simple Pan Sauce Magic
Don’t toss those flavorful drippings! After removing the chicken, pour off excess fat (leave about 1 tbsp), then return the pan to medium heat. Add 1/2 cup of liquid (chicken broth, white wine, lemon juice, or even water), scraping up the browned bits (fond) from the bottom of the pan. Simmer for 2-3 minutes until slightly reduced. For a richer sauce, whisk in 1-2 tbsp of cold butter or a splash of cream right before serving. Pour over the rested chicken.
Global Flavor Twists
Change up your seasoning blend to take your chicken on a world tour:
- Mediterranean: Lemon zest, garlic, oregano, thyme, olive oil. Serve with tzatziki and roasted veggies.
- Mexican: Chili powder, cumin, smoked paprika, garlic powder. Top with salsa, avocado, and cilantro. Great in tacos or salads.
- Asian-Inspired: Soy sauce (or tamari), ginger, garlic, a touch of honey or maple syrup, sesame oil (add after baking). Garnish with sesame seeds and scallions. Serve over rice or noodles.
- Herbes de Provence: A blend of dried lavender, rosemary, thyme, tarragon, and marjoram. Simple and elegant with roasted potatoes.
Beyond the Plate: Leftover Inspiration
Perfectly baked chicken breast is incredibly versatile for leftovers:
- Salads: Slice or cube and add to green salads, Caesar salads, or grain bowls (quinoa, farro).
- Sandwiches & Wraps: Shred or slice for classic chicken salad (mix with mayo, celery, grapes, nuts) or toss with BBQ sauce for sandwiches. Great in wraps with hummus and veggies.
- Soups & Stews: Add shredded chicken to chicken noodle soup, tortilla soup, or creamy chowders during the last 5 minutes of cooking.
- Casseroles & Bakes: Use in chicken pot pie, chicken and rice casserole, or as a topping for baked potatoes.
The key to great leftovers? Store cooled chicken in an airtight container in the fridge for up to 3-4 days. Reheat gently in a skillet with a splash of broth or water to keep it moist, or add it cold to salads and sandwiches.
Conclusion: Your Journey to Consistently Perfect Chicken Breast Starts Now
Mastering how long chicken breast in oven 400 isn’t about memorizing a single number. It’s about understanding the principles: thickness is paramount, your thermometer is your best friend, resting is essential, and 400°F is the ideal temperature for speed and flavor. By moving beyond generic timers and embracing these techniques – measuring thickness, verifying with an instant-read thermometer, patting dry, bringing chicken to room temp, and resting properly – you transform a potentially dry, disappointing cut into a consistently juicy, flavorful centerpiece.
Remember, the oven is a powerful tool, but it’s not mind-reading. Your chicken breasts are unique. Respect their individuality, arm yourself with the right knowledge and tools (especially that thermometer!), and you’ll never have to wonder “is it done?” again. The result? Tender, succulent chicken that’s safe to eat and bursting with flavor, whether it’s the star of a simple weeknight dinner or the foundation for countless creative meals. Ditch the guesswork, embrace the process, and get ready to enjoy perfectly baked chicken breast, every single time. Your taste buds (and your family) will thank you.
Frequently Asked Questions
What is the absolute minimum internal temperature for chicken breast?
The USDA mandates chicken reach 165°F internally to be safe from harmful bacteria. However, for juicy results, pull chicken breast from the oven at 160°F. The residual heat during resting will carry it to the safe 165°F mark without overcooking. Never serve chicken below 165°F.
How do I prevent chicken breast from drying out in the oven?
Key strategies include: baking at 400°F for faster cooking, pulling at 160°F (not 165°F), resting for 5-10 minutes before cutting, ensuring proper thickness measurement, and using a thermometer. Avoid overcooking – this is the primary cause of dryness.
Can I marinate chicken breast before baking at 400°F?
Yes, marinating adds flavor, but limit acidic marinades (lemon, vinegar, wine) to 30-60 minutes for boneless breasts, as they can start to “cook” the surface and make it mushy. Oil-based or dairy-based (yogurt) marinades are safer for longer periods (up to 24 hours). Always pat chicken very dry after marinating before baking for best browning.
Why does my chicken breast cook unevenly in the oven?
Uneven thickness is the main culprit. Pound thicker ends gently to match the thinner end before seasoning. Also, ensure your oven is properly preheated and avoid overcrowding the pan, which causes uneven heat distribution. Rotating the pan halfway through baking can help if your oven has hot spots.
How long can I keep cooked chicken breast in the fridge?
Properly stored in an airtight container, cooked chicken breast will stay safe and tasty in the refrigerator for 3 to 4 days. Reheat gently to an internal temperature of 165°F. For longer storage, freeze cooked chicken for up to 3 months.
Is it safe to bake chicken breast at 400°F?
Absolutely! 400°F is a standard, safe, and effective temperature for baking chicken breast. It cooks the chicken thoroughly and quickly, minimizing the time it spends in the “danger zone” (40°F – 140°F) where bacteria multiply rapidly. The key is always verifying the internal temperature reaches at least 165°F (by pulling at 160°F).