
Beef tendon transforms from tough to tender in 60-90 minutes under pressure. This guide reveals exact timing based on thickness and cooker type, plus pro tips for gelatinous perfection. Skip the 8-hour stovetop struggle!
Key Takeaways
- Cook time is 60-90 minutes: Most beef tendon needs 60-75 minutes for medium thickness, up to 90 for large chunks. Always use natural pressure release.
- Prep is non-negotiable: Clean, trim, and blanch tendon first to remove impurities and prevent cloudy broth. Skipping this ruins flavor and texture.
- Liquid matters: Use at least 1.5 cups of broth, water, or cooking liquid. Tendon needs ample liquid to create its signature gelatinous texture.
- Natural release is essential: Quick release makes tendon tough and chewy. Let pressure drop naturally for 20-30 minutes after cooking.
- Thickness dictates time: Pencil-thick pieces cook faster (60 mins) than golf ball-sized chunks (90 mins). Adjust based on your cut.
- Texture is key: Perfect tendon should be fork-tender but hold shape, with a rich, jelly-like mouthfeel. Overcooking makes it mushy.
- Versatile results: Cooked tendon works in soups, stews, stir-fries, or as a standalone appetizer with dipping sauce.
📑 Table of Contents
- Why Pressure Cooking is the Secret Weapon for Beef Tendon
- Essential Prep: Don’t Skip These Steps!
- How Long to Cook Beef Tendon in Pressure Cooker: The Exact Timing Guide
- Liquid, Seasoning, and Flavor Boosters
- Troubleshooting Texture: Tough, Mushy, or Bland?
- Serving and Storing Your Perfectly Cooked Tendon
- Conclusion: Embrace the Pressure Cooker Magic
Why Pressure Cooking is the Secret Weapon for Beef Tendon
Let’s talk about beef tendon. That tough, chewy, collagen-packed connective tissue might seem intimidating, but it’s a culinary goldmine. When cooked right, it transforms into something magical: incredibly tender, rich in gelatin, and packed with flavor. The problem? Traditional methods take forever. Simmering on the stovetop for 6-8 hours? No thanks. That’s where your pressure cooker becomes your new best friend. It’s not just faster; it’s the only practical way to achieve that perfect, melt-in-your-mouth texture without babysitting a pot all day.
Beef tendon is mostly collagen. Collagen needs two things to turn into luscious gelatin: prolonged heat and moisture. A pressure cooker delivers both brilliantly. By trapping steam and increasing pressure, it raises the boiling point of water significantly. This means your tendon cooks in superheated liquid (around 250°F/121°C instead of 212°F/100°C), breaking down that stubborn collagen much faster. The result? What used to take an entire afternoon now takes less than two hours, start to finish. You get all the depth of flavor and luxurious texture of a slow-cooked dish, but with your evening still intact. Plus, the sealed environment locks in nutrients and prevents that “boiled meat” taste you sometimes get with long stovetop cooking. It’s efficiency meets excellence.
Essential Prep: Don’t Skip These Steps!
Jumping straight into cooking beef tendon without proper prep is the fastest route to disappointment. Tendon comes with impurities, excess fat, and a slightly gamey flavor that needs addressing. Think of prep as setting the stage for success – it takes 15-20 minutes but makes all the difference in flavor and texture. Rushing this step means you’ll be fighting against the ingredient, not working with it.

Visual guide about How Long to Cook Beef Tendon in Pressure Cooker
Image source: whattocooktoday.com
Cleaning and Trimming Like a Pro
Start by giving your tendon a thorough rinse under cold running water. Look for any visible bits of meat, sinew, or discolored areas. Use your fingers or a small knife to gently scrape away any stubborn bits. Next, tackle the fat. While some fat adds flavor, excessive chunks can make the final dish greasy. Trim off large, hard pieces of yellow fat, but don’t go overboard – a little marbling is good. The goal is clean, pale tendon ready for blanching. If your tendon is very thick or has a lot of surface fat, you might want to cut it into more manageable 2-3 inch chunks before blanching. This helps the blanching water penetrate better and makes handling easier later.
The Crucial Blanching Step
Blanching is non-negotiable. It removes impurities (scum) that cause off-flavors and cloudiness in your broth. Here’s how: Place the cleaned tendon chunks in a pot and cover them with cold water. Bring this to a gentle simmer over medium heat – do not let it boil hard. As it heats, you’ll see greyish foam and scum rise to the surface. This is the impurities! Skim this off diligently with a spoon for about 5-7 minutes. Once the scum slows down significantly, drain the tendon in a colander and rinse it thoroughly under cold water. This step alone dramatically improves the clarity and taste of your final dish. Skipping it means your pressure-cooked tendon might have a slightly metallic or “bloody” undertone, and your broth will be murky. Trust us, it’s worth the extra few minutes.
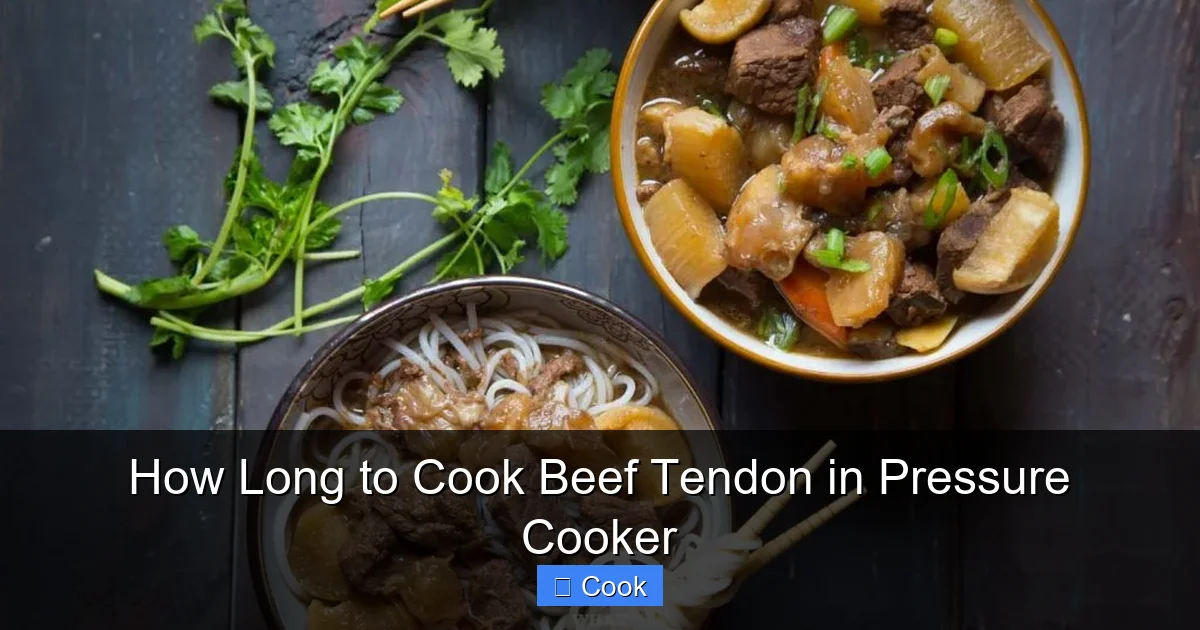
How Long to Cook Beef Tendon in Pressure Cooker: The Exact Timing Guide
This is the million-dollar question: how long to cook beef tendon in pressure cooker? The answer isn’t one-size-fits-all. It depends heavily on the thickness of your tendon pieces and your desired texture. But fear not! We’ve got you covered with precise guidelines. Forget guessing – follow this, and you’ll nail it every time.
Visual guide about How Long to Cook Beef Tendon in Pressure Cooker
Image source: whattocooktoday.com
Understanding the Thickness Factor
Thickness is the biggest variable. Imagine trying to cook a pencil lead versus a golf ball – they need different times, right? Same with tendon. Here’s the breakdown:
- Pencil-thick pieces (1/2 inch diameter): These cook relatively quickly. Aim for 60 minutes on high pressure. They’ll be tender but still hold their shape well, perfect for stir-fries or quick soups.
- Standard chunks (1 inch diameter): This is the most common size for soups and stews. Target 70-75 minutes on high pressure. This gives you that ideal fork-tender texture where the tendon yields easily but isn’t falling apart.
- Large chunks or whole pieces (1.5+ inches diameter): Think big pieces for pho or as a main component. These need the full 90 minutes on high pressure. Don’t be tempted to cut corners here – undercooked large tendon will be unpleasantly chewy.
Remember, these times assume you’ve done the essential prep (cleaning and blanching!). Using unblanched tendon might require slightly longer, but we strongly advise against skipping prep – the flavor difference is massive.
Why Natural Pressure Release is Mandatory
This is where many people go wrong. After the cooking time is up, DO NOT use the quick-release valve. Releasing pressure too fast shocks the tendon, causing it to seize up and become tough and rubbery. Instead, you must use Natural Pressure Release (NPR). This means simply turning off the heat (or switching to “Keep Warm”) and letting the pressure drop on its own as the cooker cools. For beef tendon, this takes about 20-30 minutes. Yes, it feels like forever when you’re hungry, but it’s critical. The gradual cooling allows the collagen to set properly into that beautiful, jelly-like gelatin without tightening up. Rushing this step is the #1 reason for tough tendon, even if the initial cook time was perfect. Set a timer, walk away, and trust the process.
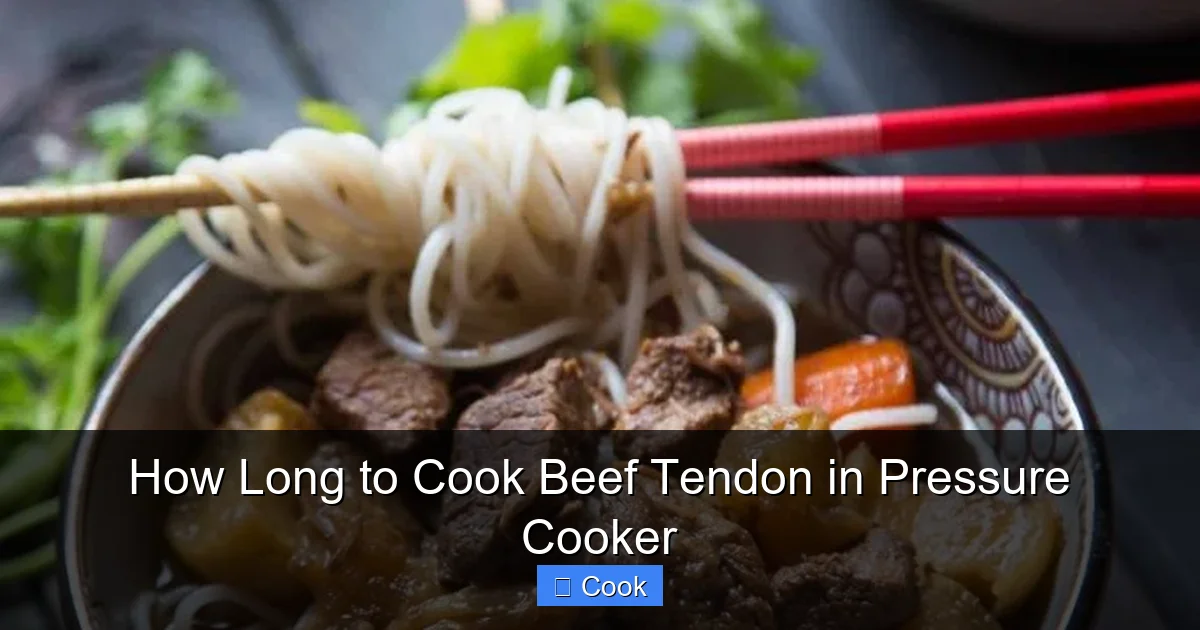
Liquid, Seasoning, and Flavor Boosters
Beef tendon itself has a mild, meaty flavor. The magic happens in the liquid it cooks in and the seasonings you add. Getting this balance right elevates your dish from “okay” to “restaurant-quality.” It’s not just about cooking the tendon; it’s about building a flavorful foundation.
Visual guide about How Long to Cook Beef Tendon in Pressure Cooker
Image source: whattocooktoday.com
Choosing the Right Cooking Liquid
You need enough liquid to cover the tendon by at least an inch – usually 1.5 to 2 cups minimum. Water works in a pinch, but broth is infinitely better. Use:
- Beef broth: The classic choice. Adds depth and complements the tendon’s richness. Low-sodium is best so you control salt later.
- Chicken broth: A lighter, versatile option, great for Asian-inspired dishes.
- Water + Aromatics: If you only have water, boost it with extra onions, garlic, ginger, or a splash of soy sauce/fish sauce.
Avoid using just plain water – it results in a bland final product. The liquid becomes your flavorful cooking medium and often the base for your sauce or soup.
Essential Aromatics and Seasonings
Don’t cook tendon in plain liquid! Toss in these flavor powerhouses before sealing the pressure cooker:
- Onion: 1/2 to 1 chopped yellow or white onion. Adds sweetness and depth.
- Garlic: 3-4 cloves, smashed. Non-negotiable for savory notes.
- Ginger: A 1-inch knob, sliced or smashed. Essential for Asian dishes, cuts richness.
- Bay leaf: 1 leaf. Adds a subtle herbal background note.
- Whole peppercorns: 1/2 tsp. Provides gentle heat.
For specific cuisines:
- Asian-style: Add star anise, cinnamon stick, or a splash of rice vinegar.
- Hearty stew: Add a Parmesan rind or a few dried mushrooms.
Salt is tricky. Add a pinch during cooking, but save most for after pressure release. The liquid reduces, concentrating flavors, and you can always add more salt later. Over-salting early is hard to fix.
Troubleshooting Texture: Tough, Mushy, or Bland?
Even with the best intentions, things can go sideways. Don’t panic! Here’s how to diagnose and fix common beef tendon texture issues in the pressure cooker.
Why Is My Tendon Still Tough?
This is usually one of two culprits:
- Insufficient Cooking Time: Especially with thicker pieces. Did you cook pencil-thick pieces for 60 minutes but used large chunks? Go back to the timing guide. If it’s tough after the recommended time, return it to the cooker for another 10-15 minutes on high pressure, followed by NPR.
- Rushed Pressure Release: This is the big one! Quick release shocks the collagen. If you used quick release, the tendon likely tightened up. Unfortunately, you can’t fully reverse this, but you can try simmering it gently on the stovetop for 20-30 minutes to soften it slightly. Learn from it – always use NPR for tendon.
Also, double-check you blanched properly. Unblanched tendon can have impurities that interfere with tenderizing.
Why Is My Tendon Mushy or Falling Apart?
Overcooking is the main cause. Cooking large chunks for 90 minutes when they only needed 75 will do it. Tendon turns to pure gelatin if cooked too long. If this happens:
- Strain it immediately: Remove the mushy tendon chunks with tongs.
- Use the liquid: The cooking liquid is now incredibly rich gelatin. Use it as a base for soup, gravy, or sauce. Skim off excess fat if needed.
- Repurpose the tendon: While not ideal for presentation, mushy tendon is still delicious stirred into soups, stews, or even blended into sauces for extra body. It’s perfect for pho broth!
To prevent this, stick strictly to the timing for your tendon’s thickness and never skip the NPR.
Why Is My Tendon Bland?
This almost always comes down to insufficient seasoning during cooking or using just water. Remember:
- Liquid is flavor: Cooking in plain water yields bland results. Always use broth or heavily aromatized water.
- Aromatics matter: Skipping onion, garlic, or ginger leaves a huge flavor gap.
- Season at the end: Salt the cooked tendon and its liquid generously after pressure release. Taste and adjust. A splash of acid (lemon juice, rice vinegar) can also brighten it up.
If it’s already cooked and bland, simmer it gently in a flavorful broth or sauce for 15-20 minutes to absorb more taste.
Serving and Storing Your Perfectly Cooked Tendon
That beautiful, glistening beef tendon is ready to shine! How you serve it depends on your dish, but the texture should be the star: tender enough to cut with a fork, with a satisfying, slightly springy bite and a rich, gelatinous mouthfeel.
Delicious Serving Ideas
Don’t just dump it in soup! Highlight its unique texture:
- Classic Pho or Ramen Topping: Slice cooked tendon thinly and add to hot broth just before serving. It absorbs the broth flavor beautifully.
- Stir-fry Star: Add chunks to a hot stir-fry in the last 2-3 minutes. Toss with soy sauce, ginger, garlic, and veggies. The tendon adds incredible texture.
- Hearty Stew Component: Include it in beef stews, oxtail soup, or bone broth. It adds body and richness.
- Appetizer with Dip: Slice cold cooked tendon thinly and serve with a spicy gochujang, peanut, or vinegar-based dipping sauce. Its unique chew is addictive!
- Sandwich Filler: Thinly slice and use in banh mi or Vietnamese-style sandwiches for a textural surprise.
Remember, the cooking liquid is liquid gold! Save it for soups, sauces, or to moisten leftovers.
Storing for Maximum Freshness
Proper storage keeps your tendon delicious for days:
- Cool Quickly: After cooking and NPR, remove tendon from the liquid. Let both cool slightly before storing.
- Separate Storage (Recommended): Store tendon pieces and cooking liquid in separate airtight containers. This prevents the tendon from becoming waterlogged.
- Refrigeration: Keeps for 3-4 days in the fridge. The liquid will solidify into jelly – a sign it’s rich in collagen!
- Freezing: Freeze tendon pieces and liquid separately in freezer-safe containers or bags for up to 3 months. Thaw overnight in the fridge. The texture holds up remarkably well frozen.
- Reheating: Gently reheat tendon in simmering broth, soup, or sauce. Avoid boiling vigorously, which can make it tough. Microwaving works for small portions (2-3 mins on medium power).
Never leave cooked tendon at room temperature for more than 2 hours.
Conclusion: Embrace the Pressure Cooker Magic
Cooking beef tendon doesn’t have to be a test of endurance. With your pressure cooker, you’ve unlocked a shortcut to one of the most luxurious textures in the culinary world. Remember the golden rules: prep diligently (cleaning and blanching are key!), respect the thickness-based timing (60-90 minutes), and always use Natural Pressure Release. It’s that simple. The payoff – tender, gelatinous, flavor-packed tendon – is absolutely worth the minimal effort.
Stop dreaming about that melt-in-your-mouth texture and start cooking. Whether you’re making a rich pho, a comforting stew, or a unique appetizer, perfectly cooked beef tendon elevates your dish instantly. Your pressure cooker isn’t just for beans and grains anymore; it’s your secret weapon for transforming one of the toughest cuts into something truly sublime. So grab that tendon, fire up your cooker, and discover why pressure cooking is the undisputed champion for this incredible ingredient. You’ll wonder how you ever cooked it any other way. Happy pressure cooking!
Frequently Asked Questions
Can I cook frozen beef tendon directly in the pressure cooker?
It’s not recommended. Frozen tendon releases a lot of ice and impurities during cooking, which can cloud your liquid and affect texture. Always thaw tendon completely in the fridge first, then clean, trim, and blanch it properly before pressure cooking for best results.
Why is my pressure-cooked beef tendon still chewy after the recommended time?
This usually means either the pieces were thicker than you estimated (requiring longer time) or you used quick pressure release instead of natural release. Check the thickness guide and ensure you let the pressure drop naturally for 20-30 minutes after cooking. If still tough, cook for an additional 10-15 minutes on high pressure with NPR.
Can I use the cooking liquid from beef tendon?
Absolutely! The liquid is incredibly rich in collagen and flavor. It’s perfect for soups, stews, gravies, or sauces. Skim off any excess fat after cooking if desired. It will solidify in the fridge – a sign of its gelatin content – and melts beautifully when reheated.
How do I know when the beef tendon is perfectly cooked?
Perfectly cooked tendon should be fork-tender – you can easily pierce it with a fork, and it yields without resistance, but it still holds its shape. It will have a glossy appearance and a rich, slightly springy, jelly-like texture in your mouth. It shouldn’t be mushy or crumbly, nor should it be tough and chewy.
Can I add vegetables to the pressure cooker with the beef tendon?
Yes, but add sturdy vegetables like carrots, daikon radish, or onions with the tendon at the beginning. Avoid delicate veggies like peas or zucchini – they’ll turn to mush. Add quick-cooking vegetables in the last 5 minutes using the quick-release method after the main cooking time.
Why is natural pressure release so important for beef tendon?
Quick pressure release causes a sudden temperature and pressure drop, which shocks the collagen structure in the tendon. This makes it tighten up and become tough and rubbery. Natural release allows the collagen to set gently into its smooth, gelatinous state, resulting in the tender, melt-in-your-mouth texture you’re aiming for.