How long to cook chicken in oven 400 depends entirely on the cut and size, not a fixed timer. Always rely on an instant-read thermometer hitting 165°F internally for safety and juiciness. Boneless breasts take 15-25 minutes, bone-in thighs 35-45 minutes, but thickness and starting temperature cause big variations.
Key Takeaways
- Internal Temperature is King: 165°F (74°C) measured at the thickest part is the ONLY reliable doneness indicator, not time alone. A thermometer is essential.
- Cut Dictates Cooking Time: Boneless breasts cook fastest (15-25 mins), bone-in thighs/drumsticks take longer (35-45 mins), and whole chickens need 1.5-2+ hours. Size matters hugely.
- 400°F is the Sweet Spot: This high heat ensures beautiful browning (Maillard reaction) and crispy skin while cooking efficiently, without excessive drying if monitored.
- Resting is Non-Negotiable: Let chicken rest 5-10 minutes after baking. This allows juices to redistribute, preventing a dry, disappointing result when cut.
- Prep Impacts Results: Patting chicken dry ensures crisp skin. Brining or dry-brining significantly boosts moisture and flavor, especially for lean breasts.
- Thermometer Technique Matters: Insert the probe sideways into the thickest part, avoiding bone or fat pockets, for an accurate reading.
- Carryover Cooking Happens: Chicken continues to cook slightly after removal from the oven. Pull it out at 160-163°F for perfect 165°F after resting.
Quick Answers to Common Questions
Can I cook frozen chicken at 400°F?
Yes, but it takes significantly longer and requires extra care. Add 50% more cooking time (e.g., 30 mins becomes 45 mins). Ensure the chicken is frozen solid when starting. Check the temperature frequently, especially near the end, as the outside can brown before the frozen center thaws and cooks. It’s safer and yields better results to thaw chicken in the fridge first.
Should I cover chicken with foil while baking at 400°F?
Generally, no, especially for the main cooking time. Covering traps steam, which prevents browning and crisping of the skin. The exception is if the chicken is browning too quickly *before* it’s cooked through – then loosely tent the top with foil for the last 10-15 minutes to protect it while the interior finishes cooking.
How do I keep boneless chicken breasts from drying out at 400°F?
Brine or dry-brine them! A 30-60 minute wet brine (saltwater solution) or 1-2 hour dry brine (salt rubbed on, refrigerated uncovered) dramatically boosts moisture retention. Pound thicker breasts to even thickness. Pat them very dry before seasoning for better browning. Pull them from the oven at 160-163°F and let them rest for 10 minutes. Avoid overcooking – use your thermometer!
Is it safe to cook chicken at 400°F? Doesn’t high heat cause cancer?
Yes, cooking chicken at 400°F is perfectly safe from a food safety perspective – it easily reaches the 165°F internal temperature needed to kill bacteria. Concerns about heterocyclic amines (HCAs) and polycyclic aromatic hydrocarbons (PAHs), compounds formed at high heat that *may* be linked to cancer, are primarily associated with charring meat over open flames (like grilling) or cooking fatty meats that drip and cause flare-ups. Properly roasting chicken in a 400°F oven, especially without charring, poses minimal risk. Trimming excess fat and avoiding charring further reduces any potential concern.
Can I use a baking dish instead of a sheet pan?
Yes, but it affects cooking. A deep baking dish traps more steam, which can lead to less crispy skin and slightly longer cooking times compared to a flat sheet pan with good air circulation. If using a dish, consider leaving the lid off for most of the cooking time, or use a rack inside the dish to elevate the chicken. Dark metal dishes work best for browning.
📑 Table of Contents
- Why 400°F is the Magic Number for Oven Chicken
- The Non-Negotiable Rule: Internal Temperature Trumps Time
- Cooking Times by Cut: Your 400°F Cheat Sheet
- Factors That Seriously Impact Your Cooking Time
- Your Foolproof Step-by-Step Guide to Perfect 400°F Chicken
- Troubleshooting Common 400°F Chicken Problems
- Conclusion: Ditch the Timer, Embrace the Thermometer
Why 400°F is the Magic Number for Oven Chicken
So, you’ve got that hankering for perfectly cooked chicken, and you’re setting your oven to 400°F. Smart move! But now the big question hits: “How long to cook chicken in oven 400?” It’s the most common oven chicken dilemma, and the answer isn’t as simple as checking a single timer. That’s because 400°F is actually a fantastic temperature for roasting chicken, but it’s not a universal timer setting.
Why is 400°F so popular? It hits a sweet spot. It’s hot enough to trigger the Maillard reaction – that magical chemical process that creates deep, complex flavors and that gorgeous golden-brown, crispy skin we all crave. At lower temperatures (like 350°F), chicken takes much longer to cook through, and the skin often turns out soggy instead of crisp. At much higher temperatures (like 450°F+), the outside can burn before the inside reaches a safe temperature, especially with thicker cuts. 400°F gives you efficient cooking with excellent browning and minimal risk of burning if you keep an eye on it. It’s the Goldilocks zone for most chicken cuts – not too hot, not too cold, just right for achieving that ideal balance of crispy exterior and juicy interior.
However, this perfect temperature doesn’t magically erase the biggest factor determining your cooking time: the chicken itself. A thin, boneless chicken breast cooks dramatically faster than a thick, bone-in chicken thigh or a whole chicken. Relying solely on a generic “20 minutes at 400°F” guideline is the fastest route to either undercooked, potentially unsafe chicken or dry, overcooked hockey pucks. Understanding why time varies is the first step to mastering oven chicken at 400°F. It’s all about heat penetration and the physical characteristics of the cut you’re cooking.
The Non-Negotiable Rule: Internal Temperature Trumps Time
Let’s cut through the confusion right now: How long to cook chicken in oven 400 is ultimately irrelevant if you don’t know the internal temperature. Seriously. The USDA and every food safety expert on the planet agree: chicken is safe to eat only when it reaches an internal temperature of 165°F (74°C) at its thickest part. This temperature instantly destroys harmful bacteria like salmonella. No amount of guessing based on time, color, or juice clarity is reliable enough.

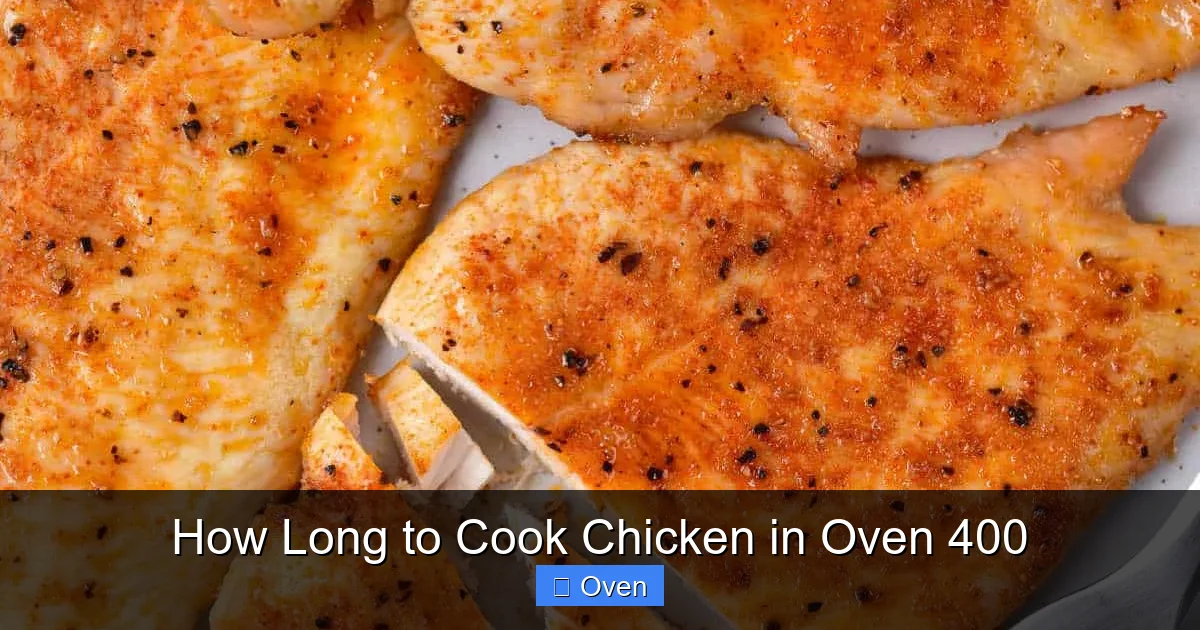
Visual guide about How Long to Cook Chicken in Oven 400
Image source: dmbsportscamp.com
Why is time such a poor indicator? Think about it. A chicken breast straight from the fridge is much colder than one left on the counter for 20 minutes. A breast that’s 1 inch thick will cook through far quicker than one that’s 2 inches thick. Bone conducts heat differently than meat, slowing down cooking near the bone. Even the type of pan you use (dark metal vs. glass) affects how heat radiates around the chicken. All these variables mean two seemingly identical pieces of chicken could need significantly different times to hit 165°F. Relying on a timer alone is gambling with your dinner – and your health.
This is where the instant-read thermometer becomes your absolute best friend. It’s not an optional gadget; it’s essential kitchen equipment for safe and delicious chicken. Here’s how to use it like a pro:
- Insert Correctly: Push the probe sideways into the absolute thickest part of the meat. Avoid hitting bone (which reads hotter) or large fat pockets (which read cooler). For breasts, go into the center. For thighs, aim for the meatiest section away from the bone.
- Check Early, Check Often: Start checking thick cuts (like bone-in thighs or a whole chicken) about 10-15 minutes before the *minimum* estimated time. For thin cuts like boneless breasts, start checking at the 10-minute mark. Don’t wait until the timer goes off!
- Understand Carryover Cooking: Chicken continues to cook for several minutes after it comes out of the oven as residual heat moves inward. Pull your chicken out when it reaches 160-163°F internally. It will safely rise to 165°F while resting. Pulling it at exactly 165°F often means it will overcook to 170°F+ during rest, drying it out.
- Clean Your Thermometer: Wipe the probe with a food-safe sanitizer or hot soapy water between checks, especially if moving between different pieces of raw chicken.
Mastering the thermometer removes the guesswork. You’ll finally know exactly when your chicken is perfectly cooked and safe, every single time. It transforms “how long to cook chicken in oven 400” from a stressful puzzle into a simple, reliable process.
Cooking Times by Cut: Your 400°F Cheat Sheet
While internal temperature is king, having a general time range for different cuts is incredibly helpful for planning. Remember, these are starting points only. Always verify with your thermometer! Here’s a breakdown for common cuts cooked at 400°F on a standard baking sheet or roasting pan:
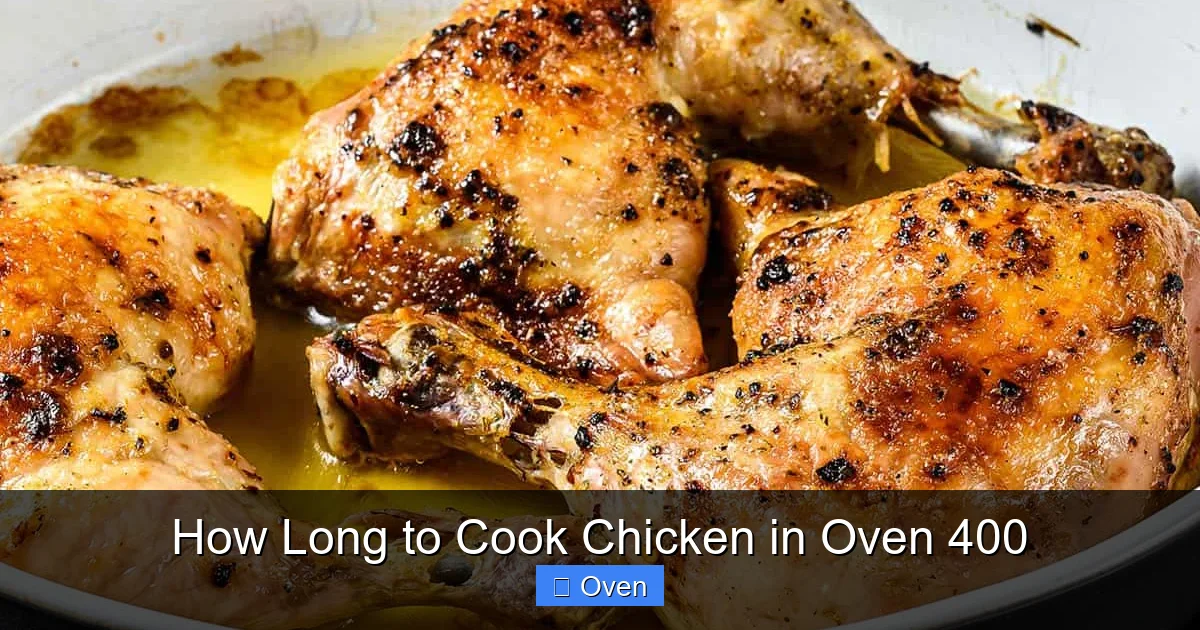
Visual guide about How Long to Cook Chicken in Oven 400
Image source: temeculablogs.com
Boneless, Skinless Chicken Breasts
These lean cuts cook the fastest but are also the most prone to drying out. Thickness is CRITICAL.
- Thin Cutlets (1/2 inch or less): 12-18 minutes. Often pounded thin or bought pre-cut. Check at 10 minutes.
- Standard Breasts (3/4 to 1 inch thick): 18-25 minutes. This is the most common size. Start checking at 15 minutes.
- Very Thick Breasts (1.25+ inches): 25-35 minutes. Consider butterflying them (cutting horizontally almost through and opening like a book) to ensure even cooking and prevent the outside from drying before the inside cooks.
Pro Tip: Brine breasts for 30-60 minutes (1/4 cup salt + 4 cups water) or dry-brine (rub with salt, refrigerate uncovered 1-2 hours) for incredible moisture retention. Pat them VERY dry before seasoning for better browning.
Bone-In, Skin-On Chicken Thighs & Drumsticks
These dark meat cuts are more forgiving and flavorful due to higher fat content. Bone slows cooking but adds flavor.
- Thighs (average size): 35-45 minutes. Start checking at 30 minutes. The skin should be deeply golden and crispy.
- Drumsticks (average size): 30-40 minutes. Start checking at 25 minutes. Drumsticks often cook slightly faster than thighs due to shape.
- Thighs/Drumsticks (large or family pack): 45-55 minutes. Check earlier if they seem to be browning too quickly.
Pro Tip: Make shallow cuts (score) through the skin down to the meat in a few places. This helps render fat, leading to crispier skin and allowing seasoning to penetrate better. Don’t skip patting them dry!
Bone-In, Skin-On Chicken Breasts
Combining the leanness of breast meat with the flavor and moisture-retaining properties of bone and skin. Cook time is longer than boneless.
- Standard Size (about 10-12 oz each): 30-40 minutes. Start checking at 25 minutes.
- Large Size (14+ oz): 40-50 minutes. Check at 35 minutes.
Pro Tip: Tuck the thin end of the breast under itself before roasting to create a more even thickness, preventing the thinner part from drying out before the thicker part cooks.
Whole Chicken (3-4 lbs)
Roasting a whole bird is rewarding! Cooking time depends heavily on weight.
- 3 lb Chicken: 60-75 minutes. Start checking at 50 minutes.
- 4 lb Chicken: 75-90 minutes. Start checking at 65 minutes.
Pro Tip: Truss the legs with kitchen twine for even cooking. Place the bird breast-side UP on a rack in the roasting pan. This allows hot air to circulate, cooking it more evenly than sitting directly in juices. Check temperature in the thickest part of the breast AND the innermost part of the thigh (near the bone).
Chicken Tenders/Lollipops
These small, uniform pieces cook very quickly.
- Standard Tenders: 15-20 minutes. Check at 12 minutes.
- Lollipops (drumettes): 25-35 minutes. Check at 20 minutes.
Pro Tip: Tenders dry out fast. A quick brine or coating them lightly in oil/butter helps. Lollipops benefit from scoring the meat.
Remember, these times assume chicken is starting from refrigerator temperature (around 40°F). If it’s been at room temp for 20-30 minutes, reduce the estimated time by 5-10 minutes. Always, always, verify with your thermometer!
Factors That Seriously Impact Your Cooking Time
Even with the same cut and oven temperature, several factors can drastically alter how long your chicken needs in the 400°F oven. Ignoring these is why so many people end up with inconsistent results.
Visual guide about How Long to Cook Chicken in Oven 400
Image source: halfscratched.com
Starting Temperature: Fridge Cold vs. Room Temp
Chicken straight from the fridge (around 40°F) takes significantly longer to cook through than chicken that has rested at room temperature for 20-30 minutes. Why? The cold center acts as a heat sink, slowing the overall cooking process. Letting chicken sit out for 20-30 minutes before roasting promotes more even cooking – the outside isn’t cooking *way* faster than the inside trying to catch up from freezing cold. However, never leave raw chicken out for more than 2 hours total (including prep time) for food safety. This small step can shave 5-15 minutes off your cooking time, especially for thicker cuts.
Size and Thickness: The #1 Variable
This cannot be overstated. A 6-ounce chicken breast is going to cook much faster than a 12-ounce one, even if they’re the same cut. Thickness is even more critical than weight. A thin, pounded cutlet might take 12 minutes, while a thick, un-pounded breast of the same weight could need 30 minutes. Always cook chicken pieces of similar size together. If you have a mix, put the thicker pieces in first and add thinner ones later, or cook them separately. When in doubt, go by thickness, not weight.
Bone-In vs. Boneless: The Heat Conductor
Bone is a poor conductor of heat compared to meat. This means bone-in cuts (thighs, drumsticks, bone-in breasts) take noticeably longer to cook than their boneless counterparts of similar size and thickness. The heat has to travel through the meat to reach the bone and then conduct through the bone to heat the meat on the other side. Bone-in cuts also generally have more fat and connective tissue, contributing to their juiciness but requiring more time. Expect bone-in cuts to take 10-20 minutes longer than boneless equivalents at 400°F.
Skin-On vs. Skin-Off: Moisture and Browning
Skin acts as a protective barrier, trapping moisture underneath and contributing fat that bastes the meat as it renders. Skin-on chicken generally stays juicier, especially breasts, and achieves much better browning and crispness at 400°F. Skin-off chicken, particularly breasts, is far more susceptible to drying out quickly at this high heat. If cooking skin-off, consider basting with butter or oil halfway through, or using a sauce/marinade to add moisture. Skin-on pieces will also render fat, which can help cook the chicken from the bottom if using a rack.
The Pan Matters: Conduction and Convection
The type of pan you use influences heat transfer:
- Dark Metal Baking Sheets/Roasting Pans: Absorb and conduct heat very well, promoting excellent browning and crispy skin. They can sometimes cause the bottom to cook faster, so rotating the pan halfway through might be needed.
- Light-Colored or Glass Pans: Reflect more heat and conduct it less efficiently. They often result in slightly less intense browning and may require a few extra minutes of cooking time compared to dark metal.
- Using a Rack: Elevating chicken on a rack inside the pan allows hot air to circulate all around the meat, promoting more even cooking and crisper skin (especially on the bottom). This is highly recommended for bone-in pieces and whole chickens.
Always preheat your pan (especially dark metal) for 5-10 minutes before adding chicken for maximum sear.
Oven Hot Spots and Accuracy
No oven is perfectly uniform. Hot spots (areas that run hotter) and cold spots exist. An oven thermometer is crucial – your oven’s dial is often inaccurate, sometimes by 25°F or more! Place the thermometer on the center rack where you’ll cook. Rotate your pan 180 degrees halfway through cooking to ensure even exposure to heat. If you consistently find one side of your chicken browns faster, adjust pan placement accordingly.
Your Foolproof Step-by-Step Guide to Perfect 400°F Chicken
Now that you understand the variables, let’s put it all together into a reliable method for consistently juicy, flavorful, safely cooked chicken at 400°F.
Step 1: Prep is Everything (10-15 Minutes)
Take your chicken out of the fridge 20-30 minutes before cooking. Pat it DRY all over with paper towels – this is non-negotiable for crispy skin and good browning. If using skin-on pieces, get that skin extra dry. Season generously all over with salt and pepper. For deeper flavor, consider a dry brine (rub with salt, place on a rack over a plate, refrigerate uncovered for 1-2 hours) or a wet brine (submerge in saltwater solution for 30-60 mins, then pat dry). Add other seasonings (garlic powder, paprika, herbs) now. If desired, lightly coat with oil or melted butter to help seasonings adhere and promote browning.
Step 2: Preheat & Prep the Pan (5 Minutes)
Preheat your oven to 400°F (200°C). Place your chosen pan (dark metal baking sheet or roasting pan) in the oven while it preheats. If using a rack, place it in the pan now. Preheating the pan ensures immediate, intense heat contact for great sear. Have your instant-read thermometer ready!
Step 3: Arrange & Roast (The Cooking Phase)
Carefully remove the HOT pan from the oven (use oven mitts!). Place the chicken pieces in the pan, skin-side up if applicable, leaving space between them (crowding steams them instead of roasting). Return the pan to the center rack of the oven. Set a timer for the *minimum* time suggested for your cut (e.g., 15 mins for standard breasts, 30 mins for thighs). Do not walk away! Oven temperatures can fluctuate, and hot spots exist.
Step 4: The Critical Check (Start Early!)
When your minimum timer goes off, it’s time to check the temperature. Insert your instant-read thermometer into the thickest part of the largest piece, avoiding bone. If it’s not close to 160°F, give it another 5 minutes and check again. Continue checking every 3-5 minutes. For bone-in pieces or whole chickens, check multiple spots (breast and thigh for whole bird). Remember carryover cooking – pull at 160-163°F.
Step 5: Resting: The Secret to Juiciness (5-10 Minutes)
Once your chicken hits the target temp (160-163°F), immediately transfer it to a clean plate or cutting board. Tent loosely with foil. Do NOT cover tightly, as this steams the skin and makes it soggy. Let it rest for at least 5 minutes (10 is better for larger cuts). This is when the magic happens: the juices, which have been driven to the center by the heat, have time to redistribute throughout the meat. Cutting too soon means all those precious juices flood out onto your cutting board, leaving dry chicken. Resting is not optional; it’s the difference between “meh” and “amazing” chicken.
Step 6: Serve and Savor
After resting, slice (if desired) and serve immediately. Enjoy the fruits of your thermometer-reliant labor – perfectly cooked, juicy, safe chicken every single time. You’ve conquered the “how long to cook chicken in oven 400” question!
Troubleshooting Common 400°F Chicken Problems
Even with the best intentions, things can go sideways. Here’s how to fix the most common oven chicken issues at 400°F:
Problem: Chicken is Dry and Tough
Likely Culprits: Overcooking (most common!), lean cuts (breasts) without moisture protection, not resting.
Solutions: Double down on using your thermometer and pulling at 160-163°F. For breasts, brine or dry-brine religiously. Consider pounding thicker breasts to even thickness. Baste skinless pieces with butter or oil halfway through cooking. Always rest for 10 minutes. If it’s slightly overcooked, slice it thin and serve with a generous sauce (pan gravy, pesto, salsa).
Problem: Chicken is Undercooked/Pink Inside
Likely Culprits: Not using a thermometer, checking too early, inaccurate oven temp, thick cut not given enough time.
Solutions: This is a food safety risk. Always use a calibrated thermometer. Ensure your oven thermometer shows 400°F. For thick cuts, allow more time or butterfly them. If you discover it’s undercooked after pulling it out, return it to the oven immediately and check every 2-3 minutes until it safely reaches 165°F internally. Don’t rely on pinkness – some chicken can be safely cooked and still have a slight pink tinge near the bone due to myoglobin, but the temp MUST be 165°F.
Problem: Skin is Soggy, Not Crispy
Likely Culprits: Chicken not patted dry, overcrowded pan (steaming), cooking skin-side down, not preheating pan, covering tightly while resting.
Solutions: Pat skin EXTREMELY dry with paper towels before seasoning. Ensure space between pieces. Always cook skin-side UP. Preheat your pan thoroughly. Score the skin. Consider broiling for the last 1-2 minutes (WATCH CLOSELY to prevent burning). Rest loosely tented, not tightly covered.
Problem: Chicken is Browning Too Fast on Outside, Raw Inside
Likely Culprits: Oven too hot (check with thermometer!), thick cut, dark pan causing intense bottom heat.
Solutions: Verify oven temp with a separate thermometer. For very thick cuts, consider starting at 400°F for 15 mins to sear, then reducing to 375°F for the remainder of cooking. Rotate the pan halfway through. If browning too quickly, loosely tent the top with foil for the last part of cooking to protect the exterior while the interior catches up.
Problem: Chicken is Bland
Likely Culprits: Insufficient seasoning, no brine, cooking plain.
Solutions: Season generously with salt (it’s flavor essential!) and pepper. Use a dry brine (salt + spices rubbed on, refrigerated). Marinate for 30-60 mins (acidic marinades can toughen surface if too long). Add aromatics under the skin (minced garlic, herbs). Baste with flavorful liquids (butter, pan drippings, broth) during cooking. Finish with fresh herbs or a squeeze of lemon after resting.
Problem: Uneven Cooking (One Side Done, Other Raw)
Likely Culprits: Oven hot spots, pan not rotated, chicken pieces not uniform size.
Solutions: Rotate the pan 180 degrees halfway through cooking. Cook pieces of similar size together. Use an oven thermometer to identify hot spots and adjust pan placement accordingly. Ensure the rack is in the center position.
Understanding these issues and their fixes turns potential disasters into learning opportunities. Remember, the thermometer is your ultimate troubleshooting tool – it tells you exactly what’s happening inside the meat.
Conclusion: Ditch the Timer, Embrace the Thermometer
So, how long to cook chicken in oven 400? The honest, empowering answer is: It depends, but your instant-read thermometer knows the exact answer every time. We’ve explored why 400°F is such an effective temperature – it delivers that irresistible crispy exterior and efficient cooking without the high risk of burning inherent in much higher heats. We’ve broken down the critical variables: the cut of chicken (boneless breast vs. bone-in thigh vs. whole bird), the size and thickness, whether it’s bone-in or skin-on, and even the quirks of your specific oven and pan.
The core lesson is simple yet transformative: stop guessing based on arbitrary timers or visual cues. Invest in a good instant-read thermometer (it’s cheaper than a dinner ruined by dry chicken or a foodborne illness). Learn to use it correctly – into the thickest part, avoiding bone, checking early and often. Understand carryover cooking and the non-negotiable need for resting. Master these fundamentals, and the question of “how long” becomes secondary to the certainty of perfect doneness.
Cooking chicken at 400°F doesn’t have to be stressful or unpredictable. By respecting the science (that 165°F internal temp), understanding the variables, and wielding your thermometer with confidence, you unlock consistent, restaurant-quality results right in your own kitchen. You’ll serve juicy, flavorful, safely cooked chicken that delights your family and friends, time after time. So preheat that oven, grab your thermometer, and get ready to cook chicken like a pro. The perfect piece of oven-roasted chicken at 400°F is absolutely within your reach – no more guesswork, just guaranteed deliciousness.
Frequently Asked Questions
What is the absolute minimum time for chicken at 400°F?
The absolute minimum time depends entirely on the cut. Very thin chicken cutlets (1/4 to 1/2 inch) might be done in as little as 10-12 minutes. However, standard boneless breasts (3/4 inch) need at least 15-18 minutes, and bone-in thighs need a minimum of 30-35 minutes. Always verify with a thermometer – don’t rely on minimum times alone, as thickness varies.
Why is my chicken still pink after reaching 165°F?
Pinkness near the bone in cooked chicken, especially thighs and drumsticks, can be normal and safe. It’s often caused by myoglobin (a protein in muscle) reacting with heat and oxygen, or sometimes from the bone marrow leaching into the meat. As long as the internal temperature at the thickest part, away from the bone, reads 165°F on your thermometer, the chicken is safe to eat. The color is not a reliable indicator of doneness.
Can I cook chicken at a lower temperature for longer?
Yes, cooking chicken at lower temperatures (like 325°F or 350°F) for a longer time is possible and can yield very tender results, especially for whole chickens or tougher cuts. However, it won’t produce the same crispy skin as 400°F. Lower temps take significantly longer (e.g., a 4lb chicken at 350°F might take 1 hour 45 mins vs 75-90 mins at 400°F). The key is still hitting 165°F internally, regardless of the oven temp.
How much does resting really affect juiciness?
Resting is crucial. When meat is hot, the muscle fibers are contracted, and juices are forced to the center. Resting allows the fibers to relax and the juices to redistribute evenly throughout the meat. Cutting too soon causes those juices to flood out onto your cutting board, leaving the chicken dry. Resting for 5-10 minutes can make a noticeable difference in moisture retention.
What’s the best way to reheat oven-cooked chicken?
To reheat without drying out, place chicken in a shallow dish. Add a splash of broth, water, or sauce to the dish. Cover tightly with foil. Reheat in a 300-325°F oven for 10-20 minutes, until heated through (internal temp 165°F). Avoid microwaving if possible, as it often makes chicken tough and rubbery. A skillet with a lid and a little liquid also works well.
Can I put chicken in a cold oven to start?
While possible, it’s not ideal. Starting chicken in a cold oven leads to uneven cooking – the outside spends too long in the lower temperatures before the oven fully heats up, potentially drying out or not browning well. Preheating the oven (and ideally the pan) ensures immediate, consistent high heat for proper searing and efficient cooking. The exception is some specific low-and-slow recipes, but not for standard 400°F roasting.