
Pressure cooker vegetable soup cooks in just 8-15 minutes under high pressure, slashing traditional simmering time by 75%! This method preserves nutrients and intensifies flavors while accommodating all veggie types. Master the timing based on your ingredients for consistently delicious, healthy meals in under 30 minutes total.
Key Takeaways
- Core cook time range: Most vegetable soups need 8-15 minutes at high pressure, depending on veggie density and desired texture.
- Veggie prep is crucial: Chop uniformly and separate hard/soft vegetables; add delicate greens during natural release or after cooking.
- Liquid matters: Always use at least 1.5-2 cups broth/water to generate sufficient steam for safe pressure building.
- Natural release for tenderness: Allow 10-15 minutes of natural pressure release after cooking to prevent mushy vegetables.
- Frozen veggies shortcut: Add frozen vegetables directly to the pot; increase cook time by 2-3 minutes for optimal results.
- Safety first: Never overfill the pot (max 2/3 full) and ensure the sealing ring is clean and properly seated.
- Flavor boosters: Sauté aromatics first, add acid (lemon/vinegar) after cooking, and finish with fresh herbs for brightness.
📑 Table of Contents
- Why Pressure Cooker Vegetable Soup is a Game-Changer
- What Makes Pressure Cooker Soup Timing Unique?
- Your Step-by-Step Timing Guide for Perfect Soup
- Pro Tips to Elevate Your Pressure Cooker Soup
- Troubleshooting Common Pressure Cooker Soup Issues
- Why This Method Beats Traditional Simmering
- Conclusion: Your Quick, Healthy Soup Future Starts Now
Why Pressure Cooker Vegetable Soup is a Game-Changer
Tired of waiting 45 minutes for a pot of vegetable soup to simmer on the stove? You’re not alone. That’s where your pressure cooker becomes your new best friend. Imagine transforming fresh, vibrant vegetables into a deeply flavorful, comforting soup in less than half an hour. No more babysitting the stove, no more nutrient loss from prolonged boiling, and absolutely no sacrificing taste for speed. The pressure cooker doesn’t just save time—it revolutionizes how you approach homemade soup.
The magic happens because pressure cookers trap steam, raising the internal temperature far beyond boiling point. This intense heat rapidly breaks down fibers while sealing in vitamins and minerals that typically leach into cooking water. For vegetable soup, this means carrots stay vibrant and sweet, beans turn creamy without disintegrating, and greens retain their fresh color. Plus, the sealed environment forces flavors to meld beautifully in record time. Whether you’re using a modern electric Instant Pot or a stovetop model, mastering how long to cook vegetable soup in pressure cooker unlocks a world of quick, healthy weeknight dinners.
What Makes Pressure Cooker Soup Timing Unique?
Unlike traditional simmering where timing is somewhat flexible, pressure cooking demands precision. The high-pressure environment accelerates cooking exponentially, but it also means overcooking happens fast. Understanding the key factors that influence your cook time prevents soups from turning into bland mush or staying stubbornly crunchy. It’s not just about setting a timer—it’s about adapting to your ingredients and goals.

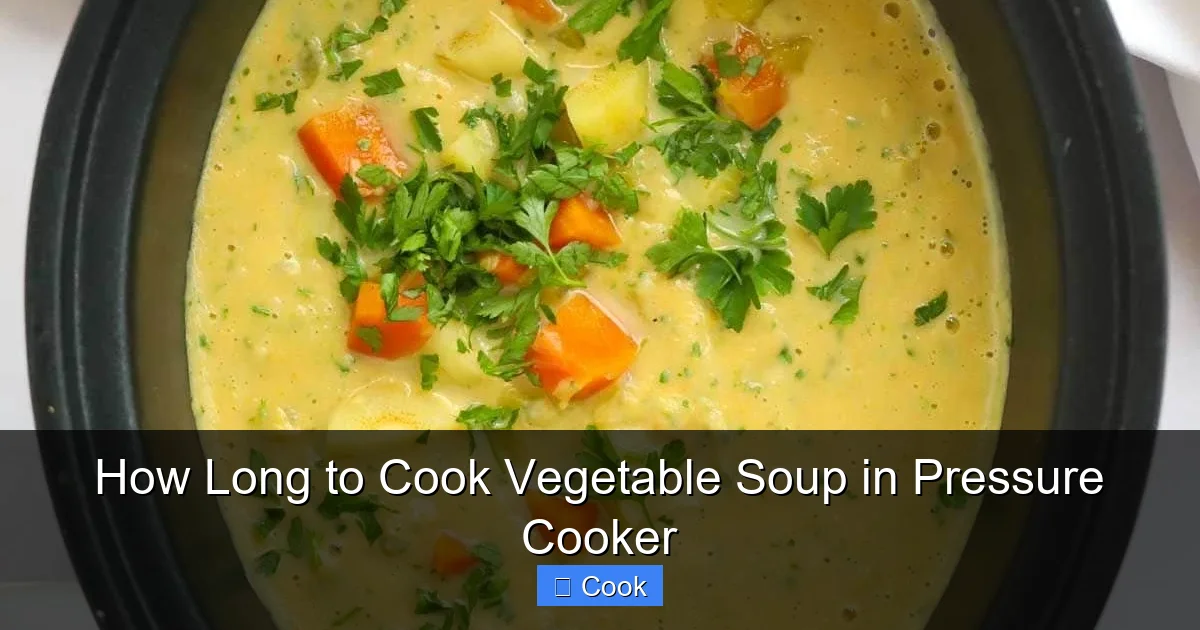
Visual guide about How Long to Cook Vegetable Soup in Pressure Cooker
Image source: missvickie.com
The Density Factor: Hard vs. Soft Vegetables
Not all vegetables are created equal when it comes to pressure cooking. Dense root vegetables like potatoes, carrots, and parsnips need more time to become tender, while delicate greens like spinach or zucchini cook almost instantly. This is the single biggest factor affecting how long to cook vegetable soup in pressure cooker. A soup packed with potatoes might need 12 minutes, while a light minestrone with tomatoes and green beans could be perfect in 8. Always consider the hardest vegetable in your pot as your timing benchmark.
Size Matters: Chop Consistency is Key
Uniform chopping isn’t just about presentation—it’s critical for even cooking. A chunky carrot cube will take longer to soften than a thin slice. Aim for pieces roughly 1-1.5 inches for hard vegetables and smaller for softer ones. If you’re adding quick-cooking veggies like peas or asparagus, have them ready to stir in during the natural release phase or after pressure cooking. Inconsistent sizes lead to some vegetables turning to pulp while others remain undercooked, ruining your soup’s texture.
Liquid Levels and Broth Quality
Pressure cookers require sufficient liquid to generate steam and build pressure—typically 1.5 to 2 cups minimum, even for thick stews. But the type of liquid matters too. Rich homemade broth infuses more flavor than water, potentially reducing the need for long simmering times to develop depth. Conversely, if using water, you might need to extend natural release time slightly to allow flavors to marry. Never skimp on liquid; insufficient amounts can cause burning or prevent pressure from building safely.
Your Step-by-Step Timing Guide for Perfect Soup
Now that you understand the variables, let’s break down exactly how long to cook vegetable soup in pressure cooker for different scenarios. Remember, these are starting points—adjust based on your specific ingredients and texture preferences. Always prioritize safety: ensure your float valve moves freely and never force the lid open.

Visual guide about How Long to Cook Vegetable Soup in Pressure Cooker
Image source: static.urbancookery.com.s3.amazonaws.com
Standard Mixed Vegetable Soup (Potatoes, Carrots, Celery, Onions)
This classic combo is the foundation of many soups. For a balanced texture where potatoes are fork-tender but hold shape, and carrots are soft but not disintegrated:
- Cook time: 8-10 minutes at high pressure
- Natural release: 10-15 minutes before quick-releasing remaining pressure
- Why it works: The natural release phase gently finishes cooking without agitation, preventing starchy vegetables from breaking down. If you prefer very soft potatoes (like for a rustic puree), bump to 12 minutes.
Example: A hearty minestrone with diced tomatoes, green beans, and small pasta shapes fits here. Add pasta with the liquid to avoid sticking.
Bean & Legume-Based Soups (Lentils, Chickpeas, White Beans)
Beans cook dramatically faster under pressure but can turn mushy if overdone. Dried beans (unsoaked) need longer than canned:
- Dried beans (no soak): 25-35 minutes high pressure + 15 min natural release
- Canned beans: Add AFTER pressure cooking during natural release or stir in just before serving
- Red lentils: 5-7 minutes high pressure (they dissolve into creaminess)
Pro tip: Always add canned beans at the end—they only need to heat through. For dried beans, skip pre-soaking to save time; the pressure cooker handles it efficiently.
Light & Fresh Vegetable Soups (Zucchini, Asparagus, Peas, Greens)
These delicate soups shine with minimal cooking to preserve brightness and nutrients:
- Cook time: 0-2 minutes at high pressure
- Natural release: 5-10 minutes
- Critical step: Add tender greens (spinach, kale) and quick-cook veggies during the natural release phase. Close the lid for 5 minutes after pressure drops to wilt them perfectly.
Example: A spring vegetable soup with asparagus, peas, and fresh herbs. Cooking for 1 minute under pressure keeps asparagus vibrant and crisp-tender.
Frozen Vegetable Shortcut
No time to chop? Frozen mixed vegetables work brilliantly:
- Cook time: Add 2-3 minutes to your standard time (e.g., 10-12 min instead of 8-10)
- Why: Frozen veggies release ice crystals, slightly lowering the pot’s temperature.
- Best practice: Add frozen veggies directly to the pot with liquid—no thawing needed. Stir well to prevent clumping.
This is perfect for emergency soups. A bag of frozen corn, carrots, and green beans cooks beautifully in 10 minutes with broth and herbs.
Pro Tips to Elevate Your Pressure Cooker Soup
Timing gets you tender vegetables, but these techniques transform good soup into exceptional soup. Pressure cooking is forgiving, but small tweaks make a huge difference in flavor and texture.
Visual guide about How Long to Cook Vegetable Soup in Pressure Cooker
Image source: tamingtwins.com
Sauté First for Deeper Flavor
Don’t skip the “Sauté” function! Spending 5 minutes browning onions, garlic, or mushrooms before adding liquid builds a flavor foundation no quick simmer can match. This Maillard reaction creates complex tastes that permeate the entire soup. For heartier soups, try browning diced tomatoes briefly to concentrate their sweetness. Just remember to deglaze the pot with a splash of broth before pressure cooking to prevent “Burn” errors.
Master the Natural Release
Rushing the pressure release is the #1 cause of mushy soup. Natural release (letting pressure drop slowly as the pot cools) gently finishes cooking without violent bubbling that breaks down vegetables. For most vegetable soups:
- Hard vegetables (potatoes, carrots): 10-15 min natural release
- Mixed textures: 8-10 min natural release
- Delicate greens: 5 min natural release or add after
If you’re short on time, quick release is okay for bean soups or when using very sturdy veggies like beets, but avoid it for creamy soups with dairy.
Acid and Herbs: The Finishing Touch
Pressure cooking can mute bright flavors. Always add acidic elements (lemon juice, vinegar, wine) and fresh herbs AFTER pressure cooking. Stir in a tablespoon of lemon juice or a splash of apple cider vinegar just before serving—it lifts the entire soup and makes flavors “pop.” Similarly, stir in chopped fresh parsley, dill, or basil at the end. Dried herbs can go in earlier, but fresh ones lose vibrancy under pressure.
Thickening Without Flour
Want a heartier soup? Blend a portion of the cooked vegetables with an immersion blender before serving. This creates natural creaminess without dairy or thickeners. For bean soups, mash a few chickpeas against the pot side. Avoid adding raw flour or cornstarch before pressure cooking—it can create gummy textures or clog valves. If needed, make a slurry with cold water after cooking and simmer on “Sauté” mode.
Troubleshooting Common Pressure Cooker Soup Issues
Even with perfect timing, things can go sideways. Here’s how to rescue your soup and prevent future mishaps.
Soup is Too Watery
This usually happens when liquid ratios are off or natural release was skipped. Fix it by:
- Removing the lid and using “Sauté” mode to simmer uncovered for 5-10 minutes
- Adding a cornstarch slurry (1 tbsp cornstarch + 2 tbsp cold water) and simmering 2 minutes
- Blending in a handful of cooked white beans for natural thickening
Prevention: Always measure liquid accurately. Remember, vegetables release water too—factor that in when doubling recipes.
Vegetables are Mushy
Overcooking or insufficient natural release is the culprit. For next time:
- Reduce cook time by 2 minutes
- Extend natural release by 5 minutes
- Add delicate veggies later in the process
Rescue: Blend the mushy parts into the broth for a creamy base, then stir in fresh raw vegetables (like shredded zucchini) for texture contrast.
Burn Notice or Insufficient Liquid
If your pot says “Burn,” immediately cancel cooking and check:
- Was there enough liquid? (Minimum 1.5 cups)
- Did you deglaze after sautéing?
- Were beans or starchy veggies stuck to the bottom?
Prevention: Always use enough liquid, scrape the pot well after sautéing, and avoid overcrowding with starchy ingredients. For bean soups, add a teaspoon of oil to reduce foaming.
Flavor is Bland
Pressure cooking concentrates flavors but can mute subtleties. Boost taste by:
- Adding salt in layers: 1/2 tsp when sautéing, another 1/2 tsp after cooking
- Stirring in umami boosters post-cook: soy sauce, tomato paste, or nutritional yeast
- Finishing with acid (lemon/vinegar) and fresh herbs
Never add salt to dried beans before cooking—it can toughen them. Wait until after pressure cooking.
Why This Method Beats Traditional Simmering
Let’s be clear: pressure cooker vegetable soup isn’t just faster—it’s fundamentally better in several ways. The sealed, high-heat environment does things a regular pot simply can’t.
Nutrient Retention Powerhouse
Studies show pressure cooking preserves up to 90% of heat-sensitive vitamins like C and B vitamins, compared to 40-60% in boiling. Why? Shorter cooking time + minimal water exposure = fewer nutrients leaching out. Broccoli cooked under pressure retains significantly more sulforaphane (a potent antioxidant) than boiled broccoli. For health-conscious cooks, this makes how long to cook vegetable soup in pressure cooker a nutritional win.
Flavor Concentration Magic
The trapped steam and high pressure force flavors to penetrate vegetables deeply. Herbs infuse more thoroughly, and vegetable sugars caramelize slightly during sautéing without burning. You get a soup that tastes like it simmered for hours—but in 15 minutes of active cooking. The natural release phase is key here; it allows flavors to meld gently as the soup cools.
Energy Efficiency Champion
Pressure cookers use 50-70% less energy than stovetop simmering. They reach cooking temperature faster and maintain it efficiently in a sealed environment. For eco-warriors or anyone watching their electricity bill, this is a silent hero. Plus, less time on the stove means less heat in your kitchen during summer—a win-win.
Conclusion: Your Quick, Healthy Soup Future Starts Now
Mastering how long to cook vegetable soup in pressure cooker puts you in control of your time and your health. No more choosing between a nutritious homemade meal and a busy schedule. With just 8-15 minutes of pressure cooking time (plus natural release), you can have a pot of vibrant, flavorful soup ready faster than it takes to order takeout. The key is understanding your ingredients: hard vegetables need more minutes, delicate ones need less, and natural release is non-negotiable for perfect texture.
Remember, your pressure cooker is a tool for empowerment, not intimidation. Start with simple recipes, follow the timing guidelines, and soon you’ll intuitively adjust for your favorite combinations. That extra 30 minutes you gain each night? Spend it with family, relax with a book, or simply savor the satisfaction of a meal made with care—in record time. Your future self (and your taste buds) will thank you. So grab those veggies, set that timer, and discover why pressure cooker soup is the ultimate weeknight hero.
Frequently Asked Questions
Can I overcook vegetable soup in a pressure cooker?
Yes, absolutely. Pressure cooking is fast, and overcooking turns vegetables to mush in minutes. Always start with the lower end of the recommended time range and use natural release. If soup is too soft, reduce cook time by 2 minutes next time or add delicate veggies later.
Why does my pressure cooker soup taste bland?
Blandness often comes from insufficient seasoning layers or skipping the sauté step. Add salt in stages (during sauté and after cooking), finish with acid like lemon juice, and always stir in fresh herbs post-cook. Pressure cooking concentrates flavors but doesn’t create them—build flavor foundations first.
Can I put frozen vegetables directly in the pressure cooker?
Yes! Frozen veggies work perfectly. Add them straight from the freezer with your liquid. Increase cook time by 2-3 minutes compared to fresh vegetables since the ice crystals lower the pot’s temperature. No thawing needed—just stir well to prevent clumping.
How much liquid is absolutely necessary for safety?
Never use less than 1.5 cups (360ml) of liquid in most 6-8 quart pressure cookers. This minimum ensures enough steam builds pressure safely. For thicker stews, 2 cups is better. Always check your manual—some smaller models require 2 cups minimum.
Should I quick release or natural release vegetable soup?
Natural release (letting pressure drop slowly) is best for most vegetable soups—especially those with potatoes, carrots, or beans. It prevents violent bubbling that breaks down veggies. Quick release only for very sturdy soups (like pureed tomato soup) or when adding dairy at the end.
Can I cook dried beans and vegetables together?
Yes, but time for the beans. Dried beans (unsoaked) need 25-35 minutes pressure time. Add hard vegetables like carrots or celery with the beans. Softer veggies like zucchini or greens go in during natural release. Always use enough liquid—beans absorb significant amounts.