Discover the foolproof method for cooking long grain white rice in your rice cooker! This guide breaks down the essential steps—from rinsing to resting—to guarantee consistently fluffy, tender grains every single time. Say goodbye to mushy or undercooked rice and hello to hassle-free perfection.
Key Takeaways
- Perfect Water Ratio is Crucial: Use 1 cup of long grain white rice to 1.5 cups of water for ideal texture. Adjust slightly based on your cooker model.
- Rinsing is Non-Negotiable: Always rinse rice until water runs clear to remove excess starch, preventing gummy results.
- Resting Time Matters: Let rice sit untouched for 10-15 minutes after cooking ends; this allows moisture to distribute evenly for fluffier grains.
- Never Peek During Cooking: Lifting the lid releases steam and heat, disrupting the cooking process and leading to uneven results.
- Fluff Gently with a Fork: Use a fork to separate grains after resting—never stir vigorously, which breaks grains and creates stickiness.
- Older Rice Needs More Water: If rice is stored long-term, add 1-2 extra tablespoons of water per cup to compensate for moisture loss.
- Clean Your Cooker Regularly: Residual starch buildup affects performance; wash the inner pot and lid after every use.
📑 Table of Contents
- Why Your Rice Cooker is the Secret Weapon for Perfect Long Grain White Rice
- Essential Tools and Prep: Setting Up for Success
- Step-by-Step: Cooking Long Grain White Rice in Your Rice Cooker
- Pro Tips for Flawless Long Grain Rice Every Time
- Troubleshooting Common Rice Cooker Problems
- Creative Ways to Use Your Perfectly Cooked Rice
- Conclusion: Your Journey to Rice Mastery Starts Now
Why Your Rice Cooker is the Secret Weapon for Perfect Long Grain White Rice
Hey there! Let’s talk about one of life’s simple pleasures: a bowl of perfectly cooked long grain white rice. You know, the kind that’s fluffy, tender, and separates easily with a fork—not mushy, not crunchy, just *right*. If you’ve ever struggled with stovetop rice (we’ve all been there—burnt bottoms, uneven cooking, constant stirring), your rice cooker is about to become your new best friend. It’s not just a convenience; it’s a game-changer for consistency. Think of it as your personal rice sommelier, handling temperature and timing so you don’t have to hover over the pot.
Long grain white rice—like Jasmine, Basmati, or American long grain—is notoriously finicky. Too much water? You get glue. Too little? It’s crunchy disappointment. But here’s the magic: rice cookers automate the entire process using precise steam and heat cycles. They detect when the water is absorbed and automatically switch to “warm” mode. No guesswork, no stress. In this guide, you’ll learn exactly how to cook long grain white rice in rice cooker for restaurant-quality results at home. Whether you’re a beginner or just tired of rice fails, we’ve got you covered. Let’s turn that humble grain into something extraordinary.
Essential Tools and Prep: Setting Up for Success
Before you hit that “cook” button, let’s make sure you’ve got everything ready. Skipping prep is the #1 reason rice turns out wrong. Don’t worry—it’s simpler than you think!

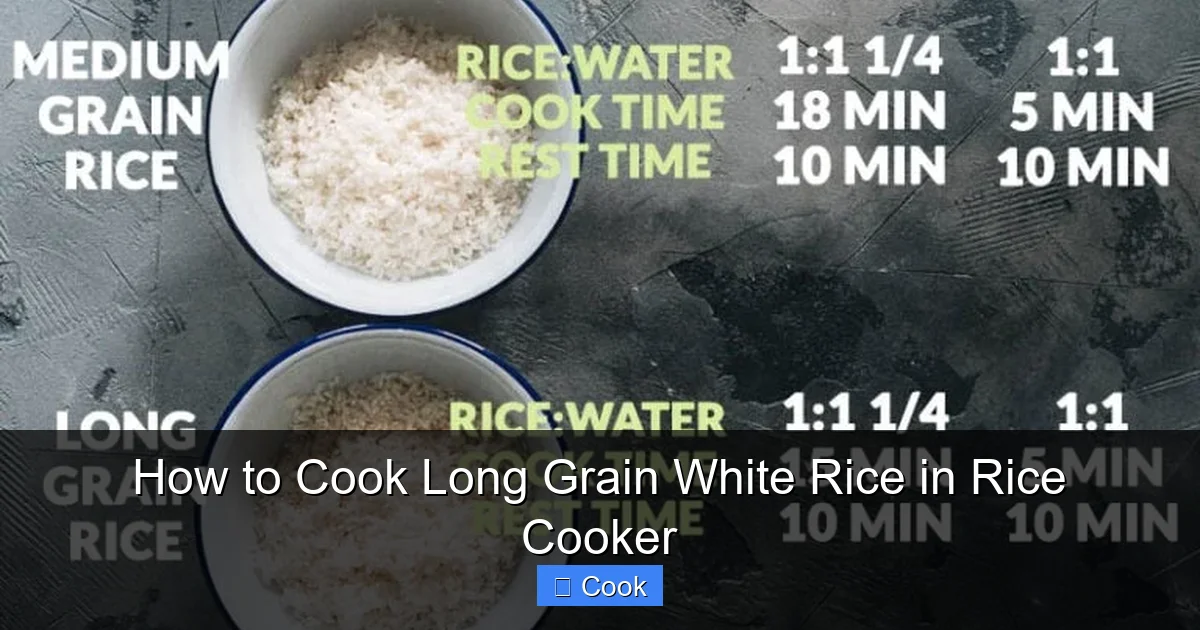
Visual guide about How to Cook Long Grain White Rice in Rice Cooker
Image source: recipevibes.com
What You’ll Need
Gather these basics: your rice cooker (obviously!), a fine-mesh strainer, a measuring cup (use the one that came with your cooker—it’s calibrated for rice, not liquid measuring cups!), a fork, and a timer. Oh, and long grain white rice, of course. Pro tip: If your rice cooker lacks a dedicated measuring cup, use a standard 1-cup dry measure—but stay consistent. Switching cup sizes mid-recipe is a fast track to soggy rice.
The Critical First Step: Rinsing Your Rice
Here’s where most people mess up: skipping the rinse. Long grain rice is coated in surface starch that makes grains stick together when cooked. Rinsing removes this starch, so your rice stays light and separate. Place rice in a strainer under cold running water. Swirl gently with your fingers until the water runs almost clear—usually 30-60 seconds. For Basmati, some soak for 20 minutes first (it elongates grains), but it’s optional for standard long grain. Never skip rinsing if you want fluffy results!
Why does this matter? Unrinsed rice releases starch into the cooking water, creating that gummy texture you hate. Rinsing is non-negotiable for perfect how to cook long grain white rice in rice cooker outcomes. Trust us—your fork will thank you.
Step-by-Step: Cooking Long Grain White Rice in Your Rice Cooker
Ready for the main event? This is where the magic happens. Follow these steps precisely, and you’ll never look back.
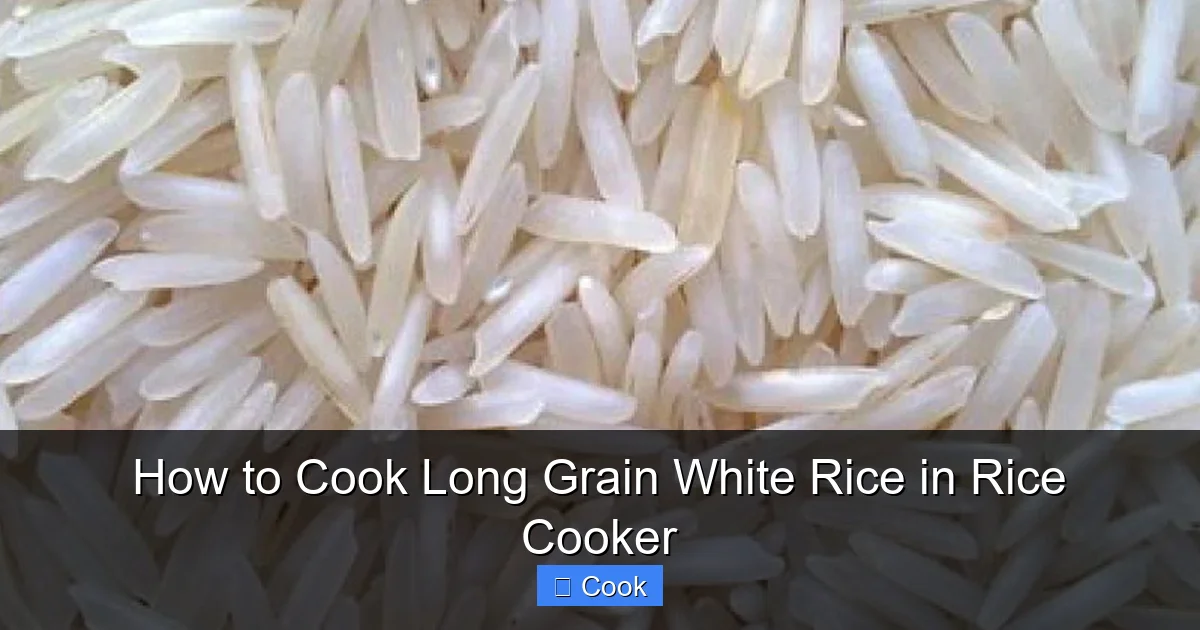
Visual guide about How to Cook Long Grain White Rice in Rice Cooker
Image source: ilgroup.com.pk
Measuring Rice and Water: The Golden Ratio
Measure 1 cup of rinsed long grain white rice into your rice cooker’s inner pot. Now, for water: the universal ratio is 1 cup rice to 1.5 cups water. But here’s the nuance—some cookers run “wetter” or “drier.” If your manual specifies a different ratio (e.g., 1:1.25 for older models), follow that. For most modern cookers, 1:1.5 is foolproof. Pro tip: Use room-temperature water—cold water can shock the grains.
Why 1.5 cups? Long grain rice absorbs about 50% more water than short grain. Too little water = undercooked. Too much = mush. This ratio accounts for evaporation and absorption. If you’re using aged rice (stored >6 months), add 1-2 extra tablespoons water per cup—older rice loses moisture over time.
The Cooking Process: Set It and Forget It
Add water to the rinsed rice in the inner pot. Give it a gentle stir with your finger—just to ensure no grains cling to the bottom. Place the pot back in the cooker, secure the lid, and select the “White Rice” or “Regular” setting. Press start. Now, walk away! Seriously. Resist the urge to peek. Lifting the lid releases steam, dropping the temperature and causing uneven cooking. Most cookers take 20-30 minutes for 1 cup of rice.
What’s happening inside? The cooker heats water to boiling, then maintains a steady simmer. As rice absorbs water, the temperature rises. Once all water is absorbed (around 180°F), the cooker detects the spike and switches to “warm” mode. This automatic shift is why rice cookers outperform stovetop methods—they respond to real-time changes.
The Resting Phase: Patience Pays Off Richly
When the cooker beeps or switches to “warm,” do NOT open the lid immediately. This is the resting phase—and it’s critical. Let the rice sit undisturbed for 10-15 minutes. During this time, residual steam redistributes moisture evenly through the grains. Skipping this? You’ll get a dry top layer and soggy bottom. It’s the difference between “meh” and “wow.”
Why rest? Rice continues cooking from carryover heat. Resting allows starch to set properly, giving you that coveted fluffy texture. Think of it like resting meat after grilling—it locks in juices. For how to cook long grain white rice in rice cooker, this step is where perfection happens.
Fluffing and Serving: The Final Touch
After resting, remove the lid. You’ll see beautiful, separate grains. Now, fluff gently with a fork—never a spoon! Insert the fork at an angle and lift grains from the bottom, folding them over. Stirring aggressively breaks grains and releases starch, making rice sticky. Fluff in sections: start at the edges, work inward. Serve immediately for peak texture.
Pro serving tip: For extra fragrance, add a pinch of salt or a bay leaf to the water before cooking. Or stir in a pat of butter after fluffing for richness. But keep it simple for your first try—master the basics first!
Pro Tips for Flawless Long Grain Rice Every Time
Even with perfect steps, small tweaks elevate your rice from good to great. These are the secrets chefs won’t tell you.
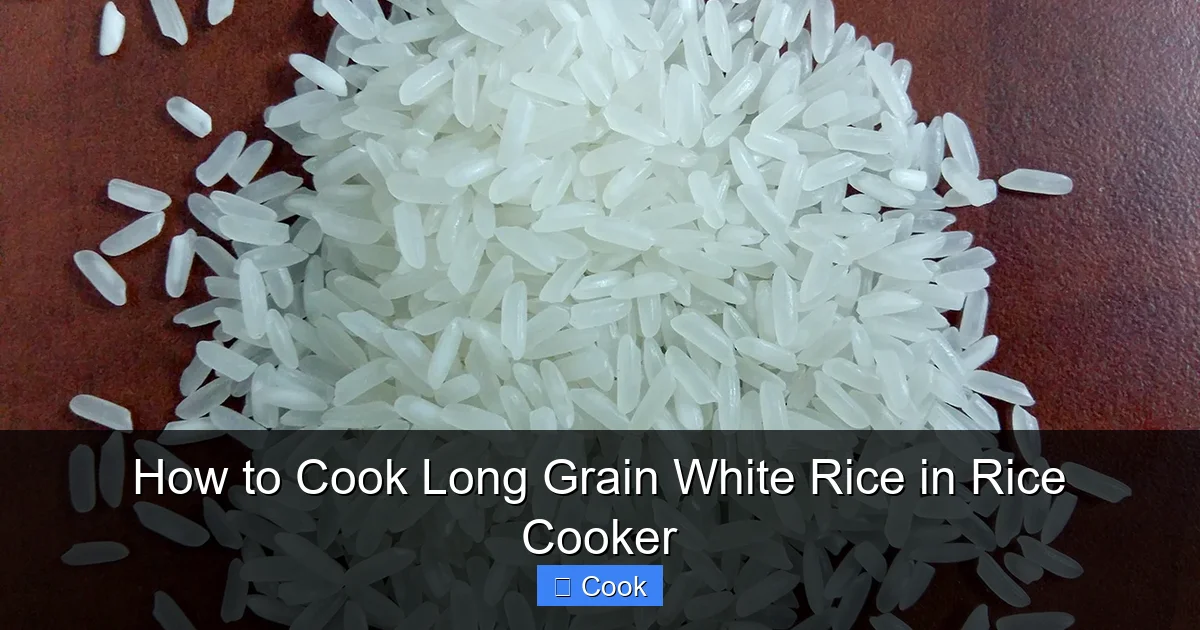
Visual guide about How to Cook Long Grain White Rice in Rice Cooker
Image source: tvfood.com.vn
Adjusting for Altitude and Humidity
High altitude? Humid climate? These affect cooking. At elevations above 3,000 feet, water boils at lower temps, so rice cooks slower. Add 1-2 extra tablespoons water per cup and extend cooking time by 5 minutes. In humidity, rice absorbs moisture from the air—use slightly less water (1.25 cups per cup rice). Keep a log: note adjustments for your next batch.
Why it matters: Rice cookers assume sea-level conditions. Ignoring altitude/humidity leads to undercooked grains. A little tweak ensures your how to cook long grain white rice in rice cooker method stays reliable anywhere.
Using Broth or Flavor Boosters
Want restaurant-style depth? Swap water for low-sodium chicken or vegetable broth. Or add aromatics: a garlic clove, onion slice, or lemon peel to the water. Remove before serving. For coconut rice, replace ¼ cup water with coconut milk. But start plain—master the base first!
Flavor caution: Avoid adding salt directly to the rice cooker pot—it can corrode non-stick surfaces over time. Season after cooking instead.
Storing and Reheating Leftovers
Cooked rice keeps 3-4 days refrigerated in an airtight container. To reheat, sprinkle with 1 tsp water per cup, cover, and microwave 1-2 minutes. Or steam over boiling water for 5 minutes. Never reheat in the rice cooker’s “warm” setting—it dries out rice.
Freezing tip: Portion rice in freezer bags, squeeze out air, and freeze flat. Thaw overnight in the fridge. Perfect for quick fried rice later!
Troubleshooting Common Rice Cooker Problems
Hit a snag? Don’t panic. These fixes solve 95% of issues.
Mushy or Gummy Rice
Too much water or over-rinsing? Check your ratio—it should be 1:1.5. If rice is consistently mushy, reduce water by 1-2 tbsp next time. Also, ensure you’re not using “quick-cook” settings for long grain rice—they cook too fast, trapping steam. Always use “White Rice” mode.
Quick fix: Spread mushy rice on a baking sheet and bake at 300°F for 10 minutes to evaporate excess moisture.
Undercooked or Crunchy Rice
Not enough water or old rice? Increase water by 1-2 tbsp per cup next time. For immediate fix, add 2 tbsp hot water, re-cover, and let sit 5 minutes. If rice is very old, it may need 20% more water.
Prevention: Store uncooked rice in airtight containers in a cool, dark place. Brown rice lasts 6 months; white rice, 1-2 years.
Rice Sticking to the Pot
Usually from insufficient rinsing or not using enough water. Always rinse thoroughly. For non-stick pots, a light spray of oil before adding rice helps. Avoid scrubbing—use a soft sponge to preserve the coating.
Pro tip: Line the pot with parchment paper (cut to fit) for foolproof release.
Creative Ways to Use Your Perfectly Cooked Rice
Great rice isn’t just a side—it’s a canvas. Here’s how to level up:
Fried Rice Made Easy
Cold, day-old rice fries best. Toss with veggies, protein, and soy sauce in a hot wok. The dry grains absorb flavors without turning mushy. Add a beaten egg at the end for classic “egg fried rice.”
Why day-old? Fresh rice is too moist. Resting overnight in the fridge firms up grains—ideal for stir-frying.
Rice Bowls and Grain Salads
Mix warm rice with black beans, corn, avocado, and lime for a quick burrito bowl. Or cool rice completely, then toss with cherry tomatoes, cucumber, feta, and lemon vinaigrette for a Mediterranean salad.
Flavor boost: Stir in fresh herbs (cilantro, parsley) or toasted nuts after cooking.
Rice Pudding and Desserts
Simmer cooked rice with milk, sugar, and cinnamon for 20 minutes to make creamy rice pudding. Or blend with coconut milk and mango for a tropical dessert soup.
Sweet tip: Use jasmine rice—its floral notes shine in desserts.
Conclusion: Your Journey to Rice Mastery Starts Now
There you have it—the complete guide to how to cook long grain white rice in rice cooker with foolproof results. From rinsing to resting, every step matters. Remember: perfect rice isn’t about fancy techniques; it’s about respecting the process. Measure accurately, rinse diligently, and let the cooker do its thing. In just 30 minutes (plus resting!), you’ll have grains that are tender, separate, and full of potential.
Don’t be discouraged if your first batch isn’t perfect. Even pros tweak ratios based on their cooker. Keep notes, experiment gently, and soon you’ll wonder how you ever cooked rice any other way. That satisfying *ping* when the cooker finishes? It’s the sound of victory. So grab your strainer, measure that rice, and get cooking—your fluffiest, most delicious bowl awaits. Happy rice-making!
Frequently Asked Questions
Do I really need to rinse long grain white rice?
Yes, absolutely! Rinsing removes surface starch that causes stickiness. Skipping this step almost guarantees gummy rice. Rinse under cold water until it runs clear—it takes just 30 seconds but makes a huge difference.
What’s the best water-to-rice ratio for my cooker?
Start with 1 cup rinsed rice to 1.5 cups water. If your rice is consistently too dry, add 1-2 tbsp extra water next time. If too wet, reduce by 1-2 tbsp. Always check your cooker’s manual for model-specific ratios.
Can I skip the resting time after cooking?
We strongly advise against it. Resting allows steam to redistribute moisture evenly. Skipping it results in a dry top layer and soggy bottom. Just 10-15 minutes makes all the difference for fluffy grains.
Why is my rice mushy even with the right ratio?
This usually happens from over-rinsing (removing too much starch) or using the wrong cooker setting. Ensure you’re on “White Rice” mode—not “Quick” or “Porridge.” Also, avoid lifting the lid during cooking, which releases steam.
How long does cooked rice last in the fridge?
Store in an airtight container for up to 4 days. Reheat with a splash of water to revive texture. For longer storage, freeze portions for 3 months—thaw overnight before reheating.
Can I cook other rice types in the same way?
Long grain white rice is the most straightforward. Brown rice needs more water (1:2 ratio) and longer cooking. Sticky rice requires soaking first. Always adjust ratios and times based on the rice variety.