
Discover how to cook on rice cooker with confidence using simple measurements and timing. This guide covers essential prep, foolproof cooking steps, troubleshooting tips, and creative recipes beyond basic rice. Stop guessing and start enjoying perfectly fluffy results every single time.
Key Takeaways
- Measure Accurately: Always use the rice cooker’s inner cup for rice and water. Standard ratio is 1 cup rice to 1.5 cups water, but adjust for rice type.
- Rinse Thoroughly: Rinse rice 2-3 times in cold water until water runs clear to remove excess starch and prevent stickiness.
- Let It Rest: After cooking, let rice sit for 10-15 minutes with the lid on. This allows moisture to distribute evenly for perfect texture.
- Clean Promptly: Wash the inner pot and lid immediately after use with mild soap and a soft sponge to avoid stuck-on residue.
- Explore Beyond Rice: Use your cooker for quinoa, oatmeal, steamed veggies, soups, and even one-pot meals for ultimate versatility.
📑 Table of Contents
- Your Rice Cooker: The Secret Kitchen MVP You’re Not Using Right
- Essential Prep: Setting Up for Rice Cooker Success
- The Foolproof Cooking Process: Step-by-Step
- Troubleshooting Common Rice Cooker Problems
- Cleaning and Maintenance: Keeping Your Cooker Happy
- Beyond Rice: Creative Uses for Your Cooker
- Conclusion: Your Path to Rice Cooker Mastery
Your Rice Cooker: The Secret Kitchen MVP You’re Not Using Right
That humble appliance sitting quietly on your counter? It’s not just for rice anymore. If you’ve ever ended up with a pot of mushy, burnt, or stubbornly undercooked rice, you’re not alone. But here’s the good news: learning how to cook on rice cooker correctly transforms it from a neglected gadget into your most reliable kitchen ally. Forget complicated stovetop methods and constant stirring. A rice cooker simplifies the process, delivering consistent, fluffy results with near-zero effort. Whether you’re a total beginner or just looking to master your machine, this guide unlocks its full potential.
Why does the rice cooker work so well? It’s all about precision. Unlike a pot on the stove where heat fluctuates, a rice cooker uses a thermostat to detect when the water is absorbed and the temperature rises above boiling. This triggers the “keep warm” function automatically. No more guessing, no more burnt bottoms. Mastering the basics – measuring, rinsing, water ratios, and resting – is the key to unlocking this magic. Let’s ditch the frustration and turn your rice cooker into the workhorse it was meant to be.
Essential Prep: Setting Up for Rice Cooker Success
Getting started right is half the battle won. Skipping these simple prep steps is the #1 reason people struggle with their rice cooker. Don’t worry, it only takes a few extra minutes and makes a massive difference.
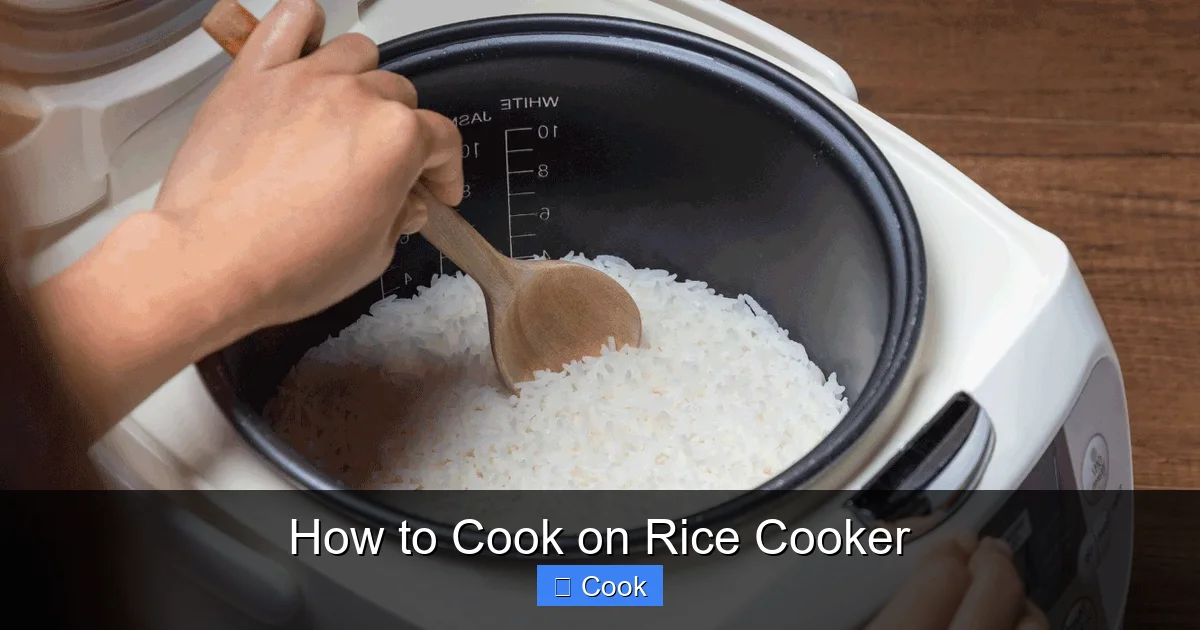
Visual guide about How to Cook on Rice Cooker
Image source: expertreviewsbestricecooker.com
Measuring Like a Pro: The Right Tools Matter
First rule: never use your standard kitchen measuring cup for rice or water in your cooker. Rice cookers come with a special, slightly smaller inner cup (usually about 180ml). This cup is calibrated specifically for the machine’s water ratios. Using a regular cup throws everything off, leading to soggy or dry rice. Always measure rice and water using the cooker’s own cup. It’s that important!
Why the special cup? Rice varieties absorb water differently. The inner cup accounts for this. For example, 1 inner cup of long-grain white rice typically needs 1.5 inner cups of water. If you use a standard US cup (240ml), you’d be adding too much water, resulting in mush. Consistency starts with the right measurement tool.
The Rinse Ritual: Why It’s Non-Negotiable
Most rice (except pre-rinsed varieties like sushi rice) has surface starch. This starch is the enemy of fluffy, separate grains. Rinsing removes it. Here’s how:
- Place the measured rice in a fine-mesh strainer.
- Rinse under cold running water, gently swishing the grains with your fingers.
- Continue rinsing for 1-2 minutes, or until the water runs mostly clear.
- Shake the strainer well to remove excess surface water before adding rice to the inner pot.
Skipping this step means your rice will likely turn out sticky and gummy, no matter how perfect your water ratio is. It’s a small effort for a huge payoff in texture.
Water Wisdom: Ratios for Every Rice Type
This is where many go wrong. Water ratios vary significantly depending on the rice:
- Long-Grain White Rice (Jasmine, Basmati): 1 cup rice : 1.25 – 1.5 cups water (Basmati often needs slightly less water).
- Short-Grain White Rice (Sushi Rice): 1 cup rice : 1.25 cups water.
- Brown Rice: 1 cup rice : 1.75 – 2 cups water (needs more water and longer cooking).
- Wild Rice: 1 cup rice : 2 – 2.5 cups water.
- Pre-Rinsed/Converted Rice: Follow package instructions, usually 1:1 ratio.
Always check your specific rice package for recommendations, as brands can vary. When in doubt, start with the standard 1:1.5 ratio for white rice and adjust next time based on results. Remember: use the inner cup for both rice and water!
The Foolproof Cooking Process: Step-by-Step
Once prepped, the actual cooking is incredibly straightforward. Your rice cooker does the heavy lifting. Follow these steps for perfect results every time.

Visual guide about How to Cook on Rice Cooker
Image source: hungryhuy.com
Loading the Cooker Correctly
After rinsing, add the rice to the inner pot. Pour in the measured water. Give it a very gentle stir with a spoon or fork – just enough to ensure the rice is submerged and no dry pockets remain. Don’t overmix, as this can break grains. Place the inner pot securely into the rice cooker base. Ensure it sits flat and makes proper contact with the heating element. Close the lid firmly.
A common mistake? Adding water *after* placing the pot in the cooker. Always add water to the pot *before* placing it in the machine. This prevents spills and ensures even heating from the start.
Selecting the Right Setting (If Applicable)
Basic rice cookers have just one button: “Cook.” Press it, and it automatically switches to “Keep Warm” when done. More advanced models offer settings like:
- White Rice: Standard setting for most white rice varieties.
- Brown Rice: Longer cooking cycle with higher heat to penetrate the tougher bran layer.
- Sushi Rice: Often a slightly shorter cycle or specific water ratio setting.
- Porridge/Congee: Extended, lower-heat cooking for creamy textures.
- Steam: Uses a separate tray above the rice water.
If your cooker has multiple settings, choose the one matching your rice type. If it’s a simple one-button model, it will work perfectly for standard white rice. For brown or wild rice, you might need to add a little extra water and potentially do a manual “keep warm” extension if it finishes too soon.
The Critical Resting Phase: Patience Pays Off
This is the step most people rush, and it ruins perfectly good rice. When the cook cycle finishes (you’ll hear a click or see the light change to “Keep Warm”), do not open the lid immediately. Let the rice sit, undisturbed, for 10-15 minutes with the lid closed.
Why? During this resting time, the residual heat and steam continue to gently cook the rice from the inside out. More importantly, the moisture redistributes evenly throughout the grains. Opening too soon causes a sudden drop in steam pressure, leading to undercooked centers and potentially making the top layer dry or crusty. This resting period is non-negotiable for restaurant-quality fluffiness.
Troubleshooting Common Rice Cooker Problems
Even with perfect prep, things can occasionally go sideways. Don’t panic! Most issues have simple fixes.

Visual guide about How to Cook on Rice Cooker
Image source: recipes.net
Mushy or Sticky Rice: Too Much Water?
If your rice is consistently mushy, gluey, or overly sticky, you’re likely using too much water. Double-check your measurements – are you using the inner cup? Did you rinse the rice well? For next time:
- Reduce water by 1-2 tablespoons per cup of rice.
- Ensure you rinsed the rice thoroughly to remove surface starch.
- If using a new rice variety, research its specific water needs.
For already cooked mushy rice, spread it thinly on a baking sheet and bake at 300°F (150°C) for 10-15 minutes to evaporate excess moisture. It won’t be perfect, but it’s salvageable for fried rice or soups.
Dry or Undercooked Rice: Not Enough Water?
Grains that are hard, chalky, or have dry centers mean insufficient water or heat. Solutions:
- Add 1-2 tablespoons of hot water per cup of rice, fluff gently with a fork, close the lid, and let it steam for 5-10 minutes on “Keep Warm.”
- For next time, increase water by 1-2 tablespoons per cup.
- Ensure the inner pot is seated correctly on the heating element.
- Check if the “Keep Warm” function is working – sometimes it doesn’t activate properly.
If the rice is severely undercooked, you might need to transfer it to a stovetop pot with a splash of water and finish cooking covered on low heat.
Burnt Bottom or Smoky Smell: Heat Issues
A burnt smell or blackened bottom layer usually indicates the heating element is too hot or the pot isn’t making good contact. Try:
- Ensuring the inner pot is clean and dry before placing it in the cooker (dampness can cause uneven heating).
- Checking that the pot sits perfectly flat on the base.
- Using the “Quick Cook” setting if available (it often uses slightly lower heat).
- For brown rice, which cooks longer, ensure you’re using the correct setting and enough water.
If burning happens frequently, your cooker might need servicing. Avoid using abrasive cleaners on the inner pot’s base, as scratches can interfere with heat transfer.
Cleaning and Maintenance: Keeping Your Cooker Happy
Proper cleaning ensures your rice cooker lasts for years and prevents off-flavors. Neglecting this leads to stuck-on residue and potential mold.
Immediate Post-Cook Cleaning Routine
As soon as you’ve served the rice, take these steps:
- Unplug the cooker and let it cool slightly.
- Remove the inner pot. Wash it immediately with warm water and a drop of mild dish soap using a soft sponge or cloth. Never use steel wool or harsh scouring pads – they scratch the non-stick coating (if present) and the metal, making future cleaning harder.
- Rinse the inner pot thoroughly.
- Wipe the inner lid (the part that touches the steam) with a damp cloth. Remove any removable steam vents or filters and wash them separately.
- Wipe the outer cooking bowl (the part the inner pot sits in) with a damp cloth. Never immerse the main unit in water!
Why clean immediately? Rice starch hardens quickly when dry, becoming much harder to remove later. A quick rinse right after use prevents this.
Deep Cleaning for Longevity
Every few weeks, or if you notice any lingering smells:
- Make a paste of baking soda and water. Apply to the inside of the inner pot (especially any stained areas) and let sit for 15-30 minutes before gently wiping clean.
- For stubborn odors, boil a pot of water with a slice of lemon or a tablespoon of vinegar for 5 minutes, then let it cool before washing.
- Ensure all removable parts (lid gasket, steam vent) are completely dry before reassembling to prevent mold.
Always dry the inner pot and lid completely before storing. Store the cooker with the lid slightly ajar to allow air circulation and prevent musty smells.
Beyond Rice: Creative Uses for Your Cooker
Your rice cooker is a versatile kitchen tool, not just a rice machine. Unlock its full potential with these easy ideas.
Perfect Grains & Legumes
Cook quinoa, barley, farro, or lentils with ease. Use the same basic principle: rinse well, use the correct water ratio (quinoa is often 1:2 rice:water), and select the appropriate setting if available. Most grains cook beautifully on the standard “White Rice” cycle. Add a pinch of salt or a bay leaf for extra flavor.
Try cooking dried beans! Soak beans overnight, then drain. Add fresh water (enough to cover by 2 inches), a pinch of baking soda (helps soften), and cook on “White Rice” for 1-2 cycles, checking tenderness. Much easier than stovetop!
Steaming Delights
Most rice cookers come with a steaming tray. Place water in the inner pot (usually 1-2 cups, check your manual), bring to a boil on “Cook,” then add veggies, fish, or dumplings to the tray. Cover and steam until tender. Perfect for:
- Broccoli, carrots, or asparagus (5-8 minutes).
- Salmon fillets or shrimp (8-12 minutes).
- Frozen dumplings or bao buns (10-15 minutes).
Steaming preserves nutrients and flavor far better than boiling. It’s a hands-off way to cook healthy sides or mains.
One-Pot Meals & Breakfasts
Make complete meals in your rice cooker:
- Congee (Rice Porridge): Use 1 part rice to 8-10 parts water. Cook on “Porridge” or “White Rice” for 1-2 cycles, stirring occasionally. Add ginger, chicken, or mushrooms.
- Oatmeal: Combine rolled oats, water/milk, and a pinch of salt. Cook on “White Rice” for 15-20 minutes. Top with fruit and nuts.
- Simple Soups: Sauté onions/garlic in the inner pot (if it’s safe to do so – check manual), add broth, veggies, and grains. Cook on “White Rice” until tender.
The “Keep Warm” function is perfect for slow-cooking stews or keeping oatmeal warm for hours. Experiment with adding protein (like chicken thighs) or veggies directly to the rice water for flavorful, complete dishes.
Conclusion: Your Path to Rice Cooker Mastery
Mastering how to cook on rice cooker isn’t about complex techniques; it’s about understanding a few fundamental principles and respecting the machine’s design. Accurate measurement with the inner cup, thorough rinsing, using the correct water ratio for your rice type, and crucially, allowing that essential resting time – these are the pillars of perfect rice. Once you’ve nailed the basics, the world opens up. Your cooker becomes a tool for effortless grains, healthy steaming, comforting porridge, and even complete one-pot meals.
Don’t be discouraged by an occasional mishap. Rice cooking has a learning curve, but it’s incredibly forgiving. Use the troubleshooting tips to adjust your next batch. Clean your cooker promptly to keep it performing its best. Most importantly, embrace the simplicity. That humble appliance on your counter is designed to take the guesswork out of a staple food, freeing you up to focus on the rest of your meal. So, grab that inner cup, rinse your rice, and press “Cook.” Perfect, fluffy results are just a cycle away. Your rice cooker isn’t just for rice anymore – it’s your new kitchen workhorse, ready to simplify your cooking life, one perfect grain at a time.
Frequently Asked Questions
Can I cook other grains like quinoa or oats in my rice cooker?
Absolutely! Rice cookers excel at cooking quinoa, oats, barley, farro, and even lentils. Use the standard “White Rice” setting for most grains, adjusting the water ratio (e.g., quinoa often needs 1 part grain to 2 parts water). Oatmeal cooks beautifully on the same setting – just combine oats, liquid, and a pinch of salt.
Why is my rice always sticky even after rinsing?
Sticky rice usually means either insufficient rinsing (starch remains) or using too much water. Ensure you rinse the rice 2-3 times until the water runs clear. Also, double-check you’re using the rice cooker’s inner cup for measurement and the correct water ratio for your specific rice type (e.g., sushi rice is naturally stickier but shouldn’t be gluey).
How much water do I add for brown rice?
Brown rice typically requires more water than white rice due to its bran layer. A standard ratio is 1 cup of brown rice to 1.75 – 2 cups of water (using the inner cup). Always use the “Brown Rice” setting if your cooker has one, as it uses a longer cooking cycle with higher heat to properly soften the grain.
Can I leave rice in the cooker on “Keep Warm” overnight?
While the “Keep Warm” function is designed for short-term holding (a few hours), leaving rice for extended periods like overnight isn’t ideal. Moisture can make the texture mushy, and there’s a slight food safety risk if temperatures drop too low. For best quality, transfer cooled rice to an airtight container and refrigerate within 2 hours.
What should I do if my rice cooker doesn’t switch to “Keep Warm”?
If the cooker stays on “Cook” indefinitely or shuts off completely, first ensure the inner pot is seated correctly on the heating element. Check if the “Keep Warm” function is enabled (some models have a separate switch). If the problem persists, the thermostat or thermal fuse might be faulty, and professional repair may be needed.
Can I cook soup or stew in my rice cooker?
Yes! Rice cookers are great for simple one-pot soups and stews. Sauté aromatics in the inner pot if safe (check manual), add broth, vegetables, grains, or beans, and cook on the “White Rice” setting. The “Keep Warm” function is perfect for slow simmering. Avoid overfilling – never exceed the max fill line.