
Discover the fastest way to cook spelt using your pressure cooker! This method slashes cooking time from hours to minutes while preserving nutrients and texture. Get perfectly tender, versatile spelt every single time with our simple steps and pro tips.
Key Takeaways
- Pressure cooking saves massive time: Cuts spelt cooking from 50-60 minutes stovetop to just 15-25 minutes, freeing up your schedule.
- No soaking required (but helpful): Skip overnight soaking; pressure cooking handles whole spelt grains beautifully, though soaking reduces time slightly.
- Liquid ratio is critical: Use 1 cup spelt to 1.25 cups liquid for pearled, 1.5 cups for whole grain to avoid mush or crunch.
- Natural release prevents mush: Always let pressure drop naturally for 10-15 minutes after cooking to keep grains intact and fluffy.
- Texture control is key: Adjust cooking time by 2-3 minutes for al dente (chewier) or softer spelt based on your recipe needs.
- Versatile & nutritious: Cooked spelt works in salads, soups, breakfast bowls, and more, packing protein, fiber, and essential minerals.
- Easy storage: Cook a big batch! Refrigerate for 5 days or freeze for 3 months for instant healthy meals.
📑 Table of Contents
- Why Pressure Cooker Spelt is a Game-Changer
- Your Essential Spelt Prep Guide
- Step-by-Step: Cooking Spelt in Your Pressure Cooker
- Mastering Texture: From Al Dente to Creamy Porridge
- Delicious Ways to Use Your Pressure Cooker Spelt
- Troubleshooting Common Spelt Issues
- Storing and Reheating Your Pressure Cooker Spelt
- Conclusion: Your Pressure Cooker Spelt Journey Starts Now
Why Pressure Cooker Spelt is a Game-Changer
Let’s be honest: cooking whole grains like spelt on the stovetop can feel like a chore. Waiting 50-60 minutes for pot after pot of water to simmer, stirring occasionally, and hoping you don’t end up with mushy or undercooked grains? No thank you. That’s where your pressure cooker becomes your new best friend. Learning how to cook spelt in a pressure cooker transforms this nutritious ancient grain from a weekend project into a weekday staple. It’s fast, foolproof, and preserves more nutrients than boiling.
Spelt itself is a superstar. An ancient cousin of modern wheat, it’s packed with protein, fiber, iron, magnesium, and B vitamins. It has a lovely nutty, slightly sweet flavor and a satisfying chewy texture when cooked right. But its tough outer hull means it needs serious cooking time to become tender. The pressure cooker’s magic? It uses steam pressure to dramatically speed up this process. Water boils at a much higher temperature under pressure, penetrating the spelt grain quickly and evenly. This means you get perfectly cooked spelt in a fraction of the time, with less hands-on effort and better retention of those valuable nutrients that can leach out into boiling water.
Your Essential Spelt Prep Guide
Before you hit that pressure button, a little prep ensures perfect results. Don’t worry – it’s simpler than you think!
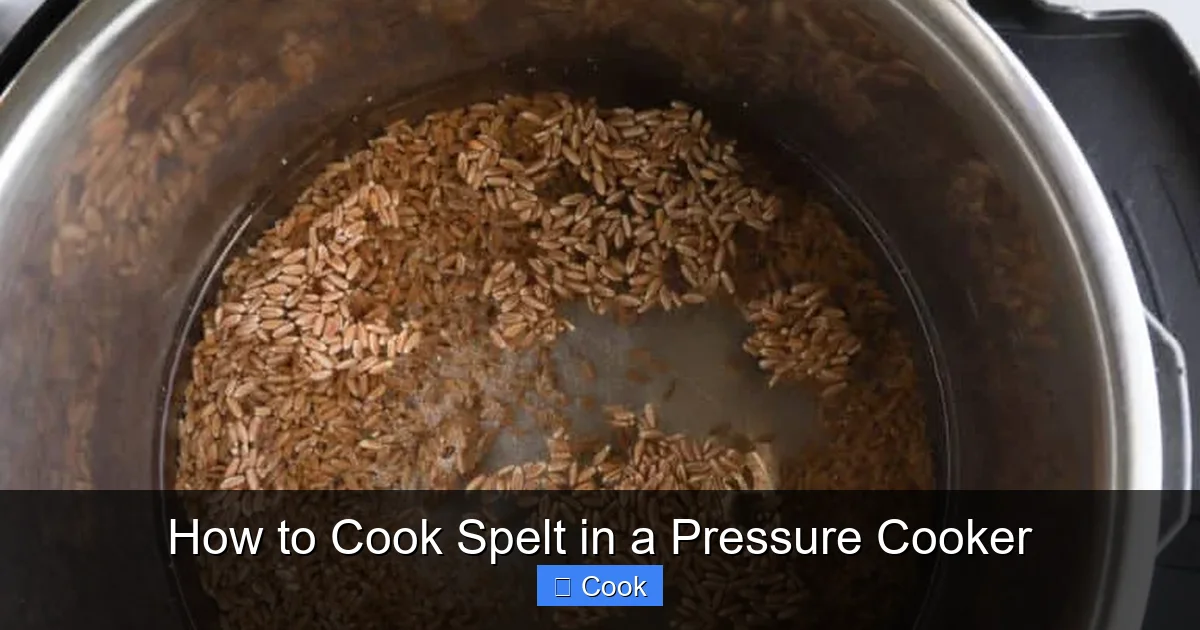
Visual guide about How to Cook Spelt in a Pressure Cooker
Image source: aredspatula.com
Choosing Your Spelt: Pearled vs. Whole Grain
This is the biggest decision impacting your cooking time and texture. Pearled spelt has its tough outer bran layer removed. It cooks faster (15-18 minutes under pressure), has a softer, more neutral texture, and is ideal for porridge, risottos, or when you want a quicker grain. Whole grain spelt (sometimes called “hulled” spelt) retains its nutrient-rich bran and germ. It’s chewier, more nutty, and packed with fiber, but takes longer to cook (20-25 minutes under pressure). It’s perfect for salads, grain bowls, or side dishes where texture matters. Always check the package – some brands label whole grain as “spelt berries.”
Rinsing and Soaking: Do You Really Need To?
Rinsing spelt is non-negotiable. Like rice or quinoa, it can have dust, debris, or even tiny stones. Place your spelt in a fine-mesh strainer and rinse thoroughly under cool running water for 30-60 seconds, swishing it around. This step prevents gritty surprises in your final dish.
Soaking is where things get interesting for pressure cooking. Traditional wisdom says soak whole grains overnight to reduce cooking time and improve digestibility. But with a pressure cooker? It’s optional, but helpful. Soaking whole grain spelt for 4-8 hours (or overnight) can shave 3-5 minutes off your pressure cooking time and may make it slightly easier to digest for some people. However, the pressure cooker is so efficient that unsoaked whole spelt cooks beautifully in 20-25 minutes. Pearled spelt rarely benefits from soaking – it’s quick enough as is. If you have time, soak whole grain spelt; if you’re in a hurry, skip it. Your pressure cooker has your back either way!
Liquid Matters: The Golden Ratio
Getting the liquid-to-spelt ratio right is crucial for perfect texture. Too little liquid, and your spelt will be crunchy and the pot might burn. Too much, and you’ll end up with mushy, soupy grains. Here’s the simple rule:
- Pearled Spelt: 1 cup rinsed spelt to 1.25 cups liquid (water, broth, or a mix).
- Whole Grain Spelt: 1 cup rinsed spelt to 1.5 cups liquid.
Why the difference? Whole grain spelt has that tough bran layer that needs more liquid to soften fully. Using broth instead of water adds fantastic flavor depth, especially for savory dishes. A splash of olive oil or a pinch of salt in the liquid is optional but can enhance taste.
Step-by-Step: Cooking Spelt in Your Pressure Cooker
Now for the fun part! This method works for most electric pressure cookers (like Instant Pot) and stovetop models. Follow these steps for foolproof results.
Visual guide about How to Cook Spelt in a Pressure Cooker
Image source: aredspatula.com
The Basic Method (Works for Both Types)
- Prep & Add: Rinse your spelt thoroughly. Add it to the inner pot of your pressure cooker.
- Liquid Level: Pour in the correct amount of liquid based on your spelt type (see ratio above).
- Seal & Set: Securely lock the lid. Ensure the steam release valve is set to “Sealing.”
- Pressure Cook: Select the “Manual” or “Pressure Cook” function. Set the time:
- Pearled Spelt: 15 minutes on High Pressure
- Whole Grain Spelt (Unsoaked): 22 minutes on High Pressure
- Whole Grain Spelt (Soaked 4+ hours): 18 minutes on High Pressure
- Natural Release: Once the cooking cycle finishes, DO NOT quick release. Let the pressure drop naturally for 10-15 minutes. This is VITAL for preventing mush. After 10-15 minutes, carefully do a quick release for any remaining pressure.
- Fluff & Rest: Carefully open the lid away from you (watch the steam!). Fluff the spelt gently with a fork. Let it sit, uncovered, for 5 minutes. This allows excess moisture to evaporate, giving you perfectly separate grains.
Pro Tips for Perfect Texture Every Time
Avoiding mush or crunch is all about timing and release:
- Natural Release is Non-Negotiable: Skipping the natural release (letting pressure drop slowly) is the #1 cause of mushy spelt. The residual heat and pressure continue cooking the grains gently. Rushing it with a quick release makes them burst.
- Adjust Time for Texture: Want chewier spelt for a salad? Reduce cooking time by 2 minutes. Need it very soft for porridge or baby food? Add 2-3 minutes. Start with the base times above and tweak on your next batch.
- Check Doneness Early: If you’re unsure, after the natural release, carefully open the lid and test a grain. It should be tender but still have a slight bite (al dente) for most uses. If undercooked, close the lid and pressure cook for 1-2 more minutes.
- Drain Excess Liquid (Rarely Needed): With the correct ratio, you shouldn’t have much liquid left. If you do (usually from using too much liquid), carefully drain it off after cooking – but try to get the ratio right first!
Mastering Texture: From Al Dente to Creamy Porridge
One of the beauties of pressure cooker spelt is how easily you can control the final texture to suit any dish. It’s not one-size-fits-all!
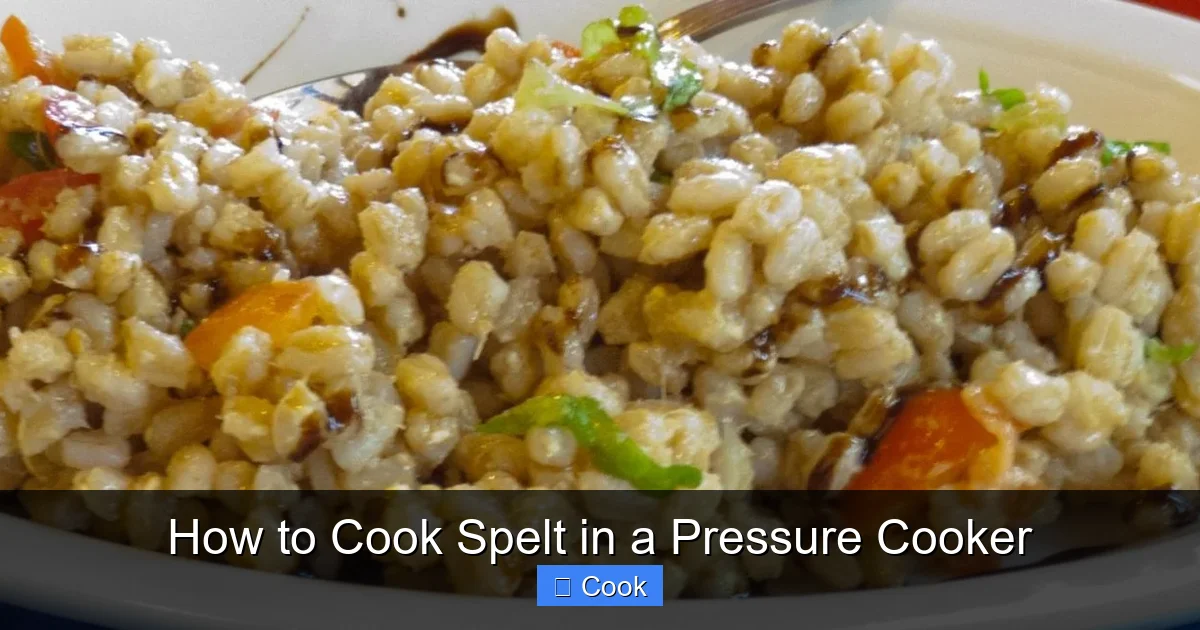
Visual guide about How to Cook Spelt in a Pressure Cooker
Image source: pressure-cooker-recipes.com
Achieving Perfect Al Dente (Chewy Grain)
This is the ideal texture for salads, grain bowls, and side dishes where you want distinct, satisfying grains. Key steps: Use the base cooking times listed (15 min pearled, 22 min whole unsoaked). Crucially, stick to the natural release for 10-15 minutes. Fluff gently with a fork immediately after the quick release. The grains should be tender throughout but still offer a pleasant resistance when bitten. If they feel too soft, reduce the cooking time by 1-2 minutes on your next attempt. Remember, residual heat continues cooking them slightly after pressure release.
Making Creamy Spelt Porridge
Love a warm, comforting breakfast? Pressure cooker spelt porridge is incredibly creamy without constant stirring. Here’s how: Use pearled spelt for faster results. Increase the liquid slightly: 1 cup spelt to 1.5 cups liquid (water, milk, or a mix). Cook for 15 minutes on High Pressure, followed by a 10-minute natural release. After opening, stir well – the spelt will be very soft and porridge-like. For extra creaminess, stir in a splash of milk or cream, a knob of butter, or a drizzle of maple syrup after cooking. Top with fruit, nuts, or seeds. Pro Tip: Cook a big batch and reheat portions with a splash of milk for quick breakfasts all week.
Using Spelt in Soups and Stews
Spelt holds its shape remarkably well in long-simmered dishes, adding heartiness and nutrition. Best practice: Cook your spelt separately using the basic method (al dente texture) until just tender. Then, add it to your soup or stew during the last 10-15 minutes of simmering. This prevents it from becoming disintegrated. If you must cook it directly in the soup, use slightly less liquid than the basic ratio (e.g., 1 cup spelt to 1 cup liquid *plus* the broth in your soup) and monitor closely near the end to avoid mush. Whole grain spelt works particularly well here for its robust texture.
Delicious Ways to Use Your Pressure Cooker Spelt
Cooked spelt is incredibly versatile. Don’t just stick it in a bowl with salt! Here are some inspiring ideas to use up that batch:
Hearty Salads & Grain Bowls
Spelt’s chewy texture and nutty flavor make it a salad superstar. Toss cooled spelt with:
- Massaged kale, roasted sweet potatoes, chickpeas, feta, and a lemon-tahini dressing.
- Arugula, grilled chicken or shrimp, sliced avocado, cherry tomatoes, and a balsamic vinaigrette.
- Mediterranean flavors: cucumber, Kalamata olives, red onion, parsley, lemon juice, and olive oil.
Tip: Let the spelt cool completely (or refrigerate overnight) for the best salad texture. The flavors meld beautifully!
Comforting Breakfasts
Beyond basic porridge, try:
- Spelt “Oatmeal”: Cook pearled spelt with milk, cinnamon, and a pinch of salt. Top with stewed apples and walnuts.
- Breakfast Burritos: Mix warm spelt with scrambled eggs, black beans, salsa, and cheese.
- Yogurt Parfaits: Layer cooled spelt with Greek yogurt, berries, and granola.
Savory Side Dishes & Main Courses
Spelt shines as a side:
- Serve buttered spelt with roasted chicken or fish instead of rice or potatoes.
- Make a spelt “risotto”: Sauté onions, add cooked spelt, then gradually stir in warm broth, finishing with Parmesan and herbs.
- Use it as a base for stuffed peppers or mushrooms.
It can even be a main:
- Combine cooked spelt with lentils, sautéed mushrooms, onions, and herbs for a hearty vegetarian loaf or patties.
- Make a spelt and vegetable stir-fry, adding the spelt at the very end.
Troubleshooting Common Spelt Issues
Even with the best method, hiccups happen. Here’s how to fix them:
My Spelt is Mushy!
This is almost always due to too much liquid or skipping the natural release. Double-check your liquid ratio next time. Ensure you let the pressure drop naturally for the full 10-15 minutes before quick releasing. If it’s already mushy, you can try spreading it out on a baking sheet and baking at 350°F (175°C) for 10-15 minutes to evaporate excess moisture, but prevention is best. Reduce liquid slightly or cooking time on your next batch.
My Spelt is Still Crunchy!
Usually means not enough liquid or not enough cooking time. Did you use the correct ratio? Whole grain needs more liquid than pearled. Was the cooking time sufficient? Whole grain unsoaked needs 22 minutes. If undercooked, you can usually salvage it: Add 1/4 cup hot water or broth, close the lid, and pressure cook for 2-3 more minutes. Ensure the vent is sealed.
There’s Too Much Liquid Left After Cooking
You likely used too much liquid initially. Spelt absorbs liquid as it cooks. With the correct ratio, it should be mostly absorbed. If you have excess, carefully drain it off after the natural release. For future batches, reduce the liquid by 1-2 tablespoons. Remember, whole grain spelt needs more liquid than pearled.
My Spelt Tastes Bland
Cook it in broth instead of water! Chicken, vegetable, or mushroom broth adds instant depth. Add a pinch of salt to the cooking liquid – it makes a huge difference. After cooking, season well with salt, pepper, herbs, or a drizzle of good olive oil. Toss with lemon juice or vinegar for brightness.
Can I Cook Other Grains the Same Way?
Absolutely! The pressure cooker is a grain-cooking powerhouse. Adjust times and liquid ratios:
- Farro (Pearled): 15-18 min, 1:1.25 ratio
- Farro (Semi-Pearled/Whole): 25-30 min, 1:1.5 ratio
- Wheat Berries: 35-40 min, 1:2 ratio (soaking highly recommended)
- Quinoa: 1 min High Pressure + 10 min Natural Release, 1:1.5 ratio
- Brown Rice: 22-25 min, 1:1.25 ratio
Always rinse grains well and use the natural release method for best texture!
Storing and Reheating Your Pressure Cooker Spelt
One of the biggest perks of pressure cooking spelt is making a big batch for the week! Here’s how to store it right:
Refrigeration
Cool cooked spelt completely within 2 hours of cooking (spread it out on a baking sheet to speed this up). Transfer to an airtight container. It will keep beautifully in the fridge for up to 5 days. This is perfect for meal prepping salads, bowls, or quick sides.
Freezing
Freezing spelt is a fantastic option for long-term storage. Portion it out:
- Scoop cooled spelt into a large bowl.
- Divide into 1-2 cup portions (ideal for most recipes).
- Spread portions on a parchment-lined baking sheet and freeze solid (about 2 hours).
- Transfer frozen portions to heavy-duty freezer bags or airtight containers, squeezing out excess air.
- Label with date. Frozen spelt keeps well for up to 3 months.
Why freeze flat first? It prevents large clumps and makes portions easier to thaw and use.
Reheating Like a Pro
Reheating spelt properly keeps it from drying out:
- Stovetop (Best for texture): Place spelt in a small saucepan. Add 1-2 tablespoons of water, broth, or milk per cup. Cover and heat over medium-low, stirring occasionally, until warmed through (3-5 mins).
- Microwave (Quickest): Place spelt in a microwave-safe bowl. Add 1-2 tbsp liquid per cup. Cover with a damp paper towel or microwave-safe lid. Heat in 1-minute intervals, stirring, until hot.
- Oven (For large portions or crisping): Spread spelt on a baking sheet. Drizzle lightly with oil or broth. Cover loosely with foil. Bake at 350°F (175°C) for 10-15 mins until heated through.
Never reheat spelt dry! The added liquid restores moisture and prevents it from becoming tough or rubbery.
Conclusion: Your Pressure Cooker Spelt Journey Starts Now
Mastering how to cook spelt in a pressure cooker unlocks a world of nutritious, delicious, and incredibly convenient meals. It’s not just about saving time (though slashing 50 minutes down to 20 is amazing!). It’s about consistently achieving that perfect chewy-yet-tender texture that stovetop cooking often struggles with. You get all the incredible health benefits of this ancient grain – the protein, the fiber, the minerals – without the hours of babysitting a pot.
Remember the golden rules: rinse well, use the right liquid ratio, respect the natural release time, and adjust cooking minutes slightly for your preferred texture. Whether you’re whipping up a quick breakfast porridge, a vibrant grain salad for lunch, or a hearty side for dinner, pressure cooker spelt is your reliable, healthy foundation. Don’t be afraid to experiment with flavors – cook it in broth, toss it with herbs, mix it into soups. The versatility is endless. So grab your pressure cooker, measure out some spelt, and discover how effortless and rewarding cooking this wholesome grain can be. Your future self (and your taste buds) will thank you!
Frequently Asked Questions
Can I cook spelt in an Instant Pot?
Absolutely! The Instant Pot is a popular electric pressure cooker and works perfectly for spelt. Simply follow the step-by-step instructions provided in the main content, using the “Manual” or “Pressure Cook” setting on High Pressure. The natural release step is especially crucial for perfect texture.
How much dried spelt makes cooked spelt?
Like most whole grains, spelt expands significantly during cooking. Generally, 1 cup of uncooked spelt will yield approximately 3 to 3.5 cups of cooked spelt. This ratio is helpful for meal planning – cook a cup for several servings throughout the week.
Is pressure cooker spelt healthy?
Yes! Pressure cooking is actually one of the best methods for preserving nutrients in grains like spelt. The shorter cooking time and sealed environment help retain more vitamins and minerals compared to prolonged boiling. Spelt itself is a nutritional powerhouse, rich in protein, fiber, iron, magnesium, and B vitamins.
Can I use the quick release method for spelt?
It’s strongly discouraged. Using the quick release (venting pressure immediately) is the most common cause of mushy, disintegrated spelt. The sudden drop in pressure causes the grains to burst. Always allow for a natural pressure release of 10-15 minutes after the cooking cycle finishes before doing a quick release for any remaining steam.
What’s the difference between spelt and farro?
Both are ancient grains, but they are distinct. Spelt is a type of wheat (contains gluten) with a nutty, slightly sweet flavor and a chewy texture when cooked. Farro usually refers to emmer wheat (also contains gluten) and has a more pronounced nutty, earthy taste with a firmer, toothsome bite. Cooking times and liquid ratios differ slightly, but both work wonderfully in a pressure cooker.
Can I cook spelt with other grains in the pressure cooker?
It’s possible, but requires caution. Grains have different cooking times and liquid needs. A safe method is to cook the grain with the longest time (like whole spelt or wheat berries) first, then add quicker-cooking grains (like pearled spelt or quinoa) during the last few minutes of pressure cooking. However, for best results and predictable texture, cooking grains separately is usually recommended.