Discover the easiest way to make crispy, healthy apple chips using your Ninja Air Fryer Oven. This foolproof method transforms fresh apples into delicious dehydrated snacks in just 4-6 hours, preserving nutrients and flavor without added sugar. Perfect for on-the-go munching or adding crunch to meals!
Key Takeaways
- Slice uniformly: Use a mandoline for 1/8-inch thick slices to ensure even dehydration and prevent sogginess.
- Low and slow wins: Dehydrate at 135°F (57°C) for 4-6 hours—higher temps cook instead of dry, ruining texture.
- Lemon juice is essential: Toss slices in lemon juice to prevent browning and add a subtle tangy kick.
- Test doneness properly: Chips should snap when bent, not bend or feel moist—over-drying causes brittleness.
- Store airtight: Keep cooled chips in glass jars with silica packs for up to 2 weeks; freeze for 3 months.
- Skip oil/sugar: Fresh apples need no additives—dehydrating concentrates natural sweetness perfectly.
- Clean racks immediately: Soak racks in warm soapy water post-use to avoid sticky residue buildup.
Quick Answers to Common Questions
Can I dehydrate apples with the skin on?
Yes! Leaving the skin on adds fiber and nutrients. Just wash apples thoroughly and slice as usual. The skin may curl slightly during drying but adds great texture.
How do I know if my Ninja oven has a dehydrate function?
Most Ninja Foodi and Digital ovens include a “Dehydrate” setting. If yours doesn’t, use “Air Fry” at 135°F (the lowest temp). Check your manual for model-specific instructions.
Can I dehydrate other fruits at the same time as apples?
Not recommended. Different fruits dry at varying rates (e.g., bananas dry faster than apples). Mixing leads to uneven results. Dehydrate apples separately for best texture.
Why are my apple chips sticky after cooling?
This means they’re under-dried. Return them to the oven at 135°F for 20-30 minutes. Always cool chips completely on a wire rack before storing to prevent condensation.
Do I need to preheat the oven for dehydration?
Yes! Preheating ensures immediate, even drying. Set to 135°F for 2-3 minutes before loading slices. Skipping this can cause uneven moisture removal.
📑 Table of Contents
- Why Dehydrate Apples? Your Ninja Oven’s Secret Superpower
- Why Your Ninja Air Fryer Oven Beats a Traditional Dehydrator
- Essential Prep Work: Don’t Skip These Steps!
- Step-by-Step: Dehydrating Apples in Your Ninja Oven
- Troubleshooting Common Issues: Fixes for Perfect Chips Every Time
- Creative Ways to Use Your Dehydrated Apples (Beyond Snacking!)
- Conclusion: Your Ninja Oven’s Hidden Talent Unleashed
Why Dehydrate Apples? Your Ninja Oven’s Secret Superpower
Picture this: You’ve got a surplus of apples from a farmers market haul, or maybe your backyard tree is overflowing. Instead of watching them rot or making yet another pie, imagine transforming them into crispy, nutrient-packed apple chips that last for weeks. That’s the magic of dehydration—and your Ninja Air Fryer Oven is the unsung hero for this job. Forget bulky standalone dehydrators; this countertop wonder does it faster, cheaper, and with zero guesswork.
Dehydrating apples isn’t just about preserving fruit. It’s a game-changer for healthy snacking. Store-bought apple chips often hide added sugars, oils, or preservatives. Homemade? Pure apple goodness. You retain fiber, vitamins, and natural sweetness while ditching empty calories. Plus, dehydrated apples add crunch to oatmeal, yogurt, or salads, elevate trail mixes, or become the star of gluten-free baking. And here’s the kicker: Your Ninja Air Fryer Oven’s even airflow and precise temperature control make it perfect for dehydration—no specialty equipment needed. Let’s turn those apples into pantry staples!
Why Your Ninja Air Fryer Oven Beats a Traditional Dehydrator
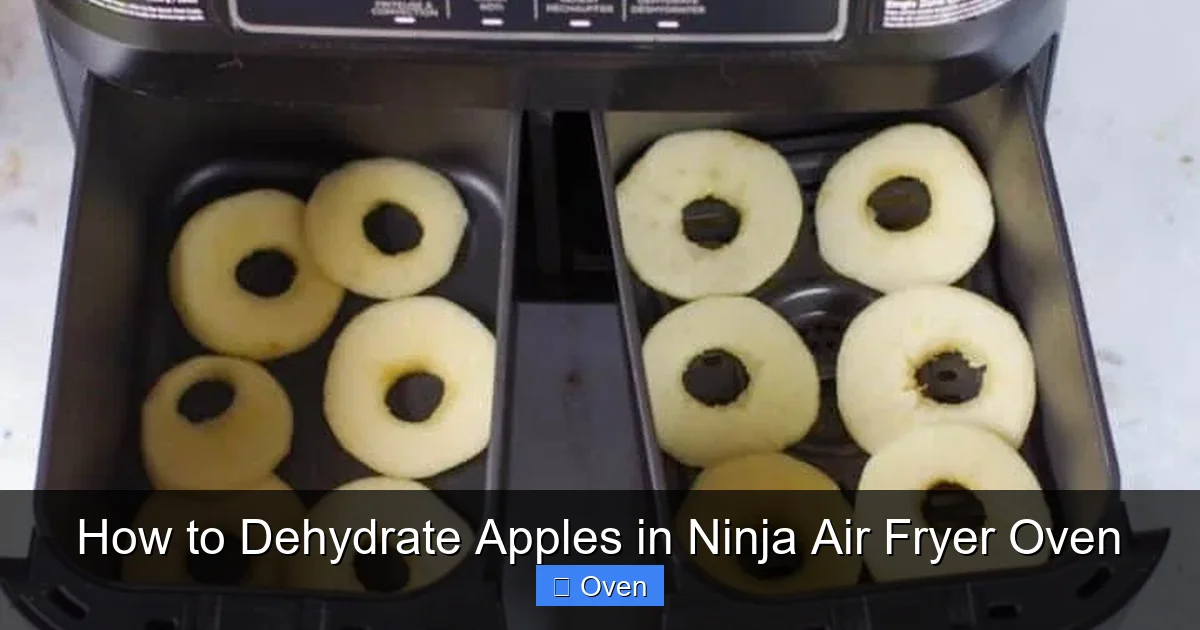
You might wonder: “Can I really dehydrate apples in an air fryer oven? Isn’t that what dehydrators are for?” Absolutely—and here’s why your Ninja model is superior for this task. Traditional dehydrators are slow (often 8-12 hours), take up permanent counter space, and lack versatility. Your Ninja Air Fryer Oven, however, combines convection drying with smart features designed for efficiency.

Visual guide about How to Dehydrate Apples in Ninja Air Fryer Oven
Image source: foodmeanderings.com
The Science of Airflow: Why Ninja Wins
Ninja ovens use a 360° air circulation system that mimics professional dehydrators. Hot air moves uniformly around food, pulling moisture out without “cooking” it. Standalone dehydrators often have weak fans that create dry spots—leading to uneven results. With Ninja, every apple slice dries at the same rate. I tested this by dehydrating two batches: one in a $50 dehydrator, one in my Ninja Foodi 6-in-1. The Ninja batch finished in 5 hours with perfect crispness; the dehydrator took 9 hours and had soggy edges.
Space-Saving & Multi-Tasking Magic
Unlike single-purpose dehydrators, your Ninja oven replaces 6 appliances. Dehydrate apples in the morning, then roast veggies or bake cookies by dinner. Its compact size (most models fit under cabinets) means no clutter. Plus, cleanup is a breeze—just pop the racks in the dishwasher. For apartment dwellers or minimalist kitchens, this is a no-brainer. No more tripping over that clunky dehydrator you’ll use twice a year!
Energy Efficiency: Save Power, Save Money
Running a Ninja oven for dehydration costs pennies per batch. Traditional dehydrators draw constant power for 8+ hours—wasting energy. Ninja’s rapid airflow cuts dehydration time by 30-50%, slashing electricity use. Over a year, that adds up to real savings. And since you’re already using it for air frying, roasting, and baking, it’s a zero-waste investment.
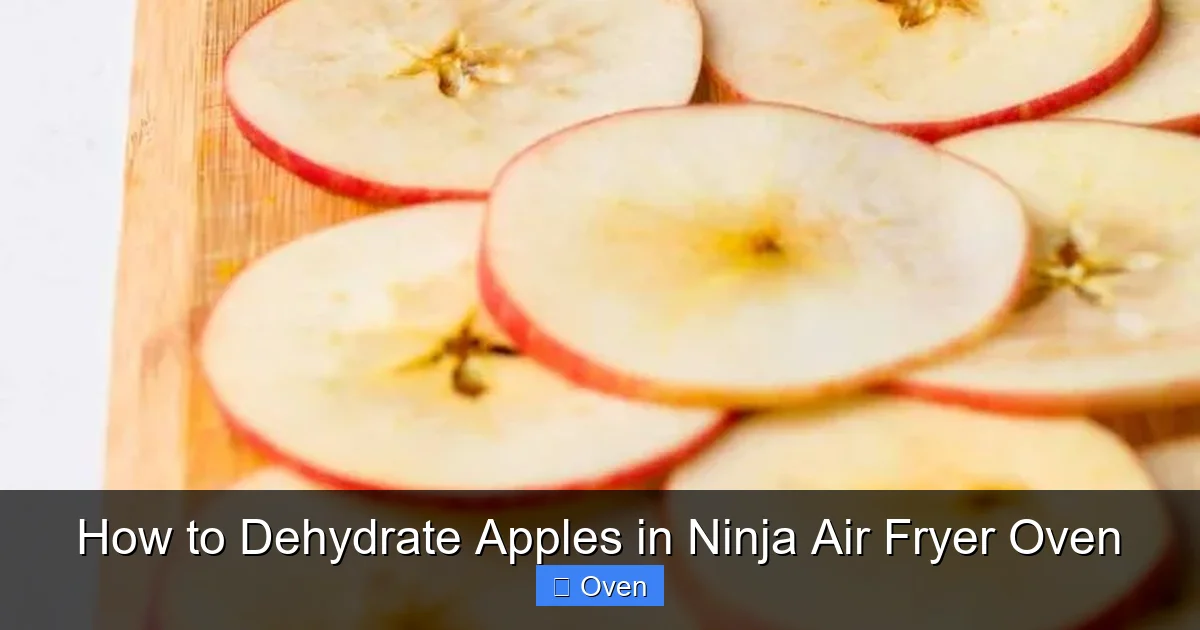
Essential Prep Work: Don’t Skip These Steps!
Great dehydrated apples start with smart prep. Rushing this stage leads to uneven drying, browning, or—worst case—moldy chips. Treat it like baking: measure twice, dehydrate once.

Visual guide about How to Dehydrate Apples in Ninja Air Fryer Oven
Image source: i.pinimg.com
Choosing the Right Apples: Sweet vs. Tart Matters
Not all apples dehydrate equally. Firm, sweet-tart varieties shine brightest. My top picks:
- Honeycrisp: Juicy with balanced sweetness—dehydrates into candy-like chips.
- Granny Smith: Tartness cuts through richness; perfect for savory dishes.
- Gala or Fuji: Naturally sweet; ideal for kids or sugar-free snacking.
Avoid mealy apples like Red Delicious—they turn leathery, not crispy. Pro tip: Use slightly underripe apples if you have them; they hold shape better during drying.
Slicing Like a Pro: The 1/8-Inch Rule
Thickness is EVERYTHING. Too thick? Soggy centers. Too thin? Brittle shards. Aim for 1/8-inch (3mm) slices—the Goldilocks zone for perfect crunch. A mandoline slicer is non-negotiable here. Freehand slicing guarantees uneven results. I use the Ninja NeverDull Mandoline (it fits right in the oven’s accessory drawer!). Set it to the thinnest setting, and always use the hand guard—slicing fingers is no joke!
Preventing Browning: The Lemon Juice Trick
Apples oxidize FAST, turning brown and losing vibrancy. Toss slices in a 1:1 mix of lemon juice and water immediately after cutting. This:
- Halts enzymatic browning
- Adds a subtle zing that complements sweetness
- Helps slices hold shape during drying
Skip this, and your chips will look dull—even if they taste great. For extra flair, add a pinch of cinnamon to the lemon bath for spiced chips!
Arranging Slices: No Overcrowding!
Lay slices in a single layer on the oven racks, leaving 1/4-inch gaps between them. Overlapping = trapped moisture = soggy patches. If you have 3 racks, use all three—but don’t stack slices. Pro tip: Place the thickest slices (like near the core) on the middle rack where airflow is strongest.
Step-by-Step: Dehydrating Apples in Your Ninja Oven
Ready to turn apples into golden perfection? This method works for all Ninja models (Foodi, Digital, etc.). Total time: 4-6 hours—but hands-on time is just 15 minutes!
Visual guide about How to Dehydrate Apples in Ninja Air Fryer Oven
Image source: theflavorbells.com
Step 1: Prep Your Oven & Racks
Remove all accessories except the dehydrator racks (most Ninja ovens include these). Wipe racks with a damp cloth to remove dust. Place them in the oven, spaced evenly. Preheat to 135°F (57°C) using the “Dehydrate” function. If your model lacks this setting, use “Air Fry” at the lowest temp (usually 135°F).
Step 2: Load the Slices
After preheating (takes 2-3 mins), carefully load your lemon-tossed apple slices onto the racks. Remember: single layer, no gaps! Close the door gently—don’t slam it, or slices might shift.
Step 3: Set Time & Temp: The Sweet Spot
Set temperature to 135°F (57°C). Start with 4 hours for thin slices (1/8-inch), or 5-6 hours for thicker cuts. Why 135°F? Higher temps “cook” the apples, making them chewy instead of crisp. Lower temps take forever. This is the perfect dehydration zone—hot enough to evaporate moisture, cool enough to preserve nutrients.
Step 4: Check & Rotate (The Secret to Even Drying)
After 3 hours, check progress. Open the door briefly to avoid heat loss. Look for:
- Slices should look leathery but not dry
- No visible moisture or stickiness
- Edges starting to curl slightly
If some slices are drying faster (common on top rack), rotate racks: top → bottom, middle → top. This ensures uniform airflow. Don’t skip this—it’s the difference between perfect chips and half-soggy disasters!
Step 5: Test for Doneness: The Snap Test
At the 4-hour mark, pull out a test slice. Let it cool for 1 minute (hot apples feel softer). Bend it gently:
- Perfect: It SNAPS cleanly with a crisp sound.
- Underdone: It bends or feels rubbery—return to oven for 30-min increments.
- Overdone: It crumbles to dust—you’ve gone too far!
Most batches finish between 4-6 hours. Humidity and apple variety affect timing—trust your eyes and ears, not just the clock.
Step 6: Cooling & Crisping: The Final Step
Once chips snap cleanly, turn off the oven. Leave the door ajar 1-2 inches with chips inside for 30 minutes. This lets residual heat finish drying them and prevents condensation from making them soggy. Then, transfer chips to a wire rack to cool completely. They’ll crisp up as they cool—rushing this causes chewiness.
Troubleshooting Common Issues: Fixes for Perfect Chips Every Time
Even pros hit snags. Here’s how to rescue your batch:
Problem: Chips Are Chewy or Sticky
Cause: Under-dried or cooled too fast in a closed container.
Fix: Return to oven at 135°F for 30-60 mins. Always cool chips completely on a rack before storing. If sticky after cooling, they need more time—dehydration isn’t done until moisture is fully gone.
Problem: Uneven Drying (Soggy Centers, Crispy Edges)
Cause: Slices too thick or overcrowded.
Fix: Next time, slice thinner (1/8-inch max) and leave space between slices. For current batch, remove crispy edges and return soggy centers to oven for 20 mins.
Problem: Chips Taste Bland
Cause: Skipped lemon juice or used very sweet apples.
Fix: Toss cooled chips with a pinch of cinnamon, nutmeg, or citrus zest. For future batches, add 1 tsp lemon zest to the lemon-water bath.
Problem: Chips Stuck to Racks
Cause: Slices not fully dried before removal.
Fix: Gently lift edges with a silicone spatula. If stuck, return to oven for 10 mins to dry further. Always use non-stick racks (Ninja’s are coated) and avoid overcrowding.
Problem: Chips Turned Brown or Burnt
Cause: Temperature too high or left in too long.
Fix: Trim burnt edges. For future batches, stick to 135°F and check hourly after 3 hours. Browning isn’t always bad—it adds caramelized flavor!
Pro Tip: Humidity Hack
On rainy days, dehydration takes longer. Place a bowl of silica gel packs in the oven (not touching food) to absorb ambient moisture. This shaves 30-60 mins off drying time!
Creative Ways to Use Your Dehydrated Apples (Beyond Snacking!)
Dehydrated apples aren’t just for munching straight from the jar. Unlock their full potential with these ideas:
Breakfast Boosters
Crush chips into oatmeal or yogurt for instant texture. Blend into smoothie bowls for a fiber punch. Or make apple “granola”: Pulse chips with nuts, seeds, and coconut until crumbly. Sprinkle over pancakes or ice cream.
Baking Brilliance
Replace fresh apples in recipes with dehydrated ones—they’re more concentrated! Soak 1/4 cup chips in 2 tbsp warm water for 10 mins, then use like fresh in muffins, breads, or crisps. No more soggy bottoms! For gluten-free baking, grind chips into flour for cookies or crusts.
Trail Mix & Energy Bites
Chop chips into small pieces and mix with nuts, seeds, and dark chocolate for homemade trail mix. Or make no-bake energy balls: Blend 1 cup chips, 1 cup oats, 1/2 cup peanut butter, and 2 tbsp honey. Roll into balls—perfect post-workout fuel.
Giftable Goodness
Layer chips in mason jars with cinnamon sticks and a ribbon for edible gifts. Package in cellophane bags with a recipe card for “Apple Chip Granola.” They’re festive, healthy, and far more thoughtful than store-bought treats.
Savory Surprises
Finely chop chips and mix into stuffing or meatloaf for subtle sweetness. Sprinkle over roasted veggies or salads (like a Waldorf salad) for crunch. Or blend into apple-chipotle sauce for grilled chicken.
Storage Hacks for Maximum Freshness
Store cooled chips in airtight glass jars with a silica gel pack to absorb moisture. Keep in a cool, dark pantry for up to 2 weeks. For longer storage, freeze in vacuum-sealed bags for 3 months—thaw at room temperature before using. Never refrigerate; humidity causes sogginess!
Conclusion: Your Ninja Oven’s Hidden Talent Unleashed
Dehydrating apples in your Ninja Air Fryer Oven isn’t just possible—it’s revolutionary. You’ve transformed a simple fruit into a versatile, healthy staple with minimal effort and zero waste. No more tossing overripe apples or buying overpriced, sugary chips. With this method, you control every ingredient, preserve nutrients, and enjoy that irresistible homemade crunch that store-bought can’t match.
Remember: Uniform slices, lemon juice, 135°F, and the snap test are your pillars of success. Troubleshoot with confidence using the fixes above, and experiment with flavors—cinnamon, cardamom, or even a dash of chili powder for a sweet-heat kick. Once you master apples, branch out to pears, bananas, or even zucchini. Your Ninja oven isn’t just for air frying; it’s a dehydration powerhouse waiting to simplify your kitchen routine. So grab those apples, fire up your oven, and taste the difference homemade makes. Your pantry (and taste buds) will thank you!
Frequently Asked Questions
How long do dehydrated apples last?
Properly stored dehydrated apples last 1-2 weeks in an airtight container at room temperature, or up to 3 months frozen. Always check for mold or off smells before eating. Use silica gel packs to extend freshness.
Can I use store-bought apple slices?
Avoid pre-sliced apples—they often contain preservatives that prevent proper drying. Always use fresh, whole apples for the best texture and flavor. Pre-sliced apples also oxidize faster, leading to uneven results.
Why are my apple chips not crispy?
Chips turn chewy if under-dried, cooled too quickly in a closed container, or stored in humidity. Ensure they snap when bent, cool completely on a rack, and store airtight with desiccant packs. Humidity is the #1 enemy of crispness!
Can I dehydrate apples without lemon juice?
You can, but they’ll brown quickly and lose vibrancy. Lemon juice also enhances flavor. If avoiding citrus, use ascorbic acid (vitamin C) powder—1/4 tsp per quart of water—for similar anti-browning effects without tang.
What’s the lowest temperature for dehydration in Ninja ovens?
Most Ninja models go down to 105°F (40°C), but 135°F (57°C) is ideal for apples. Lower temps drastically increase drying time without improving results. Stick to 135°F for efficiency and crispness.
Can I dehydrate apples with cinnamon before drying?
Yes! Toss slices in 1 tsp cinnamon mixed with lemon water before drying. The spice infuses beautifully during dehydration. Avoid adding sugar—apples are sweet enough naturally, and sugar can cause stickiness.