Westinghouse ovens with air fry mode let you achieve crispy, restaurant-quality results using superheated circulating air—no extra appliance needed! This guide covers setup, cooking techniques, and maintenance specific to Westinghouse models. You’ll learn time/temp adjustments, basket placement, and how to adapt favorite recipes for perfect air-fried meals every time.
Key Takeaways
- Verify air fry compatibility: Only select Westinghouse convection ovens have a dedicated air fry setting—check your model number and manual first.
- Preheat is non-negotiable: Always preheat the air fry basket for 3-5 minutes to ensure instant crispiness and even cooking.
- Don’t overcrowd the basket: Leave 1-2 inches of space between food items for proper air circulation—cook in batches if needed.
- Shake or flip halfway: Pause cooking at the 50% mark to rearrange food; this prevents uneven results and soggy spots.
- Adjust time/temp from recipes: Reduce conventional oven temps by 25°F and cut cooking time by 20% when adapting recipes for air fry mode.
- Clean immediately after use: Soak the basket in warm soapy water while warm (not hot) for easier cleanup—avoid abrasive scrubbers.
- Use oven mitts religiously: The air fry basket and oven interior get extremely hot; always handle with protection.
Quick Answers to Common Questions
Can I use the air fry setting on any Westinghouse oven?
No, only specific Westinghouse convection oven models (typically WFE, WFG, or WGI series from 2018 onward) have a dedicated “Air Fry” or “Air Roast” setting. Check your model number and manual to confirm compatibility. Standard convection ovens can mimic air frying but lack the optimized settings.
Do I need a special basket for air frying in my Westinghouse oven?
Yes! You must use the perforated air fry basket or rack designed for your specific Westinghouse model. A solid baking sheet blocks airflow, resulting in steamed, soggy food. The basket is essential for proper circulation.
How much time should I save when adapting conventional oven recipes?
As a general rule, reduce the conventional oven temperature by 25°F and cut the cooking time by 20-25%. Always start checking for doneness 5 minutes before the original recipe suggests, as air frying cooks significantly faster.
Why is my air-fried food not crispy?
The most common causes are overcrowding the basket (prevents airflow), skipping the preheat step, not patting food dry before cooking, using too much oil, or setting the temperature too low. Ensure you shake/flip food halfway through cooking.
Can I cook frozen food directly in air fry mode?
Absolutely! Frozen foods like fries, nuggets, and mozzarella sticks work exceptionally well in air fry mode. No thawing needed—just follow time/temp guidelines (usually 375°F-400°F for 8-15 mins) and shake halfway.
📑 Table of Contents
- Why Your Westinghouse Oven Might Be Your Secret Air Fryer Weapon
- Understanding Your Westinghouse Oven’s Air Fry Function
- Step-by-Step: Using the Air Fry Function in Your Westinghouse Oven
- Mastering Air Fry Cooking Times & Temperatures
- Essential Tips & Tricks for Air Fry Success
- Cleaning & Maintaining Your Air Fry Basket
- Troubleshooting Common Air Fry Problems
- Conclusion: Unlock Crispy, Healthy Meals with Your Westinghouse Oven
Why Your Westinghouse Oven Might Be Your Secret Air Fryer Weapon
Let’s clear up a common confusion right away: Westinghouse ovens don’t have “built-in air fryers” like standalone countertop units. Instead, many newer Westinghouse convection oven models (typically ranges or wall ovens from 2018 onward) include a dedicated air fry setting that harnesses the power of their convection fan system. This setting cranks up the fan speed and optimizes heating elements to mimic the intense, rapid-air circulation of a dedicated air fryer. The result? You get that coveted crispy exterior and juicy interior on foods like french fries, chicken wings, or roasted veggies—using just your existing oven. No extra counter space needed, no additional appliance to clean. If your Westinghouse oven has a convection fan and a button or setting labeled “Air Fry,” “Air Roast,” or something similar, you’re in luck!
So why is this such a game-changer? Traditional oven roasting can leave food dry or unevenly cooked. Deep frying is messy and high in fat. The air fry function bridges that gap perfectly. It uses up to 75% less oil than deep frying while delivering similar crispiness. It’s faster than conventional baking because the superheated air transfers heat more efficiently. And best of all, it’s incredibly versatile—you can cook everything from frozen appetizers to homemade desserts. This guide is your roadmap to mastering this feature. We’ll walk through exactly how to use the air fry function in your specific Westinghouse oven, avoiding common pitfalls and unlocking its full potential. Forget complicated gadgets; your oven might already be your ultimate air frying solution.
Understanding Your Westinghouse Oven’s Air Fry Function
Before you start cooking, it’s crucial to understand how the air fry setting works in your Westinghouse oven—and whether your specific model even has it. Not all Westinghouse ovens include this feature, so let’s get you sorted.
Visual guide about How to Use Air Fryer in Westinghouse Oven
Image source: media.prod.bunnings.com.au
Is Your Westinghouse Oven Air Fry Capable?
First, locate your oven’s model number. You’ll usually find it on a sticker inside the oven door frame, on the back of the unit, or in the user manual. Common Westinghouse series with air fry functionality include:
- Westinghouse WFE series (e.g., WFE500M, WFE520M)
- Westinghouse WFG series (e.g., WFG500M, WFG520M)
- Westinghouse WGI series (e.g., WGI500M, WGI520M)
- Select Westinghouse convection wall ovens (check for “Air Fry” or “Air Roast” setting)
If you’re unsure, consult your owner’s manual (often downloadable from the Westinghouse website) or look for these physical indicators:
- A dedicated button or control knob position labeled “Air Fry,” “Air Roast,” or “Convection Air Fry”
- A convection fan symbol (usually a fan icon) that illuminates when the setting is active
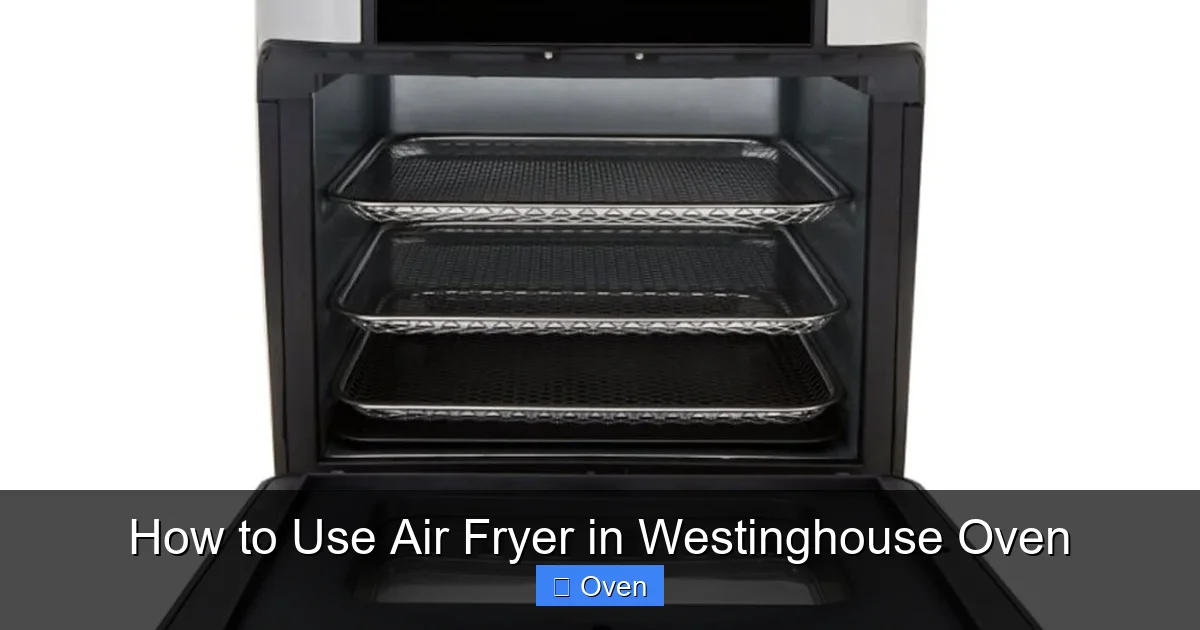
- An included perforated air fry basket or rack (essential for proper airflow)
Important: If your oven only has a standard convection setting (no specific “Air Fry” mode), you can still achieve air-fry-like results by using convection at higher temperatures and following the tips in this guide. However, the dedicated air fry setting is optimized for best performance.
How the Air Fry Setting Actually Works (The Science Simplified)
Think of your oven’s convection fan as the heart of the air fry function. In standard convection mode, the fan circulates hot air to cook food more evenly and slightly faster than conventional baking. The air fry setting takes this a step further:
- Increased Fan Speed: The fan spins significantly faster, creating a powerful vortex of superheated air.
- Optimized Heating Elements: The top and bottom heating elements work in precise coordination with the fan to maintain very high, consistent surface temperatures on the food.
- Rapid Moisture Evaporation: This intense airflow rapidly removes surface moisture from food, which is the key to achieving that crispy, fried-like texture without submerging in oil.
The magic happens because the fast-moving hot air transfers heat to the food’s surface incredibly efficiently. This triggers the Maillard reaction (that beautiful browning and flavor development) much faster than a standard oven. Crucially, the perforated air fry basket or rack is non-negotiable—it allows this hot air to circulate all around the food, not just from the top and bottom like a regular baking sheet. Without proper airflow, you’ll end up with steamed or soggy results, not crispy perfection.
Step-by-Step: Using the Air Fry Function in Your Westinghouse Oven
Ready to get cooking? Follow these precise steps to ensure success every time you use the air fry setting. Precision matters with this high-heat method!
Visual guide about How to Use Air Fryer in Westinghouse Oven
Image source: images.kitchenwaredirect.com.au
Step 1: Gather Your Tools & Prep the Basket
Before turning on the oven, make sure you have:
- The correct perforated air fry basket or rack that came with your Westinghouse oven (using a solid pan blocks airflow!).
- High-heat cooking oil spray (avocado, canola, or grapeseed oil work best) or a light brushing of oil.
- Oven mitts (seriously, don’t skip these—the basket gets dangerously hot).
- Your prepared food (pat dry with paper towels for maximum crispiness).
Prep the basket: Lightly spray or brush the perforated basket with oil. This prevents sticking and aids browning. Place your food in a single layer, ensuring pieces aren’t touching or overlapping. Overcrowding is the #1 reason for failed air frying—it traps steam and prevents air circulation. If you’re cooking a large batch, cook in multiple rounds. For example, if making 2 lbs of french fries, cook 1 lb at a time for perfect crispness.
Step 2: Preheat Like a Pro (This is Critical!)
Never skip preheating the air fry basket. This is arguably the most important step for achieving crispy results. Here’s how:
- Place the empty, oiled air fry basket on the center rack of your cold oven.
- Select the “Air Fry” setting on your control panel.
- Set the temperature (usually 375°F – 400°F is a good starting point—more on temps later).
- Set the timer for 3-5 minutes for preheating.
- Press start. The oven will heat up, and the convection fan will begin circulating air.
Why preheat the basket? A cold basket lowers the immediate surface temperature when food hits it, leading to steaming instead of searing. Preheating ensures the food starts crisping instantly, locking in juices and creating that golden crust. You’ll hear the fan ramp up—that’s your cue it’s working!
Step 3: Load, Set, and Start Cooking
Once the preheat timer dings:
- Carefully open the oven door (watch for hot air escaping!).
- Using oven mitts, pull out the preheated basket.
- Quickly add your prepared food in a single layer.
- Slide the basket back into the oven, ensuring it’s centered on the rack.
- Close the oven door firmly.
- Set your cooking time and temperature (see guidelines below).
- Press start.
Pro Tip: Keep the oven light on so you can monitor progress without opening the door frequently. Opening the door causes significant heat loss and slows cooking.
Step 4: The Halfway Shake (Non-Negotiable!)
About halfway through the estimated cooking time, you must pause and shake or flip your food. Set a timer for half your total cook time (e.g., if cooking for 20 minutes, pause at 10 minutes). Here’s why:
- Prevents Uneven Cooking: Food at the edges cooks faster than food in the center. Shaking redistributes pieces.
- Ensures All Sides Crisp: Flipping items like chicken wings or fish fillets guarantees even browning.
- Releases Steam: Gently shaking the basket releases trapped steam that can cause sogginess.
To do it safely: Open the oven door, pull out the basket with mitts, give it a firm shake (or use tongs to flip items), and slide it back in. Close the door promptly. Don’t skip this step—it’s the difference between perfect and mediocre results!
Step 5: Checking for Doneness & Finishing
Air frying cooks faster than conventional methods, so start checking for doneness a few minutes before the recipe suggests. Look for:
- Visual Cues: Deep golden brown color, crispy edges, visible shrinkage (for meats).
- Texture Test: Use tongs to gently press food—it should feel firm, not soft or yielding.
- Internal Temp (for meats): Use an instant-read thermometer (chicken: 165°F, pork: 145°F, burgers: 160°F).
If food isn’t done, add 2-3 minutes and check again. Avoid overcooking—it’s easy to go from perfect to dry in air fry mode! Once done, carefully remove the basket (it’s extremely hot!), transfer food to a plate, and let it rest for 2-3 minutes. This allows juices to redistribute. Enjoy immediately for peak crispiness!
Mastering Air Fry Cooking Times & Temperatures
One of the biggest challenges when starting with air fry mode is adjusting conventional oven recipes. The intense heat and airflow mean cooking times are significantly shorter, and temperatures often need tweaking. Here’s your cheat sheet:
Visual guide about How to Use Air Fryer in Westinghouse Oven
Image source: i.ytimg.com
General Time & Temp Guidelines
Use these as starting points, but always check food early—ovens vary, and food thickness matters:
- Frozen Appetizers (Fries, Mozzarella Sticks, Nuggets): 375°F – 400°F for 8-15 minutes. Shake halfway. Tip: No need to thaw—frozen works great!
- Chicken Wings/Thighs: 400°F for 20-28 minutes (depending on size). Flip halfway. Tip: Pat skin dry and toss with 1 tsp baking powder for extra crispness.
- Fish Fillets (Salmon, Cod): 380°F for 10-14 minutes. Flip halfway. Tip: Lightly coat with oil and seasoning; avoid breading that can blow off.
- Roasted Vegetables (Broccoli, Brussels Sprouts, Potatoes): 390°F for 12-20 minutes. Shake halfway. Tip: Cut into even sizes; toss with oil, salt, and pepper.
- Reheating Pizza: 350°F for 3-5 minutes. Tip: Place directly on rack (no basket) to revive the crust.
- Small Cakes/Muffins: 325°F – 350°F for 10-15 minutes. Tip: Reduce sugar slightly to prevent burning.
The Golden Rule for Adapting Recipes: Reduce conventional oven temperature by 25°F and cut cooking time by 20-25%. For example, a recipe calling for 400°F for 25 minutes in a conventional oven would start at 375°F for 18-20 minutes in air fry mode. Always check 5 minutes early!
Why Temperature Matters So Much
Air fry mode operates at high heat to achieve rapid crisping. Using the wrong temperature leads to common failures:
- Too High (425°F+): Food burns on the outside before cooking through inside. Common with delicate items like fish or thin-cut veggies.
- Too Low (Below 350°F): Food steams instead of crisps, resulting in soggy textures. Takes much longer to cook.
Most Westinghouse air fry settings default to 375°F – 400°F, which is ideal for the majority of foods. Save higher temps (400°F+) for very dense items like thick chicken thighs or potatoes. Lower temps (350°F – 375°F) are better for fish, reheating, or delicate baked goods. Always refer to your specific model’s manual for recommended ranges.
Food Size & Thickness: The Hidden Variable
Even with perfect time/temp, inconsistent food size ruins results. Air fryers (and air fry mode) need uniform pieces for even cooking:
- Cut Evenly: Slice vegetables or meat into similar-sized pieces (e.g., all broccoli florets the same size).
- Pat Dry: Moisture is the enemy of crispiness. Dry chicken skin, fish fillets, or veggies thoroughly with paper towels before oiling.
- Don’t Overcrowd: As emphasized before, leave space! If pieces touch, they steam each other. Cook in batches for large quantities.
- Adjust for Thickness: Thicker cuts (like pork chops) need slightly longer than thin cuts (like chicken tenders). Start checking early for thin items.
Remember: Air fry mode is less forgiving than conventional baking when it comes to food size variation. Taking 2 extra minutes to prep uniformly pays off in perfect texture.
Essential Tips & Tricks for Air Fry Success
Mastering the basics gets you good results, but these pro tips will elevate your air fry game from “pretty good” to “restaurant-quality” every single time.
Basket Placement: Rack Position is Key
Where you place the air fry basket in your oven makes a big difference:
- Center Rack: This is the optimal position for most air frying. It ensures balanced heat distribution from top and bottom elements and allows the convection fan to circulate air evenly around the basket.
- Avoid the Top Rack: Too close to the top heating element can cause excessive browning or burning on the top surface before the bottom cooks through.
- Avoid the Bottom Rack: Can lead to undercooked tops and potential smoke if drippings hit the bottom element.
Unless your specific Westinghouse manual states otherwise (some models might have unique configurations), stick with the center rack. If you notice consistent unevenness (e.g., top always browns faster), try moving the rack up or down one position as a test.
Oil: Less is More (But Don’t Skip It!)
Air frying is healthier than deep frying, but a tiny amount of oil is essential for crispiness and preventing sticking:
- Use a Spray Bottle: This gives the most even, light coating. Fill with your chosen high-smoke-point oil (avocado, canola, grapeseed).
- Light Brushing: If no spray bottle, use a pastry brush to apply a very thin layer to food and the basket.
- Avoid Dripping: Too much oil pools in the basket, causing smoking and greasy food. Aim for a light mist or brush stroke.
- Dry Rubs Work Too: For items like chicken wings, a dry rub (salt, pepper, garlic powder, paprika) combined with a tiny bit of oil spray yields fantastic results.
Never use aerosol cooking sprays (like Pam) in air fry mode—they contain propellants that can damage the oven’s interior and leave a sticky residue. Stick to oils you can spray yourself or brush on.
Preventing Smoke & Odors
Air frying can sometimes produce smoke, especially with fatty foods or excess oil. Here’s how to minimize it:
- Trim Excess Fat: Before cooking, trim visible fat from meats like chicken thighs or pork chops.
- Use the Drip Pan (If Included): Some Westinghouse air fry baskets come with a drip pan underneath. Always use it to catch drips!
- Clean the Basket Immediately: Burnt-on grease from previous uses is a major smoke culprit. Clean thoroughly after each use (see maintenance section).
- Avoid Sugary Marinades: Sugar caramelizes quickly and can burn. Apply sugary glazes after the main cooking time, during the last 2-3 minutes.
- Ensure Proper Ventilation: Turn on your kitchen exhaust fan to vent smoke.
If smoke does occur, carefully remove the basket (with mitts!), let the oven cool slightly, and wipe out any drips before continuing.
Adapting Your Favorite Recipes
Love grandma’s roasted chicken or your go-to cookie recipe? You can likely adapt it for air fry mode:
- Meats: Reduce temp by 25°F, cut time by 20-25%. Pat skin dry, oil lightly. Use a meat thermometer.
- Vegetables: Toss with minimal oil, salt, pepper. Cut uniformly. Reduce time significantly (e.g., roasted potatoes: 25 mins conventional → 15-18 mins air fry).
- Baked Goods: Reduce sugar by 1-2 tbsp per cup to prevent burning. Lower temp by 25°F. Use smaller pans/muffin tins. Check early—they cook fast!
- Reheating: Pizza, fries, nuggets—350°F for 3-5 mins revives crispness better than a microwave.
Start Small: When adapting a new recipe, cook a single portion first to test time/temp before committing a full batch.
Cleaning & Maintaining Your Air Fry Basket
Keeping your air fry basket clean isn’t just about hygiene—it’s crucial for performance. Burnt-on grease affects airflow and can cause smoke. Here’s how to keep it in top shape:
Immediate Post-Cooking Cleanup (The Easiest Method)
The secret to easy cleaning? Don’t let grease harden. While the basket is still warm (but not scalding hot—use mitts!):
- Carefully remove the basket from the oven.
- Place it in your sink.
- Pour in enough hot water to cover the bottom 1/3 of the basket.
- Add a few drops of dish soap.
- Let it soak for 10-15 minutes. The warm water loosens grease.
- Use a soft sponge or non-abrasive scrub brush to wipe away residue. Avoid steel wool—it scratches the coating.
- Rinse thoroughly and dry completely with a towel before storing.
This method prevents baked-on grease from becoming a nightmare later. If you wait until the basket is cold, cleaning requires much more effort.
Tackling Stubborn Grease & Burnt Spots
For baked-on messes, try these safe methods:
- Baking Soda Paste: Make a paste with baking soda and water. Apply to greasy areas, let sit for 15-30 mins, then scrub gently with a soft brush.
- Vinegar Soak: Fill the basket with equal parts white vinegar and hot water. Soak for 1-2 hours, then scrub.
- Dishwasher (If Manual Allows): Some Westinghouse baskets are dishwasher-safe (top rack only). Check your manual first—harsh detergents can damage non-stick coatings over time.
Avoid: Oven cleaners, bleach, or abrasive cleaners—they destroy non-stick surfaces. Never use metal utensils inside the basket—they scratch.
Long-Term Care for Longevity
To keep your air fry basket performing like new:
- Dry Thoroughly: Always dry the basket completely before storing to prevent rust (if metal) or mold.
- Store Carefully: Place it where it won’t get knocked around or stacked under heavy items. A dedicated cabinet shelf is ideal.
- Inspect Regularly: Check for chips in the non-stick coating. If damaged, replace the basket—cooking with exposed metal can be unsafe.
- Clean the Oven Cavity: Wipe down the oven interior occasionally with a damp cloth to remove any splatters that could smoke during future use.
Proper care ensures your air fry basket lasts for years and continues delivering perfect results.
Troubleshooting Common Air Fry Problems
Even with the best techniques, things can go sideways. Here’s how to fix the most frequent air fry hiccups:
Problem: Food is Soggy or Steamed, Not Crispy
Likely Causes & Fixes:
- Overcrowded Basket: Food is touching/overlapping. Solution: Cook in smaller batches, leave space.
- Skipped Preheating: Basket wasn’t hot when food went in. Solution: Always preheat 3-5 mins.
- Food Too Wet: Didn’t pat dry before cooking. Solution: Dry chicken skin, fish, veggies thoroughly.
- Too Much Oil: Pooling oil steams food. Solution: Use a light spray or brush—less is more.
- Wrong Temperature: Set too low. Solution: Increase temp by 25°F next time.
Problem: Food is Burnt on Outside, Raw Inside
Likely Causes & Fixes:
- Temperature Too High: Especially common with thin cuts. Solution: Reduce temp by 25°F.
- Didn’t Shake/Flip: Uneven cooking. Solution: Always pause at 50% mark to rearrange.
- Food Too Thick: Large cuts need lower/longer cooking. Solution: Butterfly chicken breasts or cut meat into smaller pieces.
- Oven Runs Hot: Some ovens have hot spots. Solution: Rotate basket 180 degrees during cooking.
Problem: Smoke Coming from Oven
Likely Causes & Fixes:
- Excess Grease: Fat dripping onto heating elements. Solution: Trim fat, use drip pan, clean basket thoroughly.
- Burnt-On Residue: From previous cooking. Solution: Clean basket immediately after use.
- Sugary Marinades: Burning sugar. Solution: Apply sugary glazes only in the last few minutes.
- Wrong Oil: Low smoke-point oil (like olive oil) burning. Solution: Use avocado, canola, or grapeseed oil.
If smoke is heavy, turn off the oven, carefully remove the basket, and let it cool before cleaning.
Problem: Uneven Browning
Likely Causes & Fixes:
- Didn’t Shake/Flip: Biggest culprit! Solution: Pause at 50% mark.
- Food Size Inconsistent: Pieces vary greatly. Solution: Cut food uniformly.
- Oven Hot Spots: Common in all ovens. Solution: Rotate basket 180 degrees during cooking.
- Basket Not Centered: Solution: Always use the center rack position.
Problem: Food Sticking to Basket
Likely Causes & Fixes:
- Insufficient Oil: Basket or food not lightly oiled. Solution: Always use a light spray/brush.
- Didn’t Preheat Basket: Food sticks to cold surfaces. Solution: Preheat basket 3-5 mins.
- Non-Stick Coating Damaged: Scratches expose metal. Solution: Replace basket if coating is chipped.
- Pulled Food Too Early: Needs time to release. Solution: Let food cook until nicely browned before trying to flip.
Conclusion: Unlock Crispy, Healthy Meals with Your Westinghouse Oven
Using the air fry function in your Westinghouse oven isn’t just a convenient trick—it’s a transformative way to cook. You’ve learned that this isn’t magic; it’s smart engineering harnessing rapid, superheated air circulation to deliver that irresistible crispy texture we crave, using minimal oil and significantly less time than traditional methods. From verifying your model’s compatibility and mastering the critical preheat step, to understanding the non-negotiable need for basket space and the halfway shake, you now have the blueprint for consistent success. Adapting recipes becomes second nature with the simple 25°F reduction and 20% time cut rule, and troubleshooting common issues like sogginess or uneven cooking is no longer a mystery.
The real beauty lies in the versatility. Your Westinghouse oven transforms from a simple baking tool into a powerhouse for everything from quick weeknight chicken wings and perfectly roasted vegetables to reheating pizza with a revived crust and even baking small desserts. It saves counter space, simplifies cleanup (especially with that immediate post-cook soak method), and puts healthier, restaurant-quality results within easy reach. Remember, the key is respecting the process: preheat diligently, don’t overcrowd, shake religiously, and clean promptly. Embrace the experimentation—try that new spice rub, test a recipe adaptation, or master the art of the crispy potato. Your Westinghouse oven’s air fry function is more than a setting; it’s your passport to a world of faster, healthier, and incredibly delicious meals. Now go fire it up (safely, with those mitts!) and taste the difference circulating air can make. Your crispiest, most satisfying dishes are just a preheat away.
Frequently Asked Questions
Is the air fry setting the same as convection baking?
No, while both use a convection fan, the air fry setting operates at higher fan speeds and often optimizes heating element timing specifically for rapid surface crisping. Convection baking is better for even, gentle cooking like cakes or casseroles, while air fry excels at replicating fried textures.
Can I use aluminum foil or parchment paper in the air fry basket?
You can use small pieces of parchment paper cut to fit the basket bottom (with holes for airflow), but avoid aluminum foil as it can block circulation and cause uneven cooking. Never cover the entire basket—airflow is essential.
Why does my oven smoke when using air fry mode?
Smoke usually comes from excess grease dripping onto heating elements, burnt-on residue from previous use, or sugary marinades burning. Trim fat from meats, clean the basket immediately after use, and apply sugary glazes only in the last few minutes of cooking.
How do I know when the air fry basket is preheated?
Set a 3-5 minute timer when starting the air fry setting with the empty basket inside. The oven will heat up, and the convection fan will run at high speed. There’s no visual indicator—rely on the timer for this critical step.
Can I cook a whole chicken in air fry mode?
It’s possible but challenging due to size and uneven cooking. Air fry mode works best for smaller cuts like breasts, thighs, or wings. For a whole chicken, conventional convection roasting is more reliable for even cooking throughout.
What’s the best oil to use for air frying?
Use high-smoke-point oils like avocado, canola, or grapeseed oil. Avoid olive oil (low smoke point) or aerosol sprays (can damage the oven). Apply a light mist or brush—never pour oil directly into the basket.