Unlock restaurant-quality rotisserie cooking at home with your Power Air Fryer Oven! This guide covers essential setup, safety tips, and foolproof techniques for perfectly juicy chicken, pork, and veggies. Discover how to use the rotisserie function effortlessly for crispy skin and even cooking.
Key Takeaways
- Safety First: Always ensure the rotisserie spit is securely locked and the oven door is closed during operation to prevent accidents.
- Proper Trussing is Key: Securely tie meat with kitchen twine before skewering to ensure even rotation and prevent falling.
- Preheat Matters: Always preheat your Power Air Fryer Oven Rotisserie for 5-10 minutes before adding food for consistent results.
- Don’t Overcrowd: Rotisserie only one large item (like a whole chicken) or a few smaller items (like chicken legs) at a time for proper airflow.
- Use a Drip Pan: Place the included drip pan under the rotisserie to catch grease, making cleanup easier and preventing smoke.
- Check Internal Temp: Always use a meat thermometer to verify doneness; visual cues alone aren’t reliable with rotisserie.
- Cool Before Cleaning: Allow the rotisserie spit and motor assembly to cool completely before attempting to remove or clean them.
Quick Answers to Common Questions
Can I rotisserie a frozen chicken?
It’s strongly discouraged. Rotisserie cooking requires even heat penetration, which is nearly impossible with a frozen bird. The outside will overcook or burn long before the inside is safe to eat. Always thaw chicken completely in the refrigerator before rotissing.
Why is my rotisserie chicken not crispy?
The most common reasons are: 1) Not patting the skin *extremely* dry before seasoning, 2) Not preheating the oven properly, 3) Cooking at too low a temperature, or 4) Opening the oven door too frequently during cooking. Ensure dry skin, preheat well, use 375°F+ for chicken, and resist peeking!
Can I use the rotisserie function without the drip pan?
No, never. The drip pan is essential for catching rendered fat and juices. Without it, grease will drip directly onto the oven floor or heating elements, causing smoke, potential fire hazards, and a major mess. Always use the drip pan.
How do I know if the rotisserie motor is working?
When you select the Rotisserie function and close the door, you should hear a distinct humming sound from the motor (located on the outside of the oven). You can also carefully place your hand near the motor slot (without touching) to feel the vibration. If there’s no sound or movement, check power, door closure, and spit rod insertion.
Can I rotisserie multiple chickens at once?
Generally, no. The Power Air Fryer Oven Rotisserie is designed for one large item (like a whole chicken) or a few smaller items (like chicken legs). Trying to rotisserie two whole chickens will overcrowd the cavity, block airflow, cause uneven cooking, and potentially overload the motor. Stick to the recommended capacity.
📑 Table of Contents
- Unlock Gourmet Rotisserie Magic: Your Power Air Fryer Oven Guide
- Getting Started: Unboxing, Setup & Safety Essentials
- Preparing Your Food for Perfect Rotisserie Results
- Mastering the Rotisserie Cooking Process
- Cleaning & Maintenance: Keeping Your Rotisserie Ready
- Beyond the Basics: Creative Rotisserie Ideas
- Conclusion: Your Rotisserie Journey Begins Now
Unlock Gourmet Rotisserie Magic: Your Power Air Fryer Oven Guide
So, you’ve got your shiny new Power Air Fryer Oven, and you’re eyeing that sleek rotisserie attachment with a mix of excitement and maybe a little trepidation. You’ve heard the buzz: “Rotisserie chicken that’s juicy inside and crispy outside, just like your favorite restaurant!” But how do you actually *use* it without ending up with a lopsided, undercooked bird or a kitchen smelling like burnt grease? Don’t worry! This isn’t some complicated professional technique reserved for chefs. Using the rotisserie function on your Power Air Fryer Oven is surprisingly straightforward, incredibly rewarding, and can transform your weeknight dinners and weekend feasts. Forget dry, overcooked meat – the magic of constant, gentle rotation combined with the oven’s powerful convection heat delivers results that are simply impossible with standard roasting.
The beauty of the Power Air Fryer Oven Rotisserie lies in its simplicity and effectiveness. Unlike traditional rotisserie grills that require open flames, this countertop wonder uses the oven’s precise heating elements and fan to circulate hot air *around* your food as it slowly turns. This constant movement ensures every inch of your chicken, pork loin, or even a rack of lamb gets equal exposure to the heat. The result? Unbeatable moisture retention – the meat bastes itself in its own natural juices as it rotates. Simultaneously, the intense, dry heat crisps the exterior to golden-brown perfection. It’s the secret weapon for achieving that coveted “fall-off-the-bone” tenderness with a shatteringly crisp skin, all without constant basting or worrying about hot spots. Ready to ditch the dry rotisserie chickens from the store? Let’s get your Power Air Fryer Oven Rotisserie working its magic.
Getting Started: Unboxing, Setup & Safety Essentials
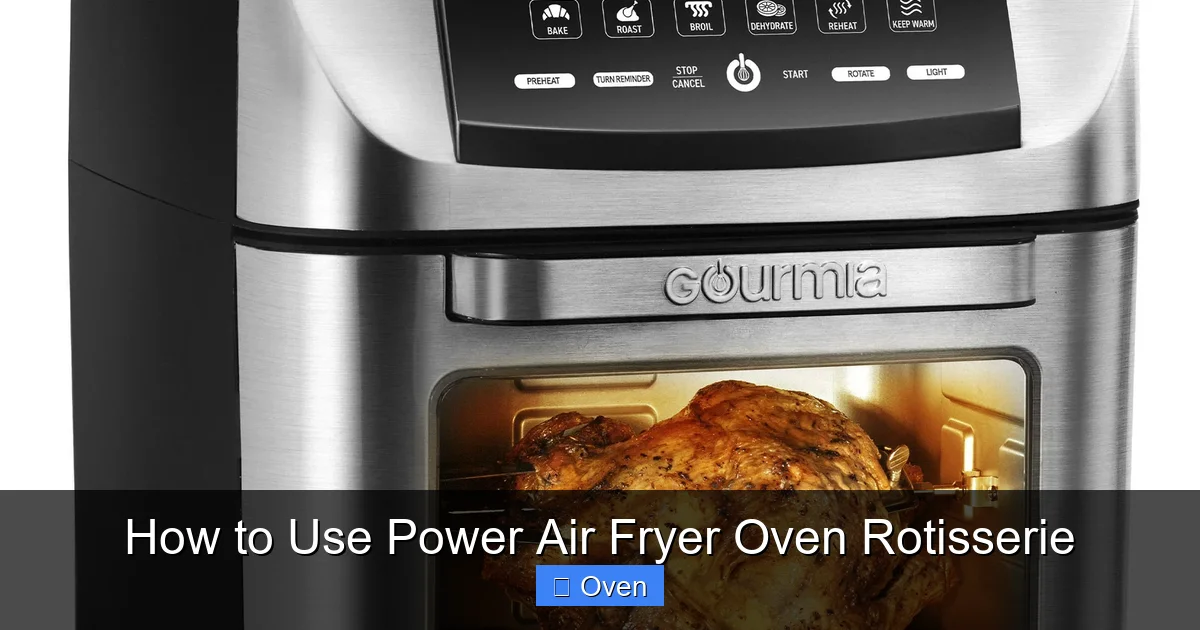
Before you even think about skewering that chicken, let’s make sure you’re set up for success and safety. Rushing this step is the fastest way to frustration or, worse, an accident. Your Power Air Fryer Oven Rotisserie kit typically includes the motor assembly (the part that sits on the *outside* of the oven, usually on the left side), the spit rod (the long metal skewer), two forks or prongs (to hold the food securely), and a drip pan. Some models might also include a handle for the spit rod.
Step 1: Familiarize Yourself with the Parts
Take everything out and lay it on your counter. Identify the motor housing – this is the boxy unit with a slot or hole where the spit rod inserts. Locate the spit rod itself; it’s a long, straight metal bar, often with a pointed end. Find the two pronged forks; these slide onto the spit rod and grip your food. Finally, spot the drip pan – this is crucial! It catches all the rendered fat and juices, preventing messy spills inside your oven and reducing smoke. Understanding these components is your first victory.
Visual guide about How to Use Power Air Fryer Oven Rotisserie
Image source: airfryer.net
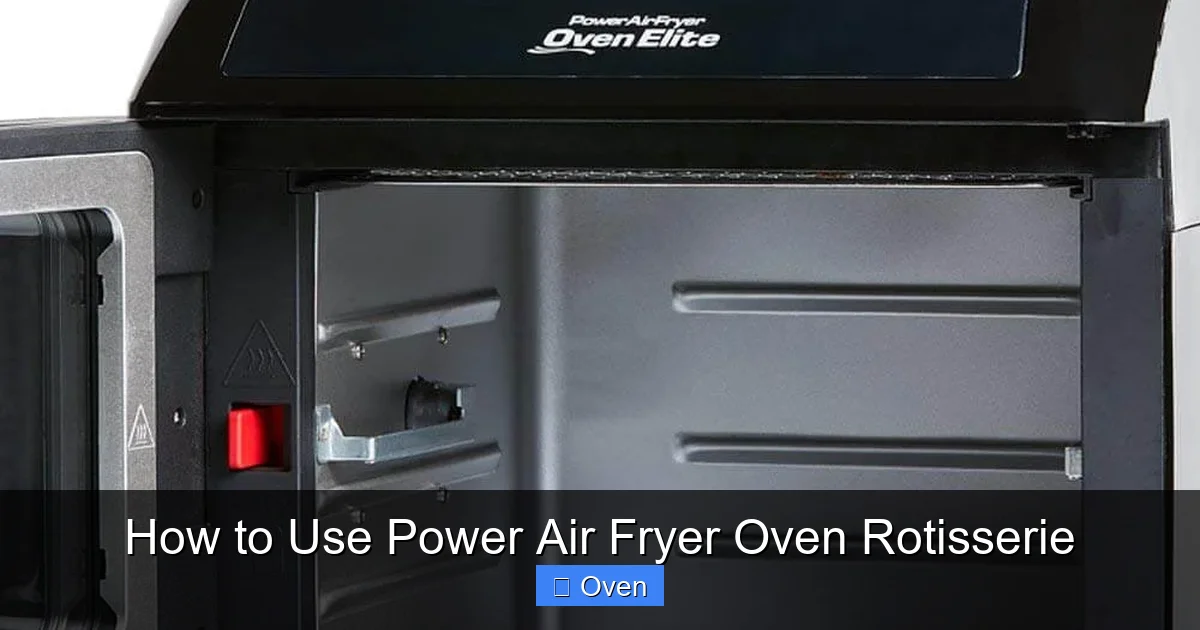
Step 2: Installing the Motor Assembly (Crucial!)
This is where many users stumble. The motor assembly **does not** go *inside* the oven cavity. It attaches securely to the **outside** of the oven, specifically designed to fit into a slot or bracket on the left side (check your manual for exact location – it’s usually near the top). Slide or clip the motor housing into this external slot until it clicks or feels firmly seated. **Never force it.** If it doesn’t fit easily, double-check the orientation. The slot on the motor where the spit rod inserts should align perfectly with the hole in the oven’s left wall. This external placement keeps the motor cool and safe.
Step 3: Safety Checks Before Every Use
Safety isn’t optional; it’s mandatory. Before plugging in the oven or turning on the rotisserie:
- Ensure the motor is securely attached to the outside of the oven.
- Verify the oven door closes completely and latches securely with the rotisserie spit rod inserted. The door *must* seal properly.
- Check that the spit rod is fully inserted into the motor slot on the outside and protrudes correctly into the oven cavity.
- Confirm the drip pan is placed directly below the rotisserie spit inside the oven cavity, on the lowest rack position or the oven floor (as per your manual).
- Clear the area around the oven – keep flammable items (towels, paper, curtains) well away from the vents and motor.
Skipping these checks risks the spit rod disengaging, the door not sealing (leading to heat loss or accidents), or grease fires. Take the extra 30 seconds – it’s worth it.
Preparing Your Food for Perfect Rotisserie Results
You’ve got the hardware sorted. Now, the star of the show: your food. How you prepare it makes or breaks your rotisserie experience. Unlike simply plopping a chicken on a rack, rotisserie demands a bit more attention to ensure even cooking and secure rotation.
The Art of Trussing: Why It’s Non-Negotiable
Imagine trying to spin a wobbly top. That’s what happens if your chicken isn’t properly trussed. Trussing means securely tying the legs and wings close to the body using kitchen twine. This serves two vital purposes:
- Even Rotation: A trussed bird is symmetrical and balanced. It spins smoothly without wobbling or tilting, ensuring all sides cook evenly. An untrussed bird will spin unevenly, causing one side to cook faster than the other.
- Preventing Falls: The twine holds limbs securely against the body. Without it, legs or wings can slip off the prongs during rotation, potentially causing the whole bird to crash into the oven walls or drip pan – a messy disaster!
How to Truss a Chicken (Simple Method):
- Place the chicken breast-side up. Tuck the wing tips behind the back.
- Cut a length of kitchen twine (about 3 feet).
- Slide the twine under the chicken, positioning it just above the tail.
- Cross the twine ends over the top of the chicken, near the breast.
- Bring the ends down and cross them under the legs.
- Pull the ends tight to bring the legs together, then tie a secure knot. Trim excess twine.
Practice makes perfect! YouTube has great visual guides. For pork loin or leg of lamb, trussing primarily involves tying it at regular intervals (every 1-2 inches) to maintain a uniform cylindrical shape for even cooking.
Visual guide about How to Use Power Air Fryer Oven Rotisserie
Image source: airfryer.net
Seasoning & Marinating: Flavor Infusion
This is where you make it YOURS. Rotisserie cooking is fantastic for infusing deep flavor because the meat bastes in its own juices and any marinade or rub.
- Dry Rubs: Ideal! Pat the meat *very* dry with paper towels first (moisture prevents browning). Generously apply your favorite rub (paprika, garlic powder, onion powder, herbs, salt, pepper) all over, including under the skin of poultry. Let it sit for at least 30 minutes, or overnight in the fridge for maximum flavor penetration.
- Marinades: Great for smaller cuts like chicken thighs or pork chops. Avoid overly acidic marinades (like vinegar or citrus-heavy) for long periods on large cuts, as they can “cook” the surface. Marinate for 2-12 hours. **Crucially: Pat the meat DRY before applying any oil-based finishing spray or placing it on the spit.** Excess surface moisture = steaming, not crisping.
- Oil Spray: A light spritz of oil (avocado, canola) *after* seasoning helps the rub adhere and promotes browning. Do this just before skewering.
Avoid adding liquid (like broth or wine) directly to the drip pan *during* rotisserie cooking. The constant rotation and high heat can cause excessive splattering and smoke. Save pan sauces for *after* cooking, using the collected drippings.
Skewering Like a Pro: Securing Your Food
Now for the moment of truth: getting that trussed chicken onto the spit.
- Slide one pronged fork onto the spit rod, prongs facing *inward*.
- Carefully impale the chicken (or other meat) onto the spit rod, starting from the cavity end. Push it firmly down the rod until it’s centered.
- Slide the second pronged fork onto the other end of the spit rod, prongs facing *inward* towards the meat.
- Push the forks firmly against the meat, securing it tightly. The forks should grip the meat securely without piercing it excessively in the center (which can cause drying).
- Ensure the meat is centered and balanced on the rod. Give it a gentle wiggle test – it should feel stable, not loose or wobbly.
- Carefully lift the assembled spit rod and insert the end into the motor slot on the *outside* of the oven. The rod should slide smoothly through the hole in the oven wall. The forks should be fully inside the oven cavity.
- Place the drip pan directly below the rotating meat inside the oven.
- Close the oven door securely.
Pro Tip: For smaller items like chicken legs or thighs, you can often skewer 2-3 pieces together on the spit rod, ensuring they are similar in size for even cooking. Always use the forks to secure them tightly.
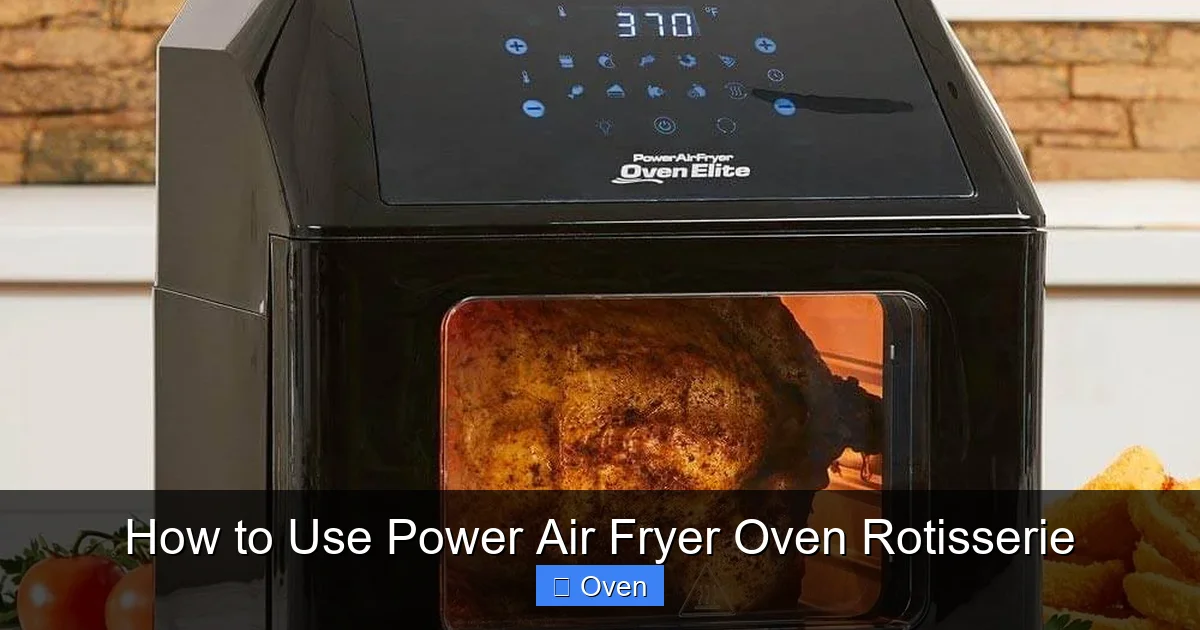
Mastering the Rotisserie Cooking Process
You’ve prepped your food, secured it perfectly, and the oven is ready. Now, the magic begins! Using the Power Air Fryer Oven Rotisserie function is intuitive, but understanding the settings and timing is key to perfection.
Setting Up Your Power Air Fryer Oven Rotisserie
Most Power Air Fryer Ovens have a dedicated “Rotisserie” button or setting. Here’s the typical sequence:
- Preheat is Essential: Turn on the oven and select the “Rotisserie” function. Set the temperature (usually between 350°F – 400°F / 175°C – 200°C is ideal for most meats). **Always preheat for 5-10 minutes.** Starting with a cold oven leads to uneven cooking and longer times.
- Load the Food: Once preheated, carefully open the door and insert your secured spit rod into the motor slot (as practiced in setup). Ensure it’s fully seated. Place the drip pan below. Close the door firmly.
- Set Time & Temp (If Adjustable): While the Rotisserie function often has a default temp (like 375°F), many models allow adjustment. Refer to the guidelines below for specific temps. Set the timer. **Do not open the door frequently during cooking** – this causes significant heat loss and disrupts the rotation.
Why Preheat Matters: Just like a conventional oven, starting with a hot cavity ensures immediate, even cooking. Cold air hitting your food causes it to steam initially, hindering that crucial crispy skin development. Preheating guarantees the rotisserie heat hits your meat the moment it’s inside.
Rotisserie Cooking Times & Temperatures: Your Cheat Sheet
Unlike static roasting, rotisserie cooking is generally faster and more even due to the constant rotation and convection. **ALWAYS use a meat thermometer – this is non-negotiable for safety and perfection.** Visual cues (like golden brown color) are helpful but unreliable for doneness. Here are general guidelines (times are approximate and depend on size, starting temp, and oven calibration):
- Whole Chicken (3-4 lbs / 1.4-1.8 kg): 375°F (190°C). Cook for 45-65 minutes. **Internal Temp:** 165°F (74°C) in the thickest part of the thigh (not touching bone).
- Whole Turkey (Up to 12 lbs / 5.4 kg – check oven capacity!): 350°F (175°C). Cook for 1.5 – 2.5 hours. **Internal Temp:** 165°F (74°C) in thigh.
- Pork Loin (2-3 lbs / 0.9-1.4 kg): 375°F (190°C). Cook for 45-60 minutes. **Internal Temp:** 145°F (63°C) + 3 min rest.
- Leg of Lamb (3-4 lbs / 1.4-1.8 kg): 375°F (190°C). Cook for 60-80 minutes (for medium-rare). **Internal Temp:** 135°F (57°C) for medium-rare, 145°F (63°C) for medium.
- Chicken Legs/Thighs (4-6 pieces): 400°F (200°C). Cook for 35-45 minutes. **Internal Temp:** 175°F (80°C).
- Vegetables (Bell peppers, zucchini, onions – cut large): 400°F (200°C). Toss with oil, salt, pepper. Skewer securely. Cook for 20-30 minutes until tender-crisp and charred.
Critical Reminder: These are starting points! Ovens vary, and meat size differs. **The ONLY accurate way to know it’s done is by checking the internal temperature with a reliable instant-read thermometer.** Insert it into the thickest part, avoiding bone. Pull the meat out 5-10°F before the target temp, as carryover cooking will continue to raise it.
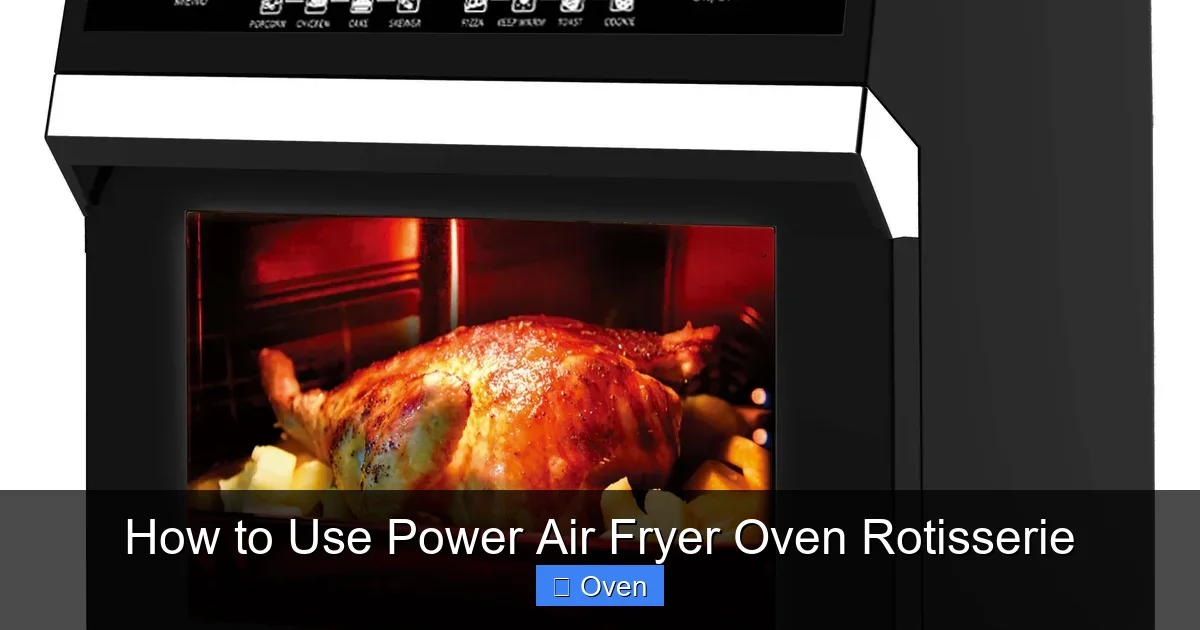
The Finishing Touches: Resting & Serving
Don’t rush this step! Resting is crucial for juicy results.
- Carefully Remove: Once the internal temp is reached, turn off the oven. **Wear heavy oven mitts!** The spit rod and forks will be extremely hot. Open the door and carefully lift the spit rod straight out of the motor slot. Place it on a heat-resistant surface (like a baking sheet or cutting board).
- Rest the Meat: **Do NOT carve immediately.** Tent the meat loosely with foil and let it rest for 10-15 minutes (longer for very large cuts like turkey). This allows the juices, which have been driven to the center by the heat, to redistribute throughout the meat. Cutting too soon means those precious juices run out onto the cutting board, leaving dry meat.
- Make Pan Sauce (Optional but Recommended): While the meat rests, pour the flavorful drippings from the drip pan into a small saucepan. Skim off excess fat if desired. Add a splash of broth, wine, or water, bring to a simmer, and reduce slightly. Season to taste. This simple sauce elevates your rotisserie dish immensely.
- Carve & Serve: Remove the twine (if used). Slide the meat off the spit rod. Carve as desired and serve immediately with your pan sauce and sides.
Resting might feel like torture when you smell that amazing food, but it’s the secret to restaurant-quality moisture. Trust the process!
Cleaning & Maintenance: Keeping Your Rotisserie Ready
The joy of rotisserie cooking shouldn’t be followed by a cleaning nightmare. With the right approach, cleaning your Power Air Fryer Oven Rotisserie components is straightforward. Prompt cleaning prevents grease buildup, which can become difficult to remove and potentially cause smoke or odors later.
Cleaning the Rotisserie Components (After Cooling!)
**This cannot be stressed enough: WAIT until the spit rod, forks, and motor assembly are COMPLETELY COOL before touching them.** Severe burns are a real risk.
- Spit Rod & Forks: These are usually dishwasher safe (top rack recommended), but handwashing is often easier. Soak them in hot, soapy water for 10-15 minutes to loosen grease. Use a scrub brush or sponge to remove any stuck-on bits. Pay attention to the crevices where the forks attach to the rod. Rinse thoroughly and dry completely before storing. Avoid abrasive pads that could scratch the metal.
- Drip Pan: This catches the most grease. Line it with aluminum foil *before* cooking for incredibly easy cleanup – just toss the foil! If unlined, soak in hot, soapy water. Stubborn grease might need a degreaser or baking soda paste. Avoid harsh chemicals that could damage the finish.
- Motor Assembly (External): **NEVER immerse the motor housing in water.** Wipe the exterior surface with a damp cloth. If grease splatters onto it during cooking, wipe it off promptly once cool. Do not use excessive water near the motor slot.
Storing components dry prevents rust and keeps them ready for your next rotisserie adventure.
Cleaning the Oven Cavity
Regular cleaning prevents smoke and maintains performance.
- After Each Use: Wipe down the interior walls and door with a damp cloth to remove any splatters. This is the easiest time to clean.
- Deep Clean (As Needed): For baked-on grease, use the oven’s self-clean function if available (check manual – some rotisserie models may not recommend this due to the motor). Alternatively, use a paste of baking soda and water. Apply, let sit for several hours or overnight, then scrub gently with a non-abrasive sponge. Rinse thoroughly. **Avoid commercial oven cleaners unless specified as safe for your model, as fumes can be harmful and residue may damage components.**
- Rack Positions: Ensure the rack positions are clean and free of grease buildup, which can affect airflow.
Keeping the interior clean ensures optimal airflow for the convection function and prevents smoke during future rotisserie sessions.
Long-Term Care & Troubleshooting
To keep your Power Air Fryer Oven Rotisserie functioning perfectly:
- Inspect Regularly: Before each use, check that the motor spins freely (manually rotate the spit rod slot when off) and that the spit rod inserts smoothly.
- Store Properly: Store the spit rod, forks, and drip pan in a dry place. Keep the motor assembly attached to the oven or stored safely nearby.
- Common Issue: Motor Not Spinning: Ensure the oven is plugged in, the Rotisserie function is selected, and the door is fully closed/latched. Check if the spit rod is fully inserted into the motor slot. If it still doesn’t spin, unplug the oven and contact customer support – don’t force it.
- Common Issue: Excessive Smoke: Usually caused by excessive grease in the drip pan (don’t overfill!), food touching the heating elements, or using too high a temperature for fatty cuts. Always use the drip pan, ensure proper clearance, and consider lowering the temp slightly for very fatty meats.
A little regular care goes a long way in ensuring your rotisserie function works flawlessly for years.
Beyond the Basics: Creative Rotisserie Ideas
You’ve mastered the classic whole chicken – congratulations! Now, it’s time to unleash your inner rotisserie chef. The Power Air Fryer Oven Rotisserie is incredibly versatile. Think beyond poultry and pork; it’s perfect for adding unique flavor and texture to a wide range of foods.
Rotisserie Vegetables: Charred & Caramelized Perfection
Forget soggy steamed veggies. Rotisserie cooking delivers incredible caramelization and smoky char.
- Best Veggies: Bell peppers (halved or quartered), zucchini/squash (cut into thick spears), red onions (cut into large wedges), portobello mushrooms (stems removed), cherry tomatoes (skewer on small metal or soaked wooden skewers), asparagus (trimmed, tied in bundles).
- Prep: Toss veggies generously with olive oil, salt, pepper, and your favorite herbs (rosemary, thyme, oregano work great). Ensure pieces are similar in size for even cooking.
- Skewering: Thread veggies securely onto the spit rod, using the forks to hold them in place. Pack them fairly tightly but allow some space for air circulation.
- Cooking: 400°F (200°C) for 20-35 minutes, depending on size and desired char. They’re done when tender-crisp and nicely browned. Perfect as a side, in salads, or over grains.
Pro Tip: Add halved lemons or limes to the skewer – they become beautifully caramelized and can be squeezed over the finished dish for a bright finish.
Visual guide about How to Use Power Air Fryer Oven Rotisserie
Image source: cdn.shopify.com
Rotisserie Fish & Seafood: Gentle & Flaky
Fish can be delicate, but rotisserie’s gentle rotation is surprisingly good for it.
- Best Options: Whole fish (like trout or snapper, scaled and gutted), thick fish fillets (salmon, halibut – skin-on is best), large shrimp (peeled and deveined, tails on), scallops.
- Prep: Pat fish *extremely* dry. Score skin lightly. Season inside and out with salt, pepper, lemon slices, and herbs (dill, parsley). For fillets/shrimp/scallops, toss lightly in oil and seasoning.
- Skewering: Whole fish: Impale through the head cavity and out the tail. Secure with forks. Fillets/Shrimp/Scallops: Thread onto the spit rod in a single layer, securing tightly with forks. Use smaller metal skewers for shrimp/scallops if needed.
- Cooking: 375°F – 400°F (190°C – 200°C). Whole fish: 20-30 mins per pound. Fillets: 12-18 mins. Shrimp/Scallops: 8-12 mins. **Internal Temp:** Fish flakes easily at 145°F (63°C). Shrimp/scallops turn opaque.
Pro Tip: Wrap delicate fish fillets in parchment paper or banana leaves before skewering to prevent sticking and falling apart.
Rotisserie Desserts & Surprises
Yes, even desserts! The rotisserie’s even heat is fantastic for certain treats.
- Pineapple: Peel, core, and cut a whole pineapple into thick rings or spears. Skewer securely. Brush with a little honey or brown sugar mix. Rotisserie at 375°F (190°C) for 15-20 mins until caramelized and tender. Serve with ice cream!
- Potatoes: Skewer whole small potatoes (like fingerlings) or large baked potatoes (pricked). Rotisserie at 400°F (200°C) for 45-60 mins until fork-tender and skin is crispy. Top with butter, sour cream, chives.
- Garlic Bread: Slice a baguette lengthwise, spread with garlic butter. Skewer the halves together. Rotisserie at 350°F (175°C) for 8-12 mins until golden and crispy.
Pro Tip: For desserts or breads, monitor closely as they can go from perfect to burnt quickly due to sugar content.
Meal Prep Power: Rotisserie for the Week
Leverage your rotisserie for efficient meal prep:
- Cook a large batch of chicken legs or thighs on Sunday. Shred the meat for tacos, salads, or sandwiches throughout the week.
- Rotisserie a pork loin, then slice it for sandwiches or dice it for fried rice.
- Make a big batch of rotisserie vegetables to add to grain bowls, pasta, or omelets.
- Cook a whole chicken, use the meat for dinners, and make stock from the carcass (after removing meat).
The even cooking and large capacity of the rotisserie function make it an ideal tool for cooking once and eating multiple times.
Conclusion: Your Rotisserie Journey Begins Now
Mastering the Power Air Fryer Oven Rotisserie isn’t just about cooking a chicken – it’s about unlocking a whole new dimension of flavor, texture, and convenience in your home kitchen. That satisfying sizzle as the meat rotates, the incredible aroma filling your house, the moment you pull out a perfectly golden, juicy bird with skin that crackles… it’s a culinary experience that feels both impressive and deeply satisfying. You’ve moved beyond basic air frying into the realm of restaurant-quality results, right on your countertop.
Remember, the keys to rotisserie success are simple but crucial: prioritize safety with proper setup, master the art of trussing and securing your food, never skip preheating, and **always, always rely on a meat thermometer for doneness**. Embrace the drip pan, respect the resting time, and keep things clean. Start with that classic whole chicken – it’s the perfect teacher. Follow the steps, trust the process, and you’ll be rewarded with moist, flavorful meat and crispy skin that will make you wonder how you ever cooked poultry any other way. Once you conquer the basics, let your creativity run wild with vegetables, fish, and even desserts. Your Power Air Fryer Oven Rotisserie is more than just a feature; it’s a gateway to effortless, impressive, and incredibly delicious meals. So, preheat that oven, truss that chicken, and get ready to rotate your way to rotisserie greatness. Your taste buds (and your family) will thank you!
Frequently Asked Questions
Is the Power Air Fryer Oven Rotisserie safe to use?
Yes, when used correctly according to the manufacturer’s instructions. Key safety practices include ensuring the motor is securely attached externally, the oven door closes and latches fully with the spit inserted, using the drip pan, never forcing the spit rod, and allowing components to cool completely before cleaning. Following these steps minimizes risks.
What size chicken can I rotisserie in my Power Air Fryer Oven?
Most standard Power Air Fryer Ovens can handle chickens up to 4-5 pounds comfortably. Always check your specific model’s manual for the maximum weight and size capacity. Overloading can cause uneven cooking, motor strain, or prevent the door from sealing properly.
Do I need to baste rotisserie chicken?
No, basting is generally unnecessary and counterproductive with rotisserie. The constant rotation bastes the meat in its own juices naturally. Opening the oven door to baste causes significant heat loss, increases cooking time, and can prevent the skin from crisping properly. Trust the process!
Can I use aluminum foil with the rotisserie?
Use foil cautiously. It’s fine to line the drip pan for easy cleanup. However, **do not** wrap the meat itself in foil during rotisserie cooking, as this traps steam and prevents the crucial crisping of the skin. Foil can also potentially come loose and interfere with rotation.
Why does my rotisserie meat sometimes cook unevenly?
Uneven cooking is usually caused by: 1) Improper trussing leading to wobbling, 2) Overcrowding the spit rod, 3) Not preheating the oven, 4) Opening the door too often, or 5) Using a very irregularly shaped cut of meat without proper securing. Ensure good trussing, don’t overload, preheat, minimize door openings, and choose uniform cuts.
How often should I clean the rotisserie components?
Clean the spit rod, forks, and drip pan after *every single use*, once they have cooled completely. Wipe down the oven interior cavity after each use to remove splatters. Perform a deeper clean of the interior as needed (e.g., when grease buildup is visible), following the manufacturer’s guidelines. Regular cleaning prevents smoke, odors, and maintains performance.